
NB: I started this piece originally with the intention of talking about methods to improve your Skype interviews for academic positions, and then the COVID-19 pandemic did two things that necessitate a bit of tweaking. First, it basically froze almost all hiring in the humanities—a lot of the positions I interviewed for have been cancelled or are still very much in flux. Second, it threw a bunch of people into the deep end as far as trying to think about their online presence via video for Zoom interviews, class recordings and the like. Everyone saw the slate of videos about Zoom backgrounds, but the fact of the matter is that that sort of software-based background takes up significant processing resources that you may or may not have. Additionally, it is actually more limited than it initially seems as it either leaves a fake-looking outline or chromakeys only on a green background, whereas a more granular setup allows you to do so with an old bedsheet or other item if you want to go that route. At any rate, in finishing up the post—which I hoped would conclude with one or both of us getting positions—it struck me that I should include some nods towards the new normal. So I'm expanding it to consider recording as a possible option as well, which is going to make the post a bit more technical than I had originally intended (and I'd already intended a more technical post than what others had provided) and which focuses on interviewing or streaming for class depending on what I'm talking about. I have hopefully organized it so I don't lose anyone, but if I do and you're not sure what I mean please feel free to contact me via the email address on my C.V. and I will be happy to help you out.
I did a few Skype interviews over the course of the past year, and as my partner has finished up her degree I suspect there will be more than a few for either of us over the course of this upcoming market season (which, if it is like this past year, will start well ahead of the traditional September 15th window! I guess the new normal is a “soft launch,” so to speak), as well. As part of my planning one thing I’ve been thinking about a lot in the aftermath of those interviews is how to better present myself on screen. Not only are more and more campuses moving to Skype interviews as the costs of the conference interview balloons (encouraged, no doubt, by the MLA finally acknowledging the facts on the ground and suggesting web interviews over the conference a couple years back) but most campuses have invested in multimedia setups allowing committees to easily conduct the interview on their end. This is all to the good, but what about on the end of the interviewee? Most interviewees are stuck with their laptop or desktop webcam and a hopefully clean and quiet space where they can speak. If they’re lucky, they might be able to reserve a multimedia room or study space at the library and conduct their interview there. Thus, what they’re able to control in terms of how they come across to a hiring committee is not always in their hands. It makes sense to take care of those things that are. Likewise, with the new situation with COVID-19 being ready to switch to entirely online instruction has become a necessity, and for this reason it's worthwhile to think about how to do so in the best way possible.
In this post, I want to point out what an interviewee might do to make a good visual and auditory impression on a committee and hopefully make the technical aspects of a web interview a little smoother. The Chronicle has already done a article in the paper proper as well as two posts in their Chronicle Community service regarding this, but I thought all three pieces could use some expansion and in some cases, updating. Specifically, they were a little light on the various technical possibilities and what it would take to achieve the best interview possible from an audiovisual standpoint, particularly as the DIY videomaking movement has created a market for inexpensive studio lights and microphones and thus increased expectations for what an amateur video should look like. None of these tips are going to automatically result in a job offer, but what I think it will do is ensure candidates make an impression beyond another echoing voice combined with grainy, washed-out video. Likewise, if you’re interested in doing videos for your students being able to present the best audio possible along with solid video is going to make the experience more pleasant for them. Everyone has watched a washed out video with distant, echoing audio on YouTube, and your students are likely to tune those videos out and miss the important things you have to say.
We’ll start with some general advice that I think is important regardless of the type of camera and sound you might have. It repeats some of what Kelsky, Hull, and Royles have already stated, but focuses on framing that general advice through the technical lens and events on the ground that I feel their pieces are lacking. From there, we’ll move to the visual aspects—lighting options and what is possible with different types of cameras. Next, we’ll talk about sound—the microphones, cables, and audio interfaces you may want to consider to sound your absolute best, and then wrap up with postprocessing for those of you who want to try to alter your background, reduce noise, and the like programatically. In the case of the more technical aspects and hardware suggestions—at least in terms of video—I’ll move from the basic webcam and microphone that anyone might have on a desktop or laptop (or, perhaps, even on a cellphone, although that presents its own difficulties and I would not recommend it if there is any other option) to consumer grade hardware, and from there to “prosumer” grade hardware. I don’t have the money for truly professional gear and don’t really need it for the video and audio projects I am developing, so I am going to leave that aspect of things out. If your campus has studio space and you have access to it and its professional-grade equipment you likely have someone more qualified than I am who can help you with getting set up in your particular space anyway, and some of the links I provide at the end will use and recommend more professional-grade equipment if you want to dip your toes into that world. I personally think it's overkill for interviewing and recording lectures, but if you have the budget for it more power to you.
Since this is a rather large post, I'm collapsing everything past this introduction into into four broad categories: general advice, visual aspects, audio aspects, and postprocessing. Likewise, there are subsections under each of those categories that have been collapsed as well for ease of navigation and reading. Click on the header below to open the sections or subsections you're interested in. Also note that some sections are much more concerned about interviewing than recording for class; if your reason for being here is to get suggestions for making better videos for your students you may want to skim over the General Advice section and concentrate more fully on the more technical sections underneath it. There is still some useful information, especially as regards bandwidth and staging, that might be of use to instructors who are doing lectures via Zoom or over online services in that first section, however.General Advice
Most candidates who are interviewing have been groomed by their advisors and department to know how to handle themselves during an interview. If they’re particularly lucky, they have been able to go through one or more mock interviews, where nervous ticks and other aspects of their performance (and while it’s true that an interview should be considered a conversation, it’s also a performance—you are presenting the best part of yourself) are critiqued by multiple faculty members and in some cases by individuals who are specifically hired by the university to aid with the job interviewing process. Nothing about those experiences should be ignored (and I’m not going to presume to be able to tell you more than your mentors in the department can in that regard when it comes to your personal case). There are things, however, that an interviewee should do slightly differently when interviewing online as opposed to interviewing in person.
Place
Seek out the quietest place possible to conduct the interview. This is important because in a noisy hotel suite the committee is experiencing the same distractions and issues as the candidate, and that provides a degree of sympathy that may not be present if they’re in a quiet shared office or conference room while the candidate is on the other side of a glass partition from a shared kitchen space with its rattling dishes and impromptu conversations. We naturally tune out extraneous noise in our immediate environment. Microphones don’t, so any chatter may be picked up by the microphone and transmitted to the committee. This can be mitigated some through microphone selection and technique, which I’ll talk more about below.
“Pick someplace quiet” is obvious advice, but it can also prove incredibly difficult to achieve. During my second postdoc, I rented a basement apartment with inadequate sound insulation between the units—to the point where I could hear the conversations (and other activities) of the people above me. This meant that I couldn’t consistently use my living room cum office as a place to hold the interview on my end because I could not be sure the people above me wouldn’t break into an argument or even a loud conversation in the middle of my trying to explain why I’m the best fit for the particular job or explicate a tricky theoretical point. Similarly, on campus my workspace follows popular design trends, which means a cubicle that does little to abate sound or an open floorplan which does nothing.
I have come up with some solutions for this over the past couple of years, but they are largely situational. Whether it is borrowing the office of an advisor or colleague with a permanent position, reserving a study space or other quiet area on campus, or finding a quiet classroom nobody is using for that particular hour there are options available if you’re flexible, creative, and plan ahead. If you are not affiliated with a campus or if you are too low on the campus totem pole to be able to reserve such spaces you may have to see about finding someplace quiet amongst the apartments of friends, the local library, or even a living room or other shared space with appropriate warning to the other people present in the house or apartment. I’ve conducted more than one interview in my parents’ living room while home for a visit during the holidays; with proper camera placement and knowledge that I was interviewing people were able to walk behind me without being visible to the committee. In any case, finding a quiet place to talk where you’ll feel comfortable is of paramount importance. If you’re feeling cramped, worried, or otherwise “off” it will come across in your answers.
Location also brings up the issue of staging. As anyone who has watched a day of HGTV over the past fifteen years knows, staging is the strategic use of lighting, furniture and possibly selected knickknacks in order to help sell a product—in this case, yourself as a potential colleague. The advice the Chronicle and Chronicle Communitypieces offer is fairly general: make sure whatever is going to appear on camera is neat, avoid a cluttered or distracting space (Royles suggests avoiding tons of books as a backdrop, while Hull suggests that bookshelves are a good backdrop but any controversial or “loud” objects should be removed). To this advice, I would add two things: first, that any strategically-placed items should reinforce the impression that that you want to give to the committee, and second that you can avoid a committee commenting on your knick-knacks or the titles on your shelves through the use of what photographers refer to as bokeh—the deliberate out of focus background you'll find sometimes watching interviews and that Zoom and Skype try to emulate programmatically. I’ll speak more about bokeh in the camera portion below and focus primarily on the process of staging as it relates to my personal office space here as an example of a starting point that can be improved upon throughout the rest of the post. My hope is that by showing that space to you, warts and all, you might get some ideas about what your personal space says about you and how you might stage it to give the best possible impression.
My Office: Four Views
There are two types of positions I’ve typically applied for: traditional faculty positions in two specialties—Medieval English Literature and Digital Humanities—and postdoctoral positions that often fall under the umbrella of an “alt-ac” position intended primarily to support theresearch ofpermanent faculty members and graduate students as well as conducting my own research work. This means there’s three different versions of “Matthew Davis” that I have to think about when I’m considering my office space as a background for an interview. Additionally, my office is a bit schizophrenic—my desk is basically an entire dining room table, without drawers, and ordinarily a webcam would sit behind the monitor on that desk, as might be expected. This would make the “natural” background whatever is behind me as I sit at my desk. Behind my chair on the opposite wall, though, is a set of shelves where I keep cameras, my printer and stationary, audio and lighting equipment, tubs of cables, tools, and small parts bins. As such, those shelves might look more in place in a garage or workshop space than in an academic office—in fact, a friend has referred to it as the “right-wing radio host” view of my office for its similarity to the sorts of backdrops favored by those low-budget shows on YouTube and Twitch. My actual bookshelves are on either side of the room in order to keep the sun from fading the spines, and tucked away by the door is my all-important coffee cart.
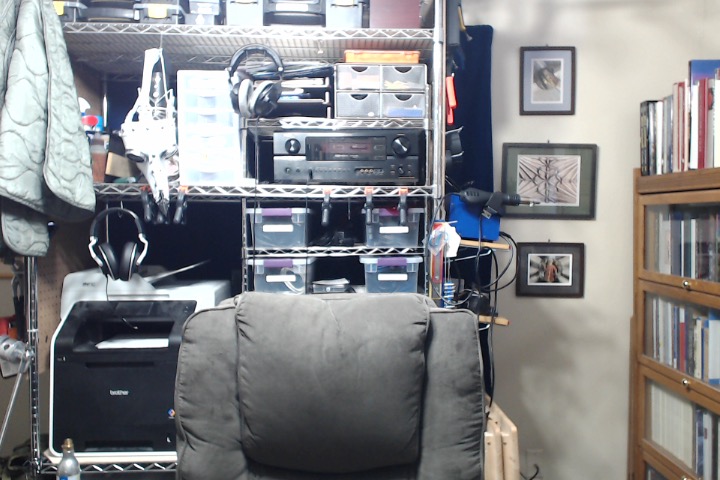

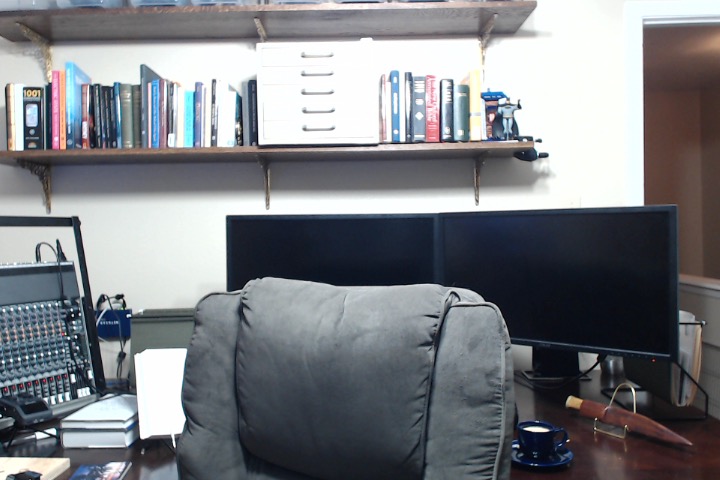
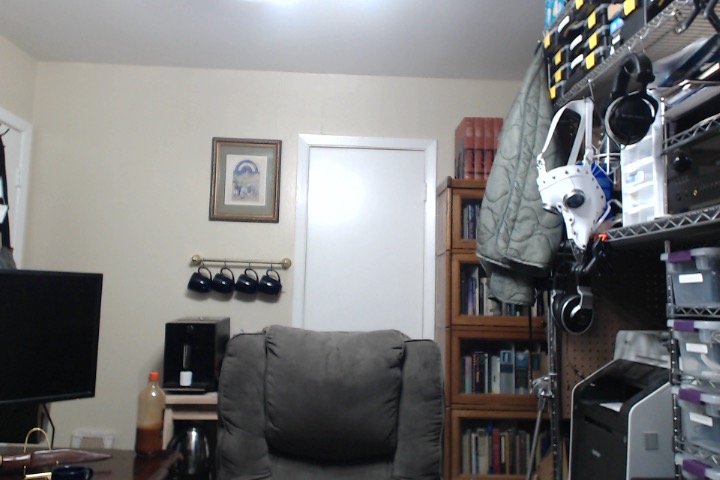
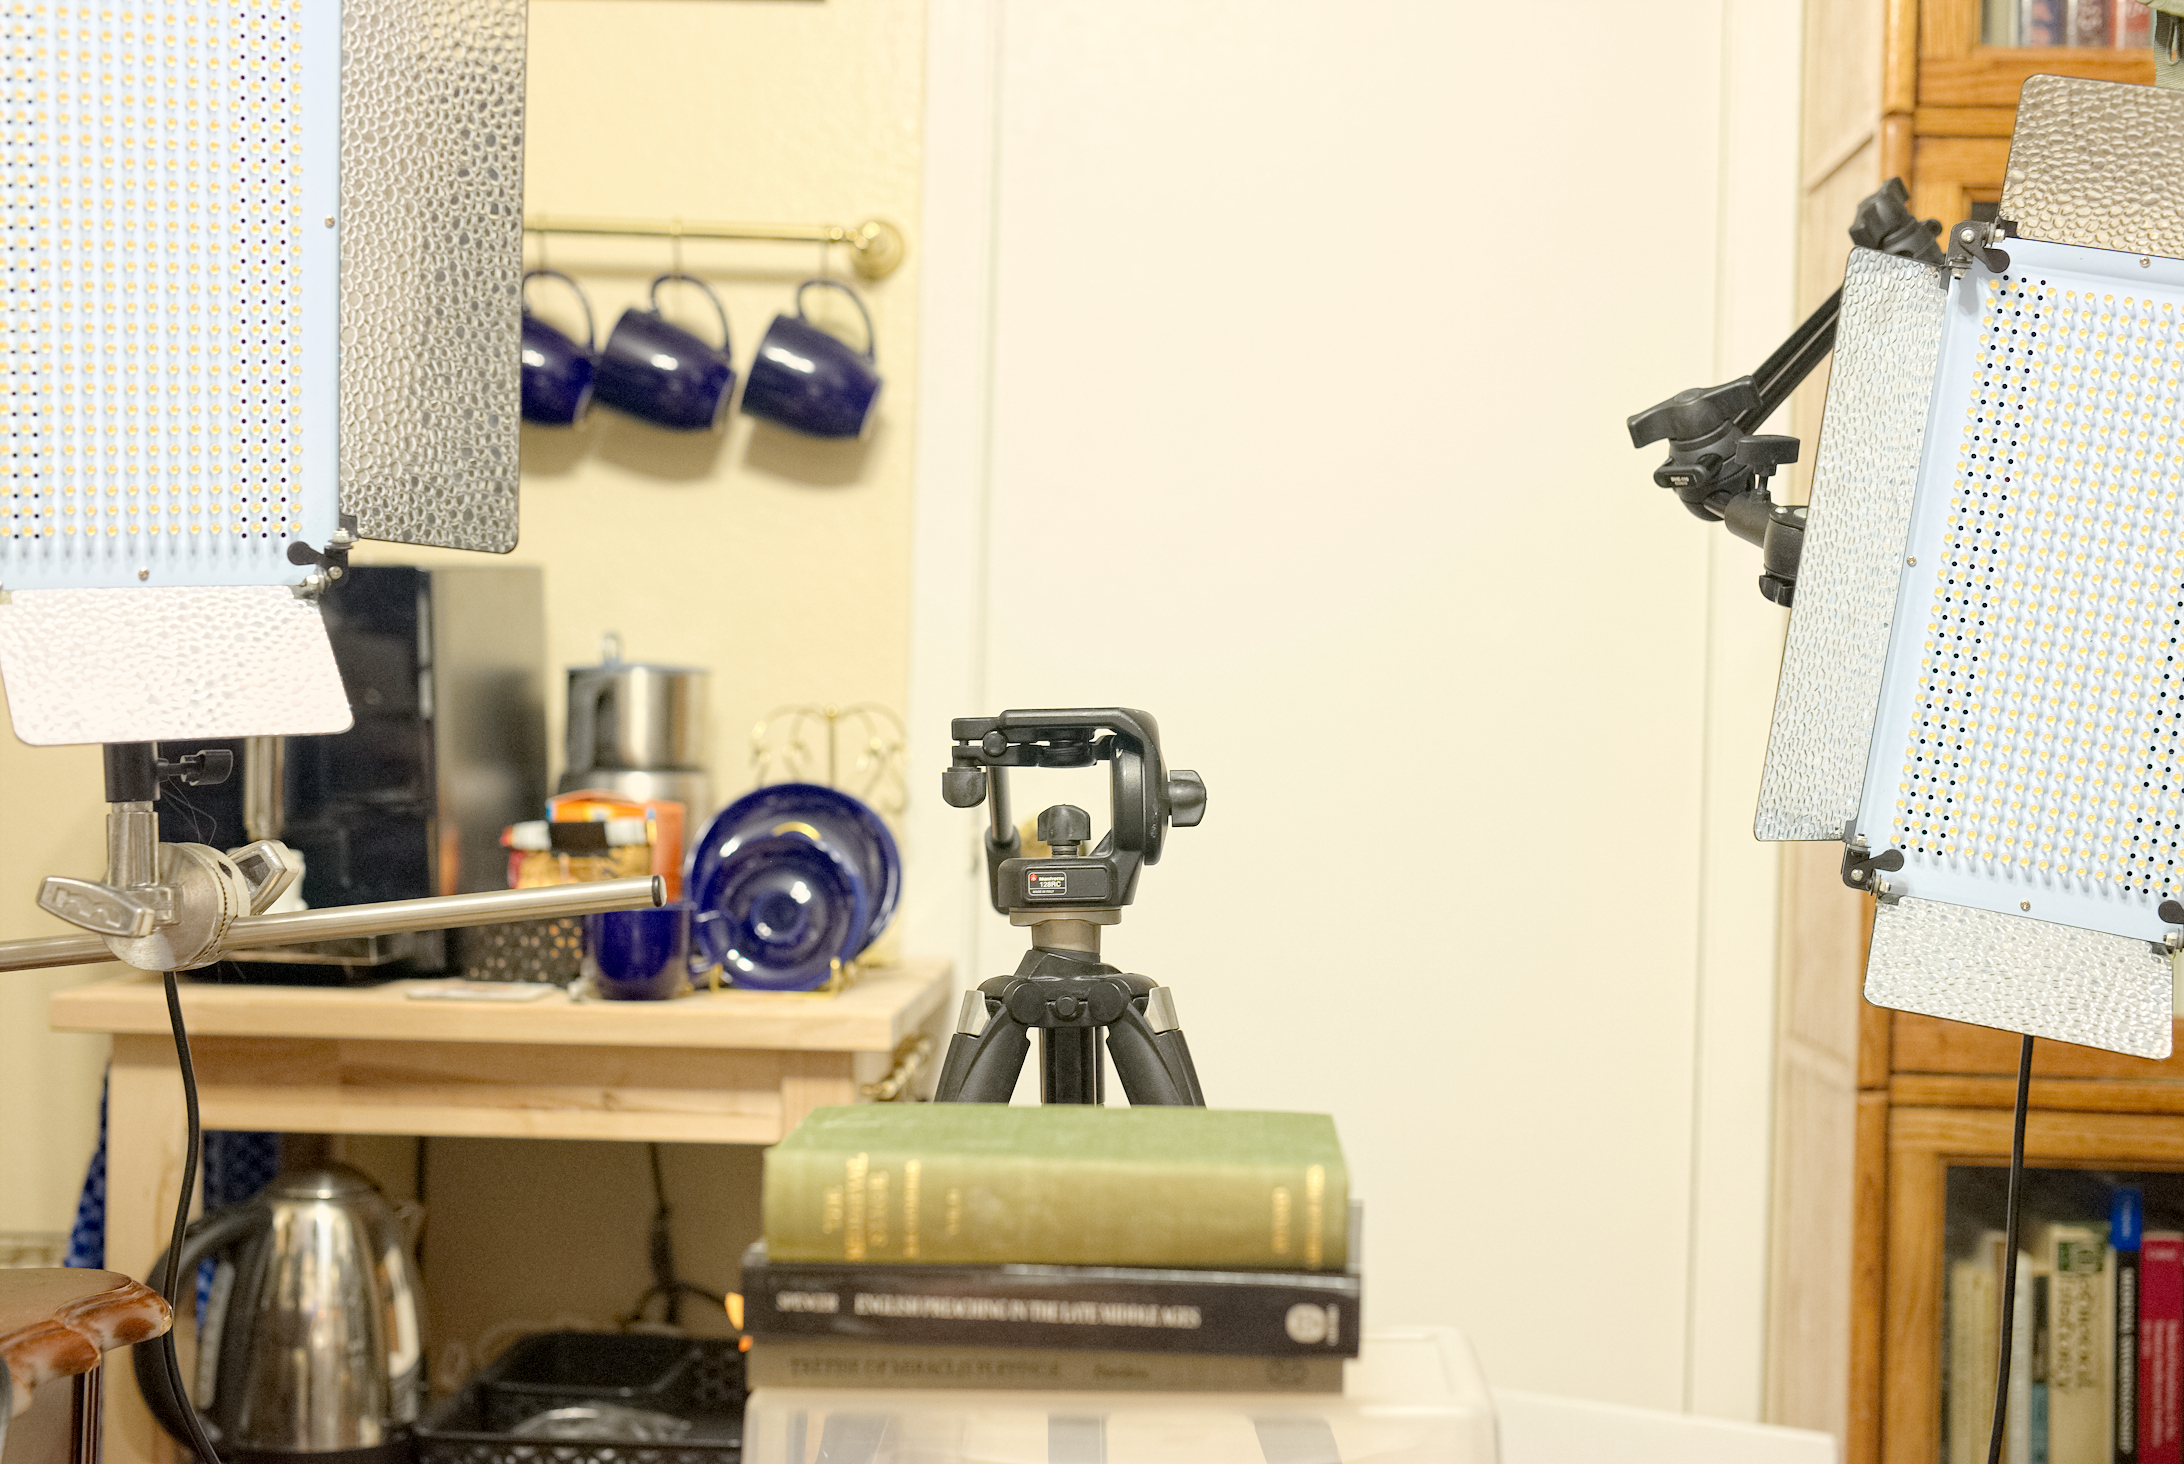
As part of my initial exploration of the space, then, I have photos of each wall of the room as a background, following Royles’ advice and keeping the background parallel to the screen. Note that here I’m using a webcam as my camera and I’ve done nothing to clean up the space. You can see that the four walls present four distinctly different impressions of me, and none of those impressions are perfect. The four pictures suggest that it would likely be best to interview with either the low bookshelf or the “radio host" view in the background. Considering the amount of items in the "radio host" view that are not directly germane to the types of positions I'm applying for, however, it probably makes a lot more sense to use the low bookshelf as a background, which is part of the reason I have taken to calling that background the "interview view." However, depending on the position of my chair the items on top of the bookshelf may provide a distraction. Ordinarily they are blocked, as evidenced in the videos in that Visual and Audio sections, but the platform the keyboard and lights rest on and the board my DIY benchtop power supply rest on are both a lighter color than the bookshelf since they are really meant to be in a workshop rather than my office. For this reason they're almost guaranteed to draw the eye if they both come into frame and are in focus. Likewise, the wireless router mounted to the wall on the right of the bookcase and the Arduino boards next to the power supply both blink, which may be distracting to a committee or a class. Depending on the particular position I'm interviewing for, it might make better sense to clear the fountain pen inks and platform off the top of the shelf and place more books there, or to select the keyboard and inks but move the power supply. If the lights can be seen during a test video it may also make sense to move the Arduino boards and router entirely so they do not serve as a blinking distraction.In every case, the decision is largely dependent on how clear the background is in comparison to the foreground and whether I include a colored “wall wash” light as a point of interest, as I do when I’m using this background for instructional videos. For this reason the specific decisions made for the types of positions I’m applying to will mostly be discussed later in the camera section, as camera selection will make a difference in what actually needs to happen in terms of staging that background area.
Time and preparation
Again, I’m assuming your mentors have given you suggestions about how to prepare for the interview in your area in general. My thoughts on preparation have more to do with setting up the space for the interview and having it look the best it can.
Record a short video of yourself in the space, dressed in what you will wear to the interview and with the equipment you intend to use. You might move around a bit and gesticulate, especially if you tend to do so when making points. It doesn’t matter what you’re saying in your video, obviously—what you’re doing here is looking at how the space looks and sounds on camera as is, so you can think about how you’re going to light it and how to position yourself on camera. Hopefully you’ll only really have to do this once if you have a dedicated interview space; if not, try to find time in the period before your interview to see how you look on camera. This can also help to determine whether you might have any issues—for example, one of my cameras uses facial tracking to help keep in focus. This means that I can have issues with the image going slightly fuzzy if I gesture too much depending on the type of lens I use, as it's trying to track my face while I speak in an animated fashion.
In addition to making yourself aware of the space before your interview also give yourself an ample window on the day of to prepare. It takes time to set up a space to look its best for the camera (especially if it’s a space you don’t ordinarily have control over), and you need time to mentally prepare for the interview as well. Ideally, I like to try to give myself at least an hour before the interview to set the space up and go over my notes one last time. Any equipment you’re bringing with you should have already been tested prior to being packed, if you will be using a shared space, or set up perhaps the evening prior if not. If your camera takes batteries, make sure the batteries are charged. Doublecheck any cables, stands, or tripods you might need to take with you and make sure you have long enough extension cords to reach any outlets you might need to reach.
If you are going to be traveling, make sure you have a backup for any equipment you bring as well and budget time for the unexpected. Last year I interviewed for a fellowship in a reserved campus space and it ended up taking longer than expected to get there and set up. On top of that, I had difficulty setting up my camera and ended up having to use my laptop. I only just finished setting up the space when the call from their end came through the line, which meant I wasn’t in an ideal mental space to begin the interview.
Bandwidth
A clean image with good audio is going to take up more bandwidth than a grainy, compressed picture, but will be much more pleasant for a committee to look at and interact with. Thus, if you follow the suggestions regarding producing a quality video below you are going to need decent bandwidth. Even the fastest commercially available wireless ethernet commonly available, the Wifi 6 (or 802.11ax) standard, tops out at 1.1Gbps on the 2.4Ghz band that most campus and residential wifi access points use, but is much more likely to actually deliver a lower speed. At 5Ghz the standard tops out at 4.8Gbps, but again is more likely to actually deliver at a lower speed. The more common Wifi 5 (or 802.11ac) standard tops out 450Mbps and 1.3 Gbps, respectively. Because of this disparity between the speed at the two frequencies you should make sure your computer is set to use the 5GHz band if possible. Even better, avoid wireless entirely and use a wired connection. Wifi 5 is still the most common residential and campus standard, and those numbers tend to be "up to" ratings rather than consistent results—which leaves a lot of room for much slower connections. Especially in a situation where you have tons of people connecting to the same access point, such as in a library, or something where there are a lot of things attempting to use that 2.4Ghz radio band. The “real” speed of your connection will generally be significantly lower on both channels. A wired connection, on the other hand, avoids any sort of radio interference. Its speed will be capped at whatever the router and cables you use can take, but the bandwidth on a campus wired connection will generally be rated in multiple gigabits per second—more than your hardware can take advantage of. Likewise, most cable or fiber ethernet providers will offer a gigabit ethernet connection, which is generally the top end of most consumer ethernet routers (this is changing—I’m seeing 20 gigabit home setups but they mostly seem to be limited to enthusiasts with access to fiber connections to the home at the moment). Regardless of the speed of the wired connection, you will almost always have a faster connection over wire than over wifi, provided you are using modern equipment and category 5e, category 6 or 6A, or (if you’re reading this in the next few years from now) category 7A or 8 cables.
Visual Aspects
Obviously, if you are going to be recording yourself or streaming video to a committee you'll need to think about the visual setup you're working with. Kelsky, Hull, and Royles all touch on differing aspects of how to present yourself visually online, as mentioned above. What they don't really do is get into the various ways you might improve your visuals for the audience beyond some simple lighting and staging tips. To be honest, those tips may be enough. But if you're like me watching people in meetings has displayed a lot of ways in which lighting, camera issues, or staging problems can cause someone's message to fall on deaf ears.
In this section, then, we'll first expand on the staging discussion above by looking at some examples to talk about ways that the background can help to improve the visual composition of your interview or recording space. From there, we'll talk about ways you can use lighting and composition in the frame to make sure you look your absolute best, discuss the various camera options available to you, and finish up the section with how I'm dressing and lighting my particular setup.
While I touched on my particular office and the various background options available to me earlier briefly I didn't say much about actually attempting to dress up the space. For this reason, I thought it might be useful to look at some examples of non-academics doing informational videos online. Because YouTube has become a legitimate medium for people to make a living doing informational videos, many of them have taken time and thought on the staging of their background—especially when they have a dedicated recording space (which may become necessary if you are going to be teaching remotely for the next year). Furthermore, since most of them tend to do a least part of their video content as a "talking head," front-facing video they produce can serve as inspiration for how to stage your space. I wouldn't necessarily go to the level some of them have, but you might get some useful ideas from the various individuals below if you don't want to use bokeh or the in-program blur feature to de-emphasize your background. I'll also include a couple of examples taken from video interviews in order to discuss the pros and cons of trying to record in ad-hoc setup for those of you who may need to carve out space in an office, living room, or random corner in order to record your videos or conduct your interview.
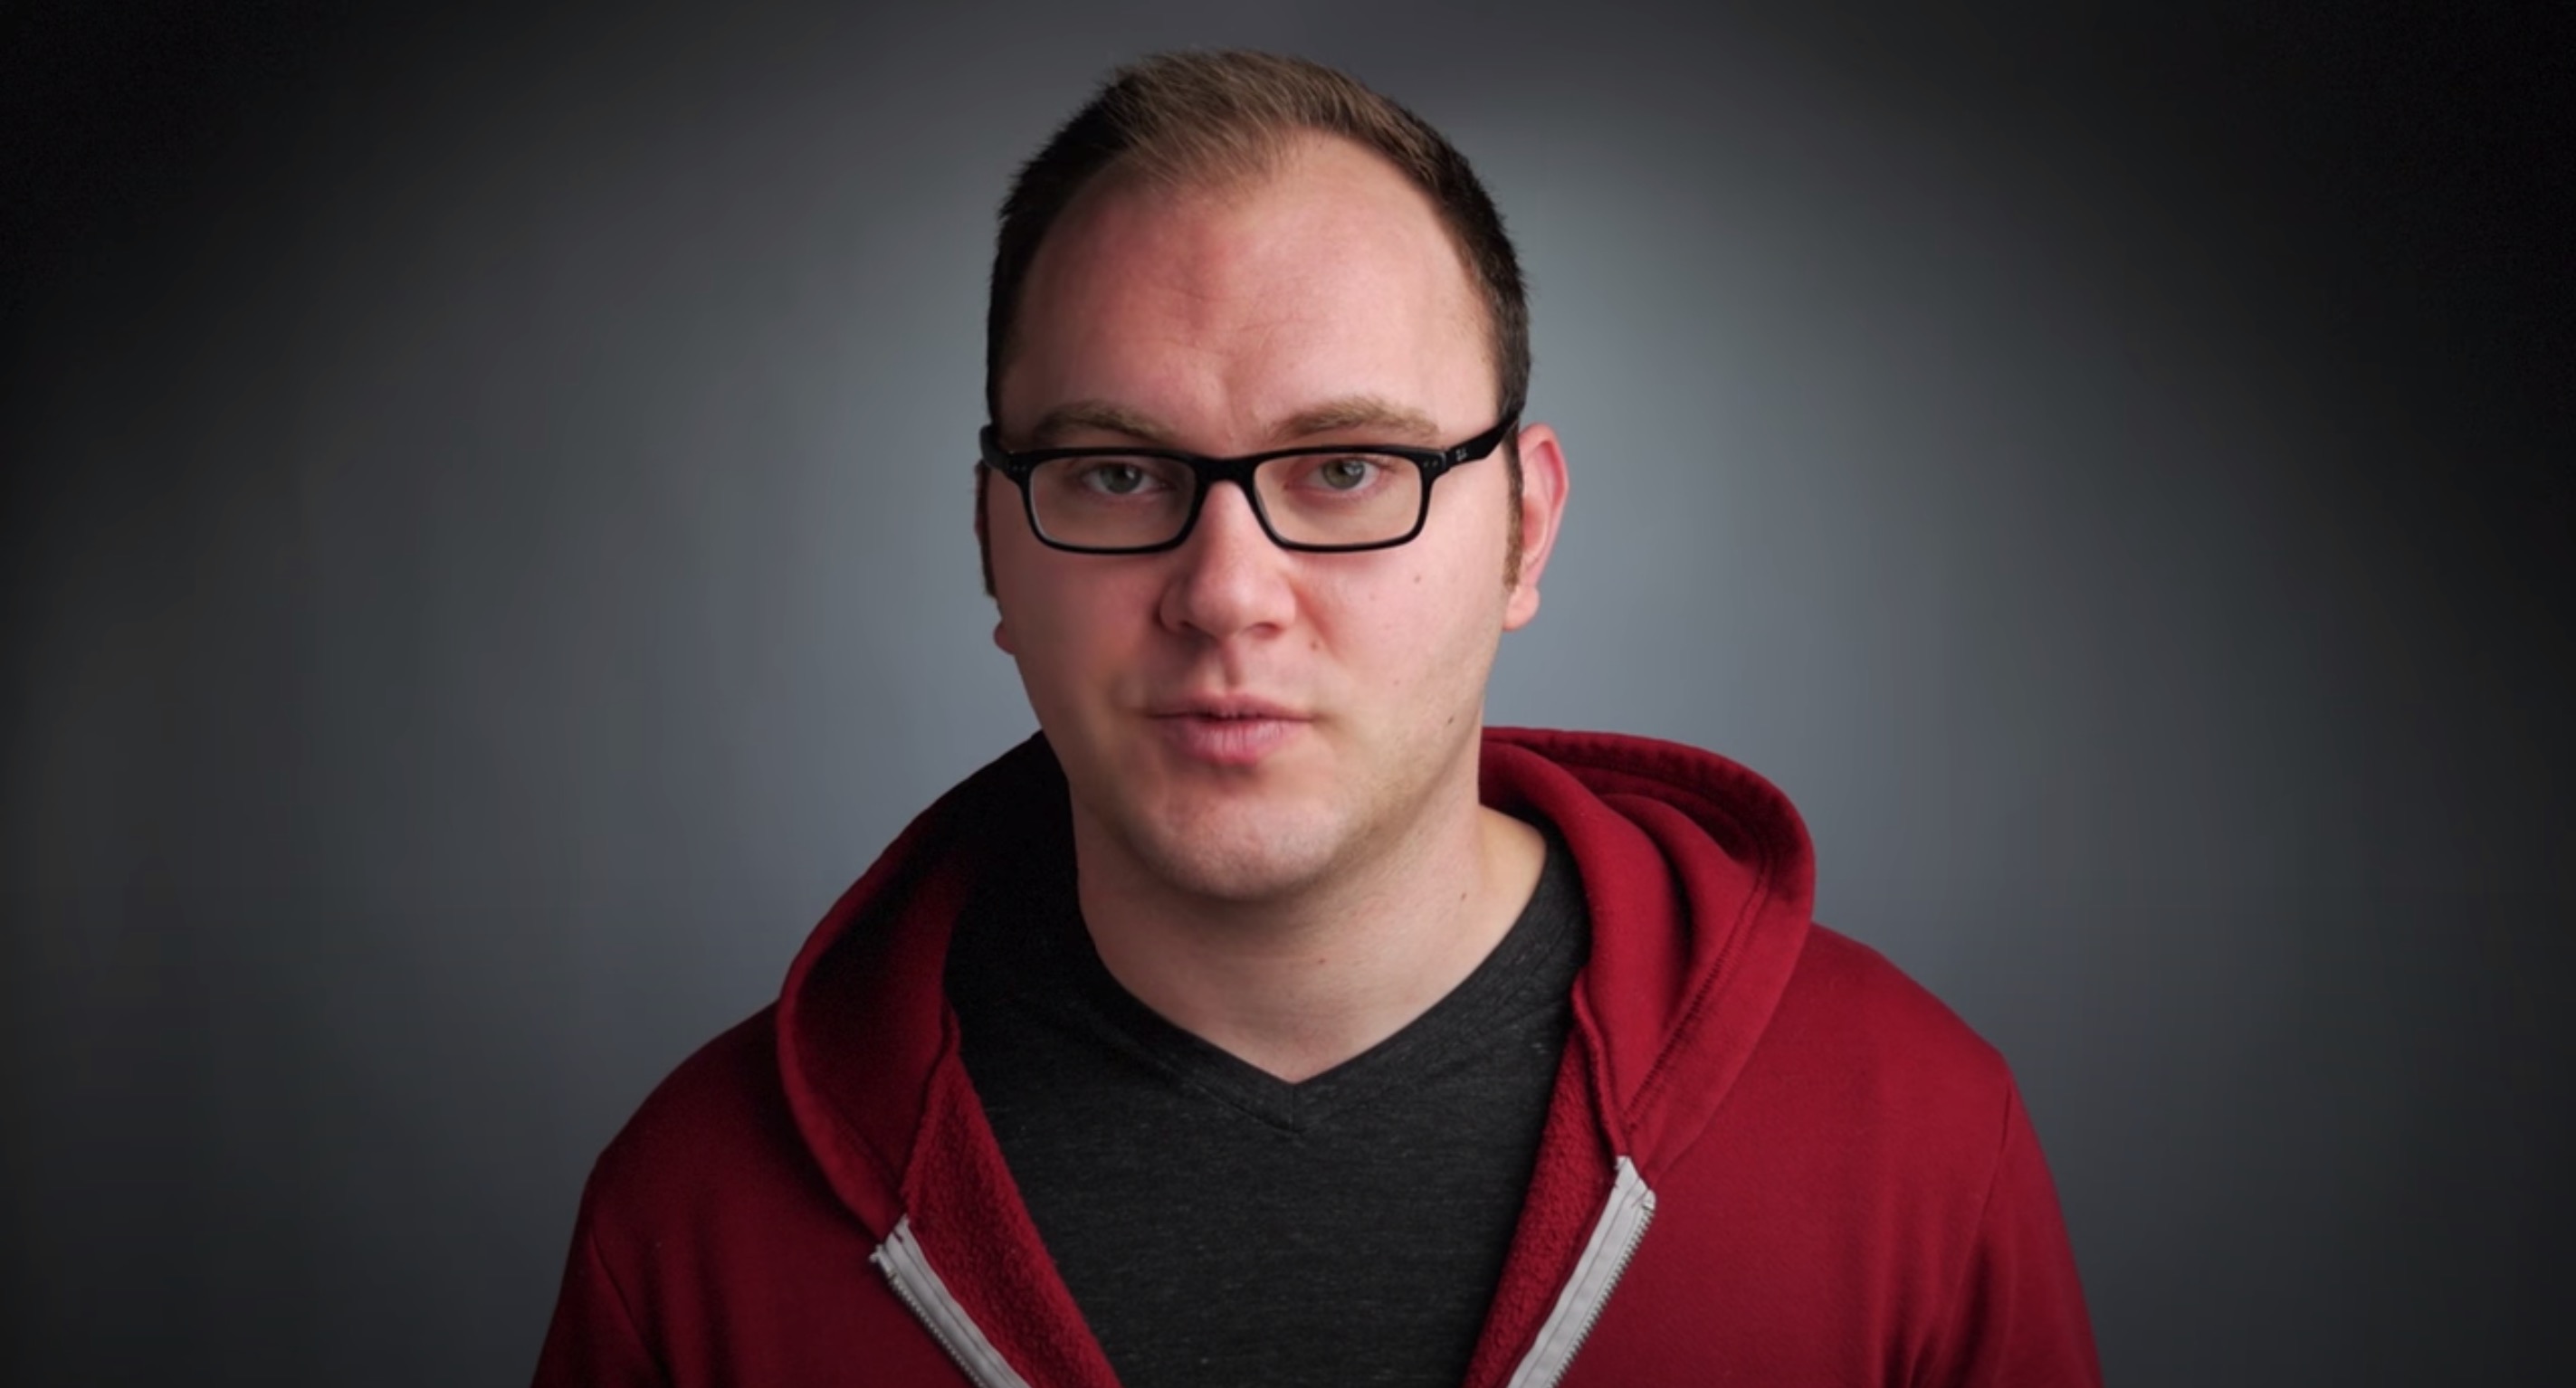

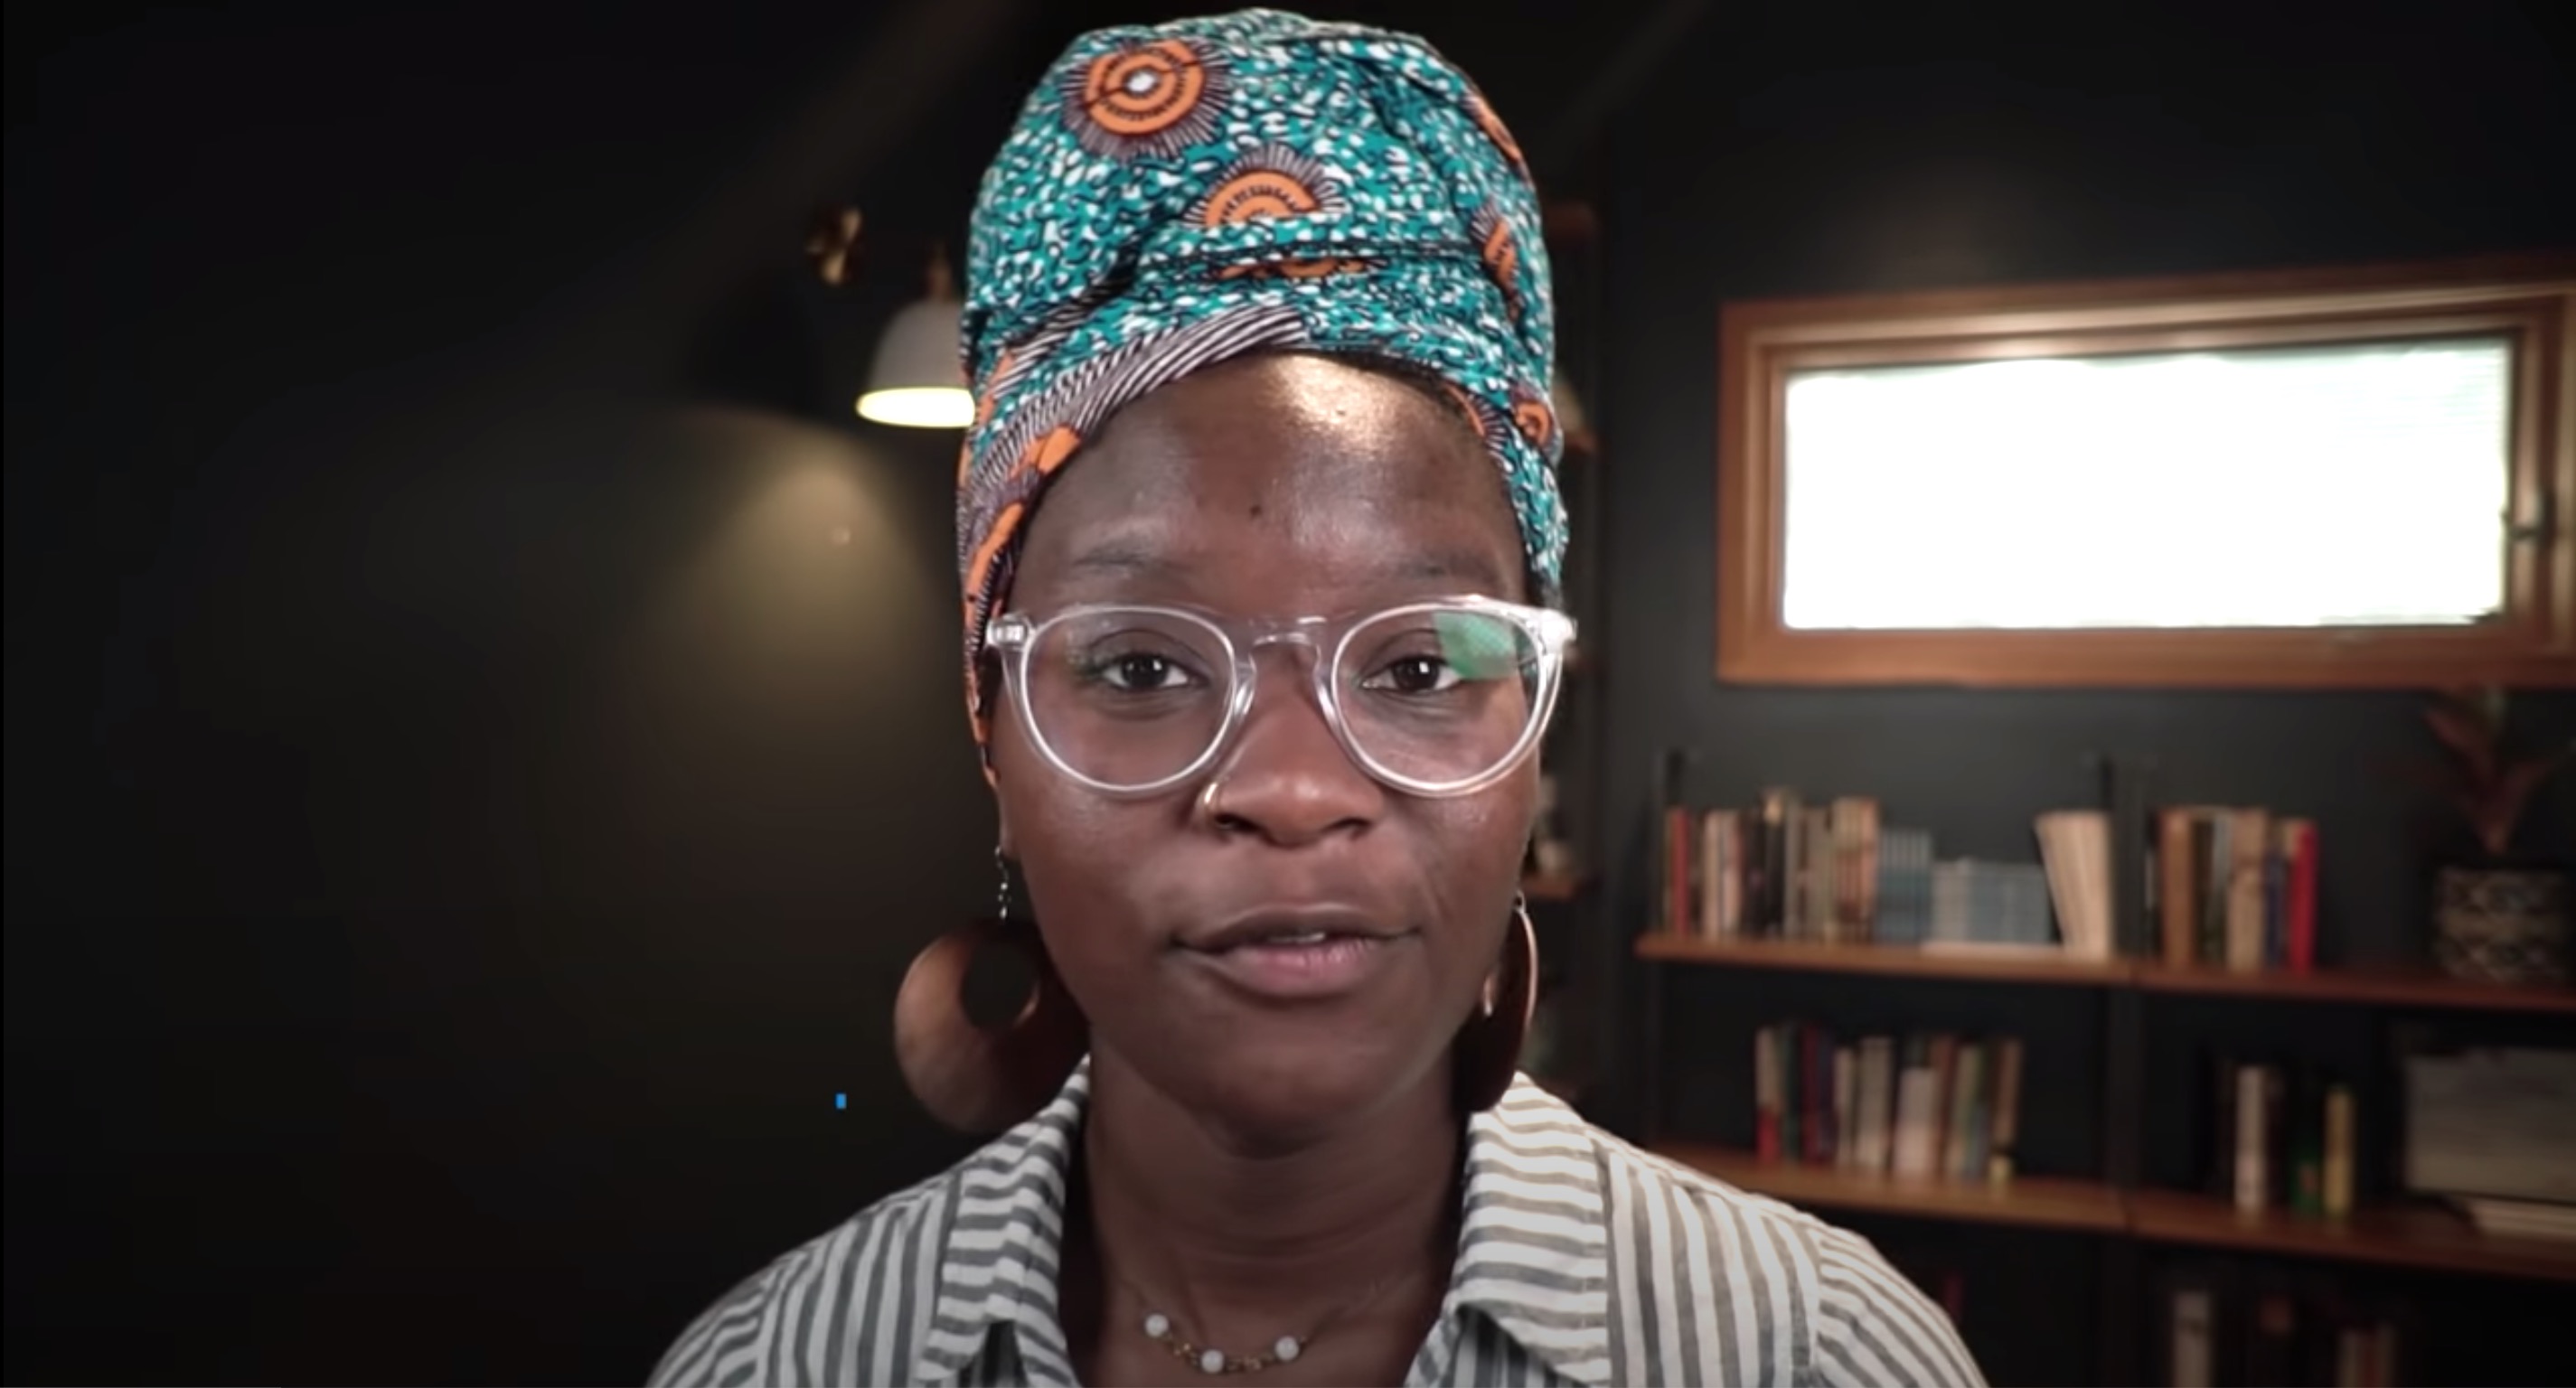
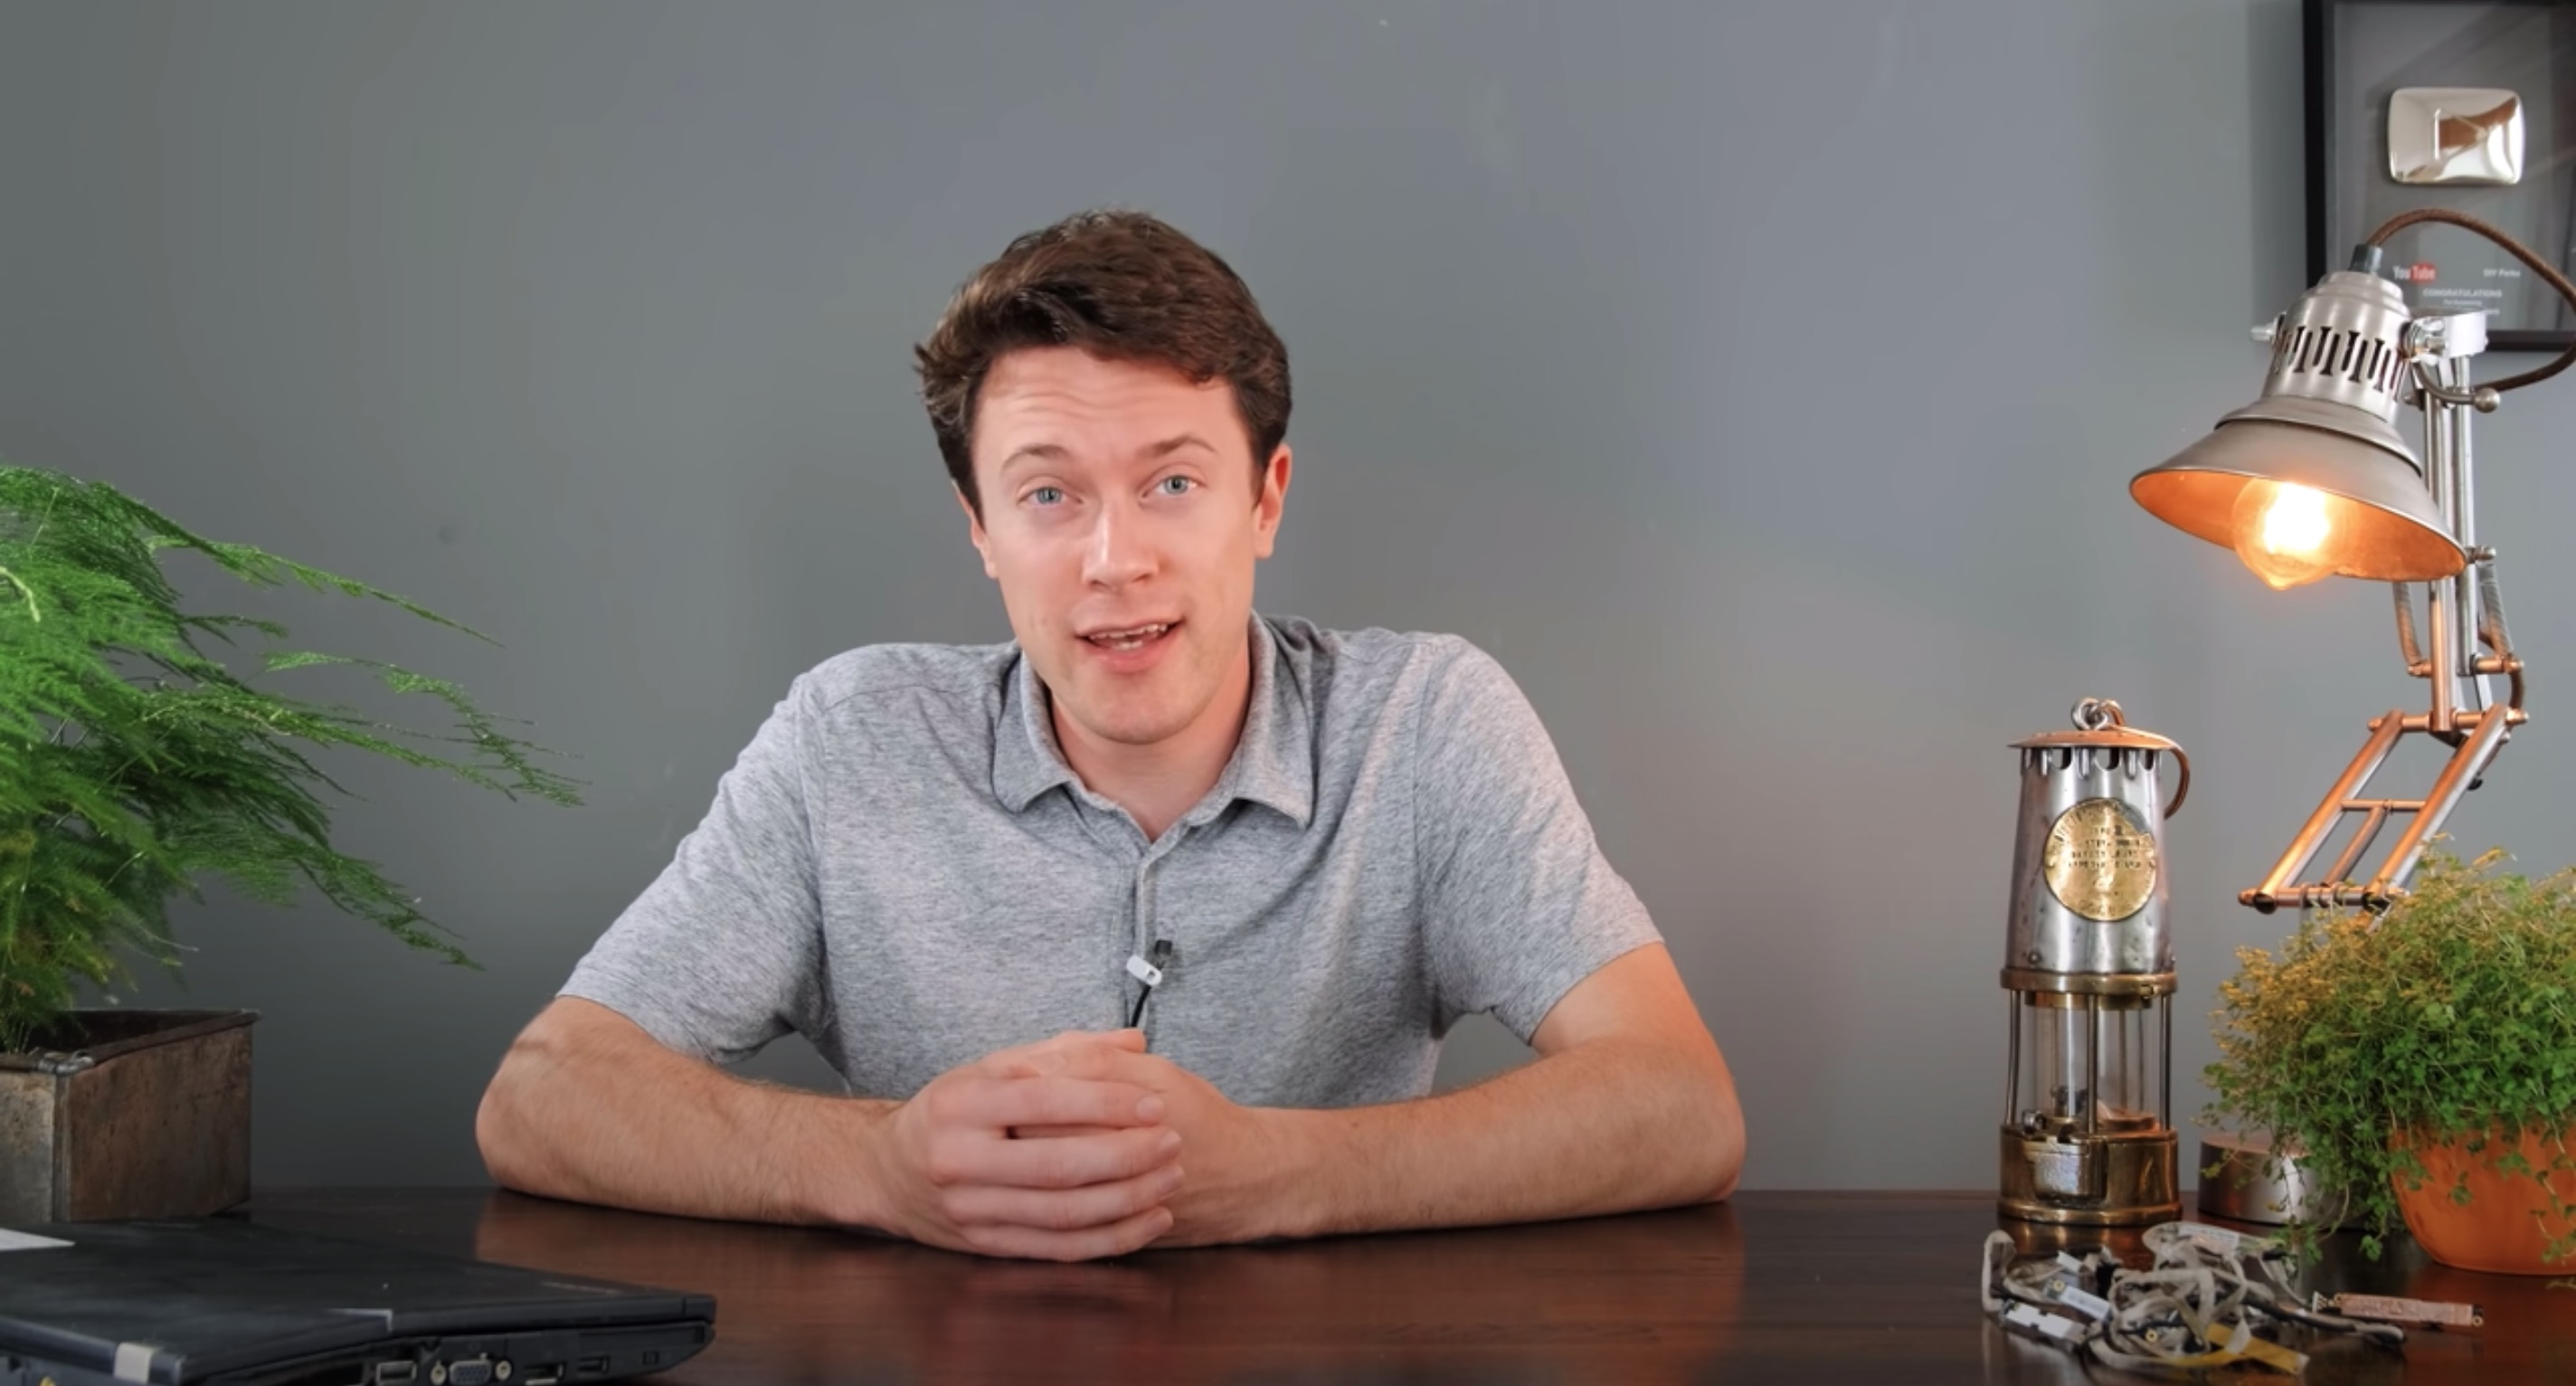
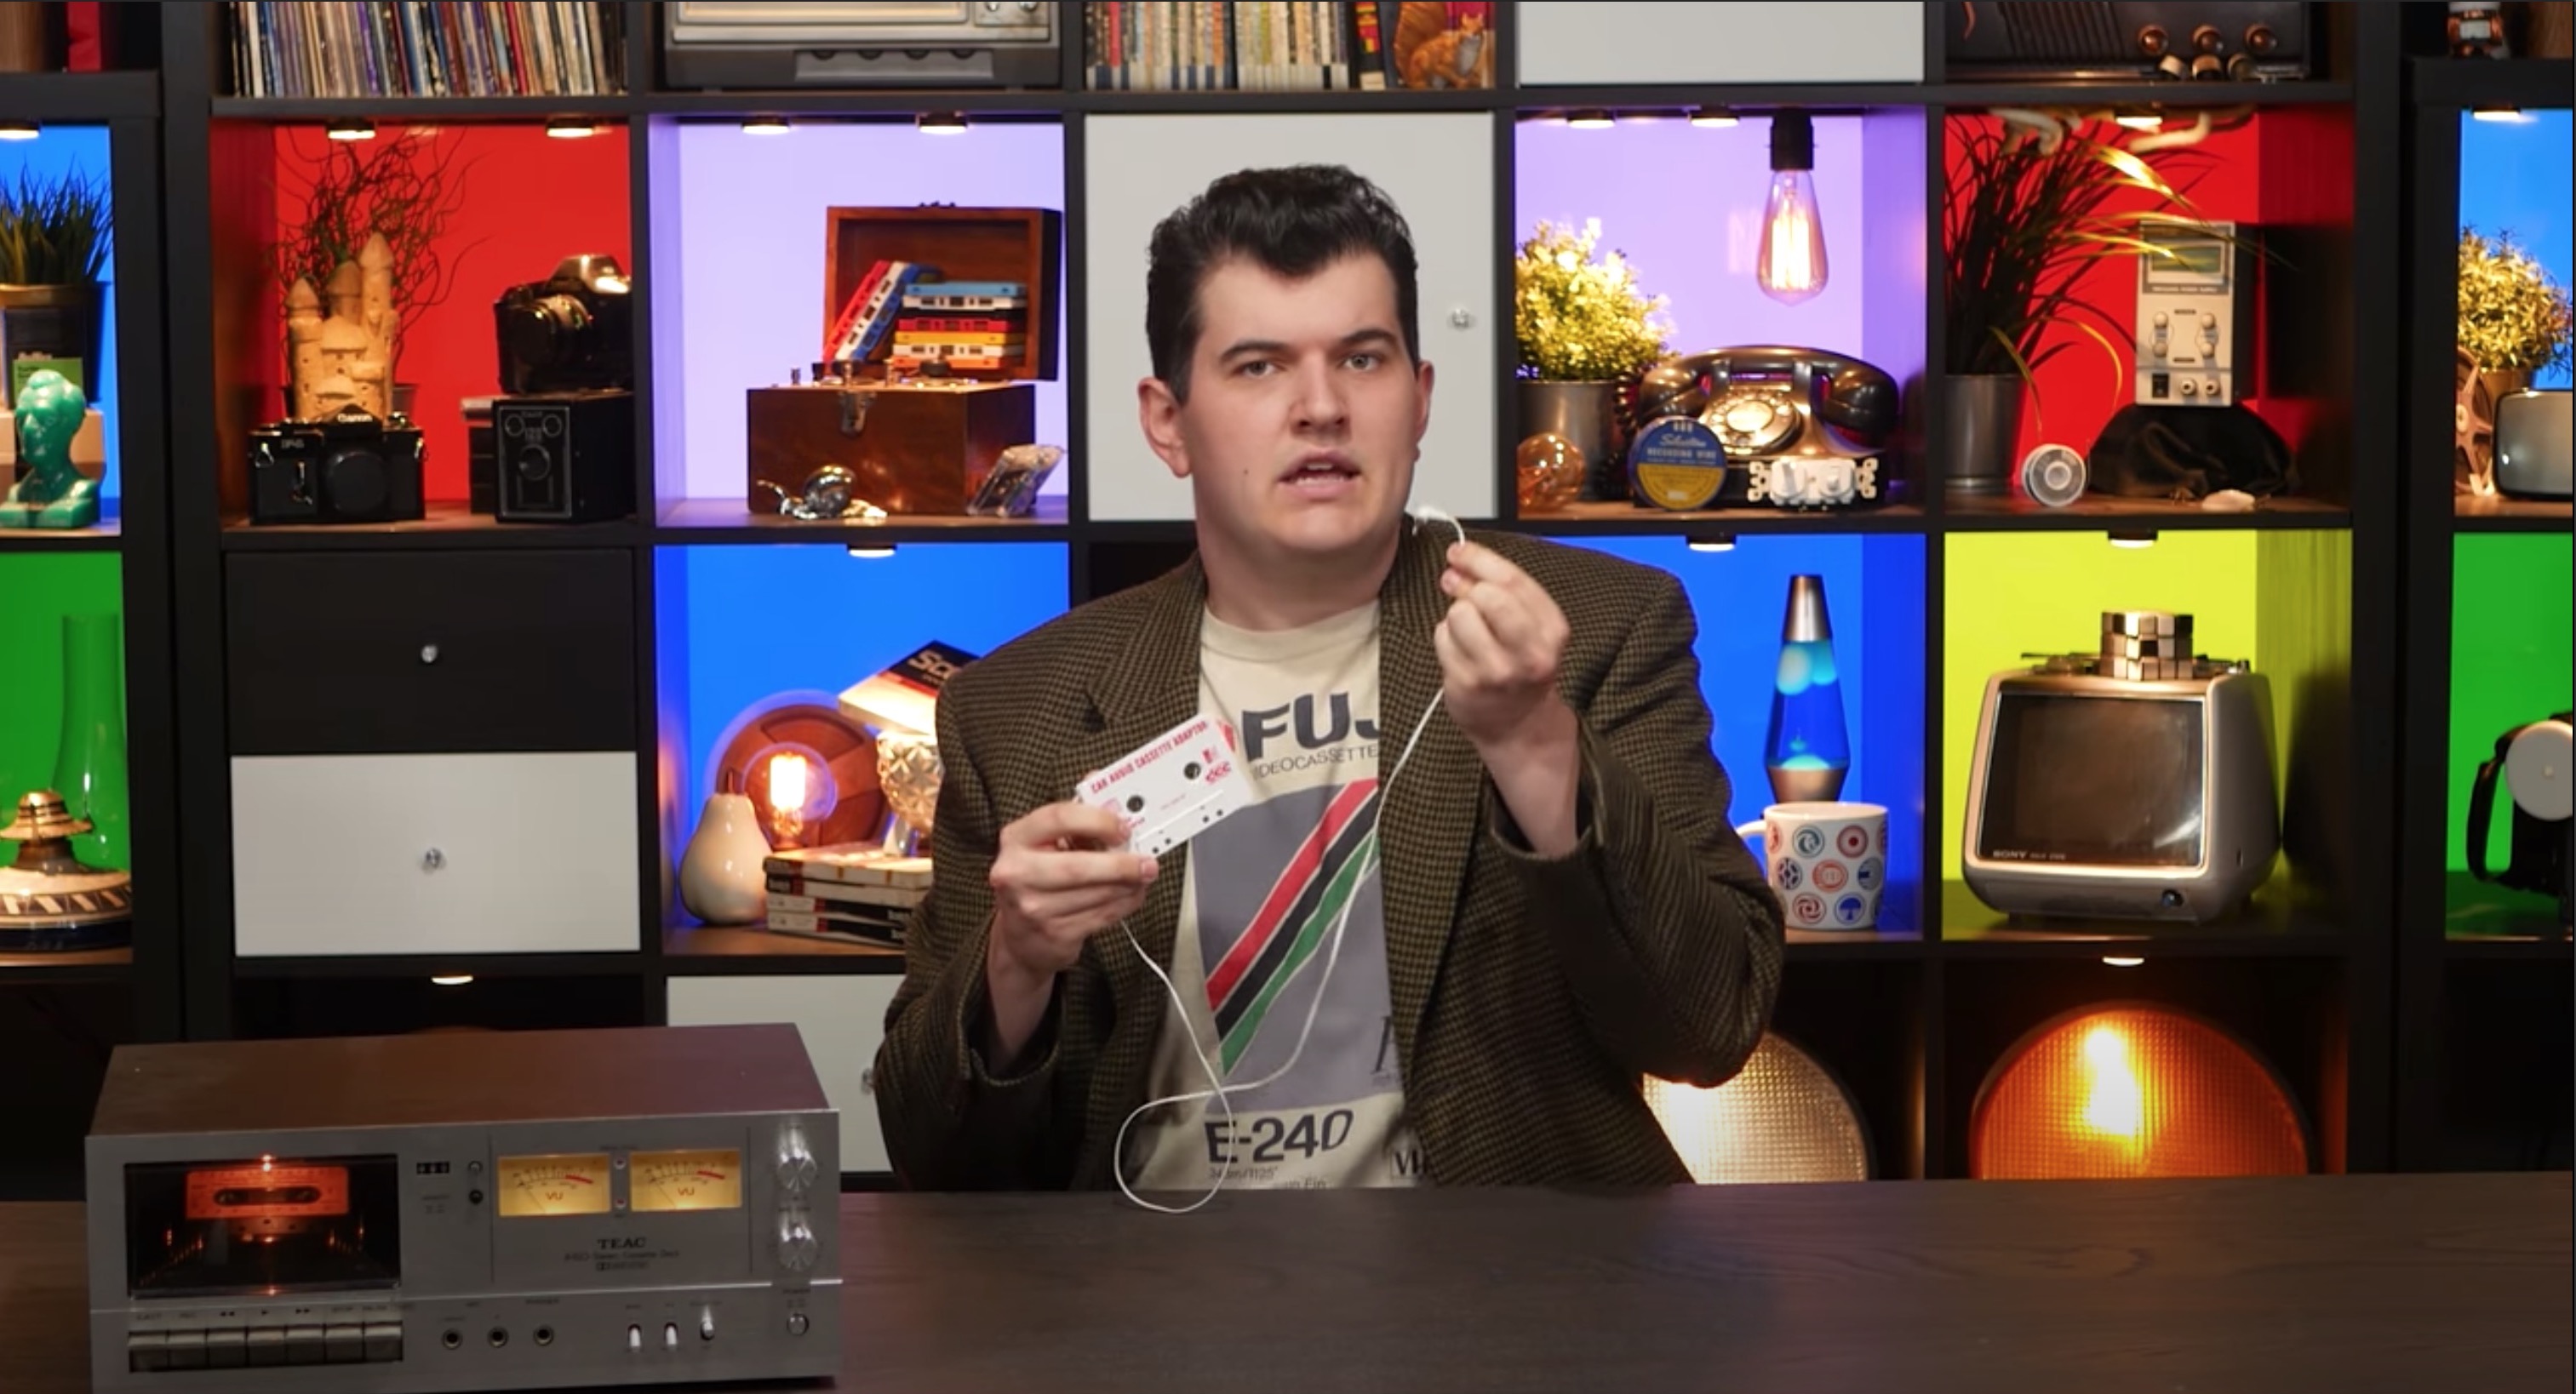
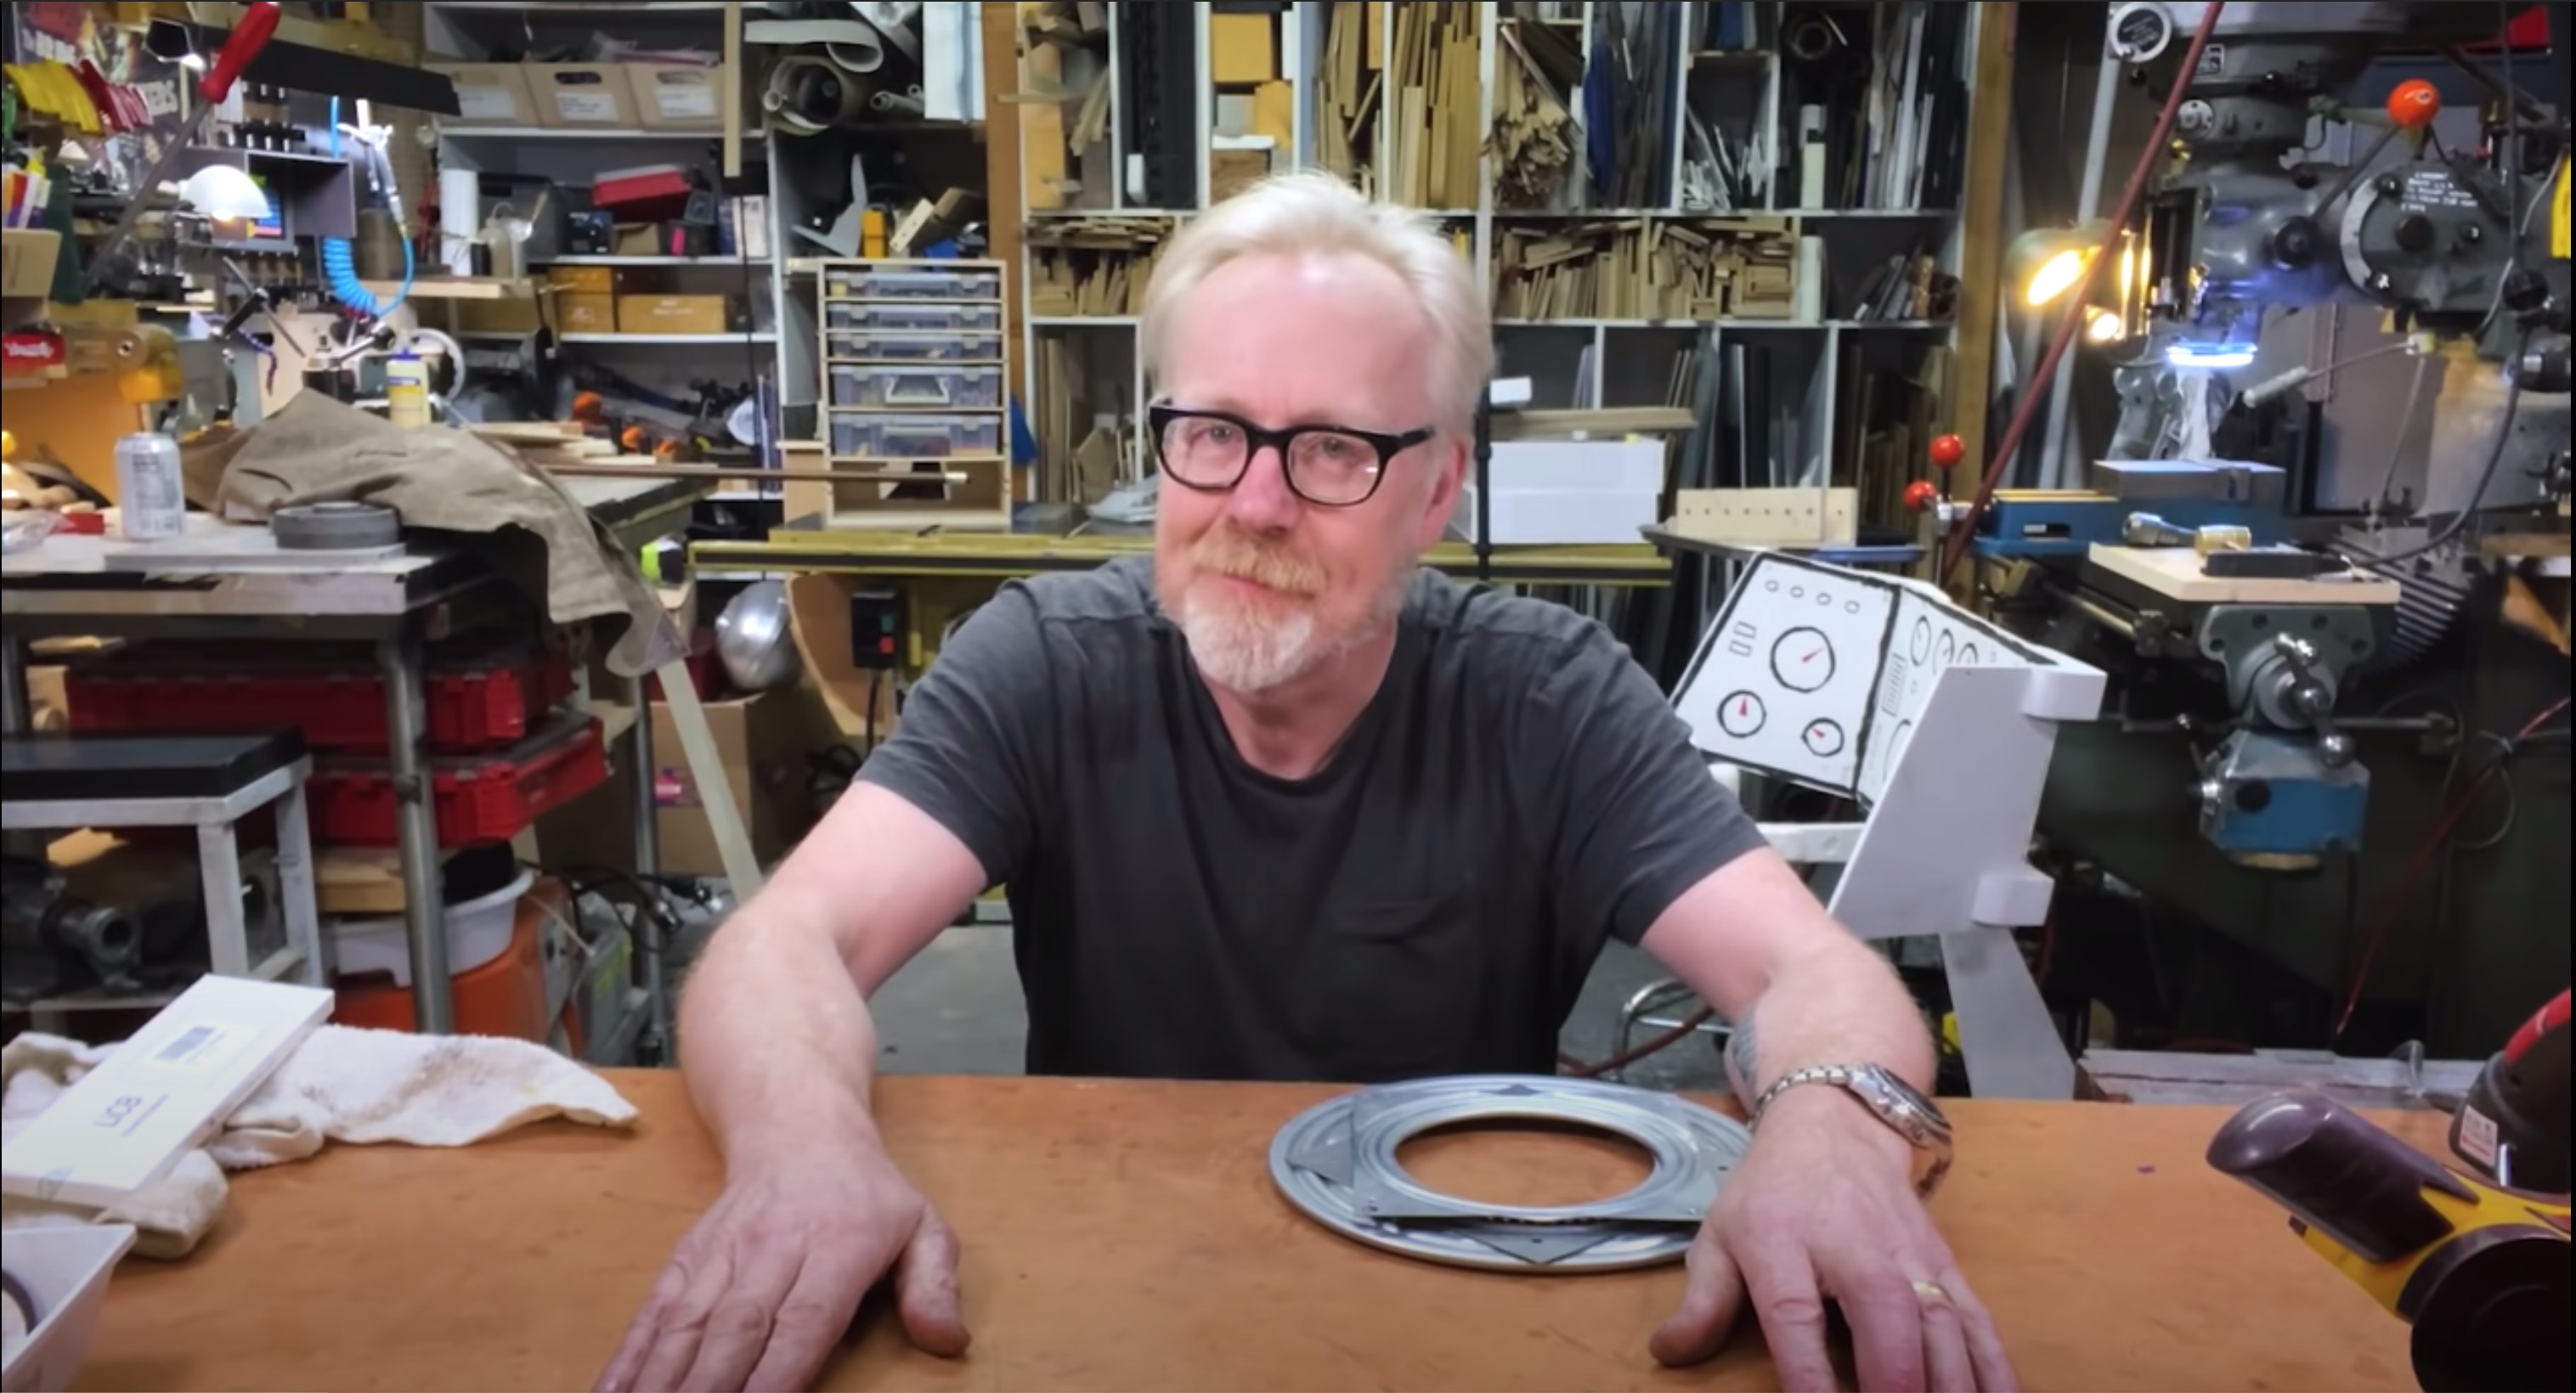
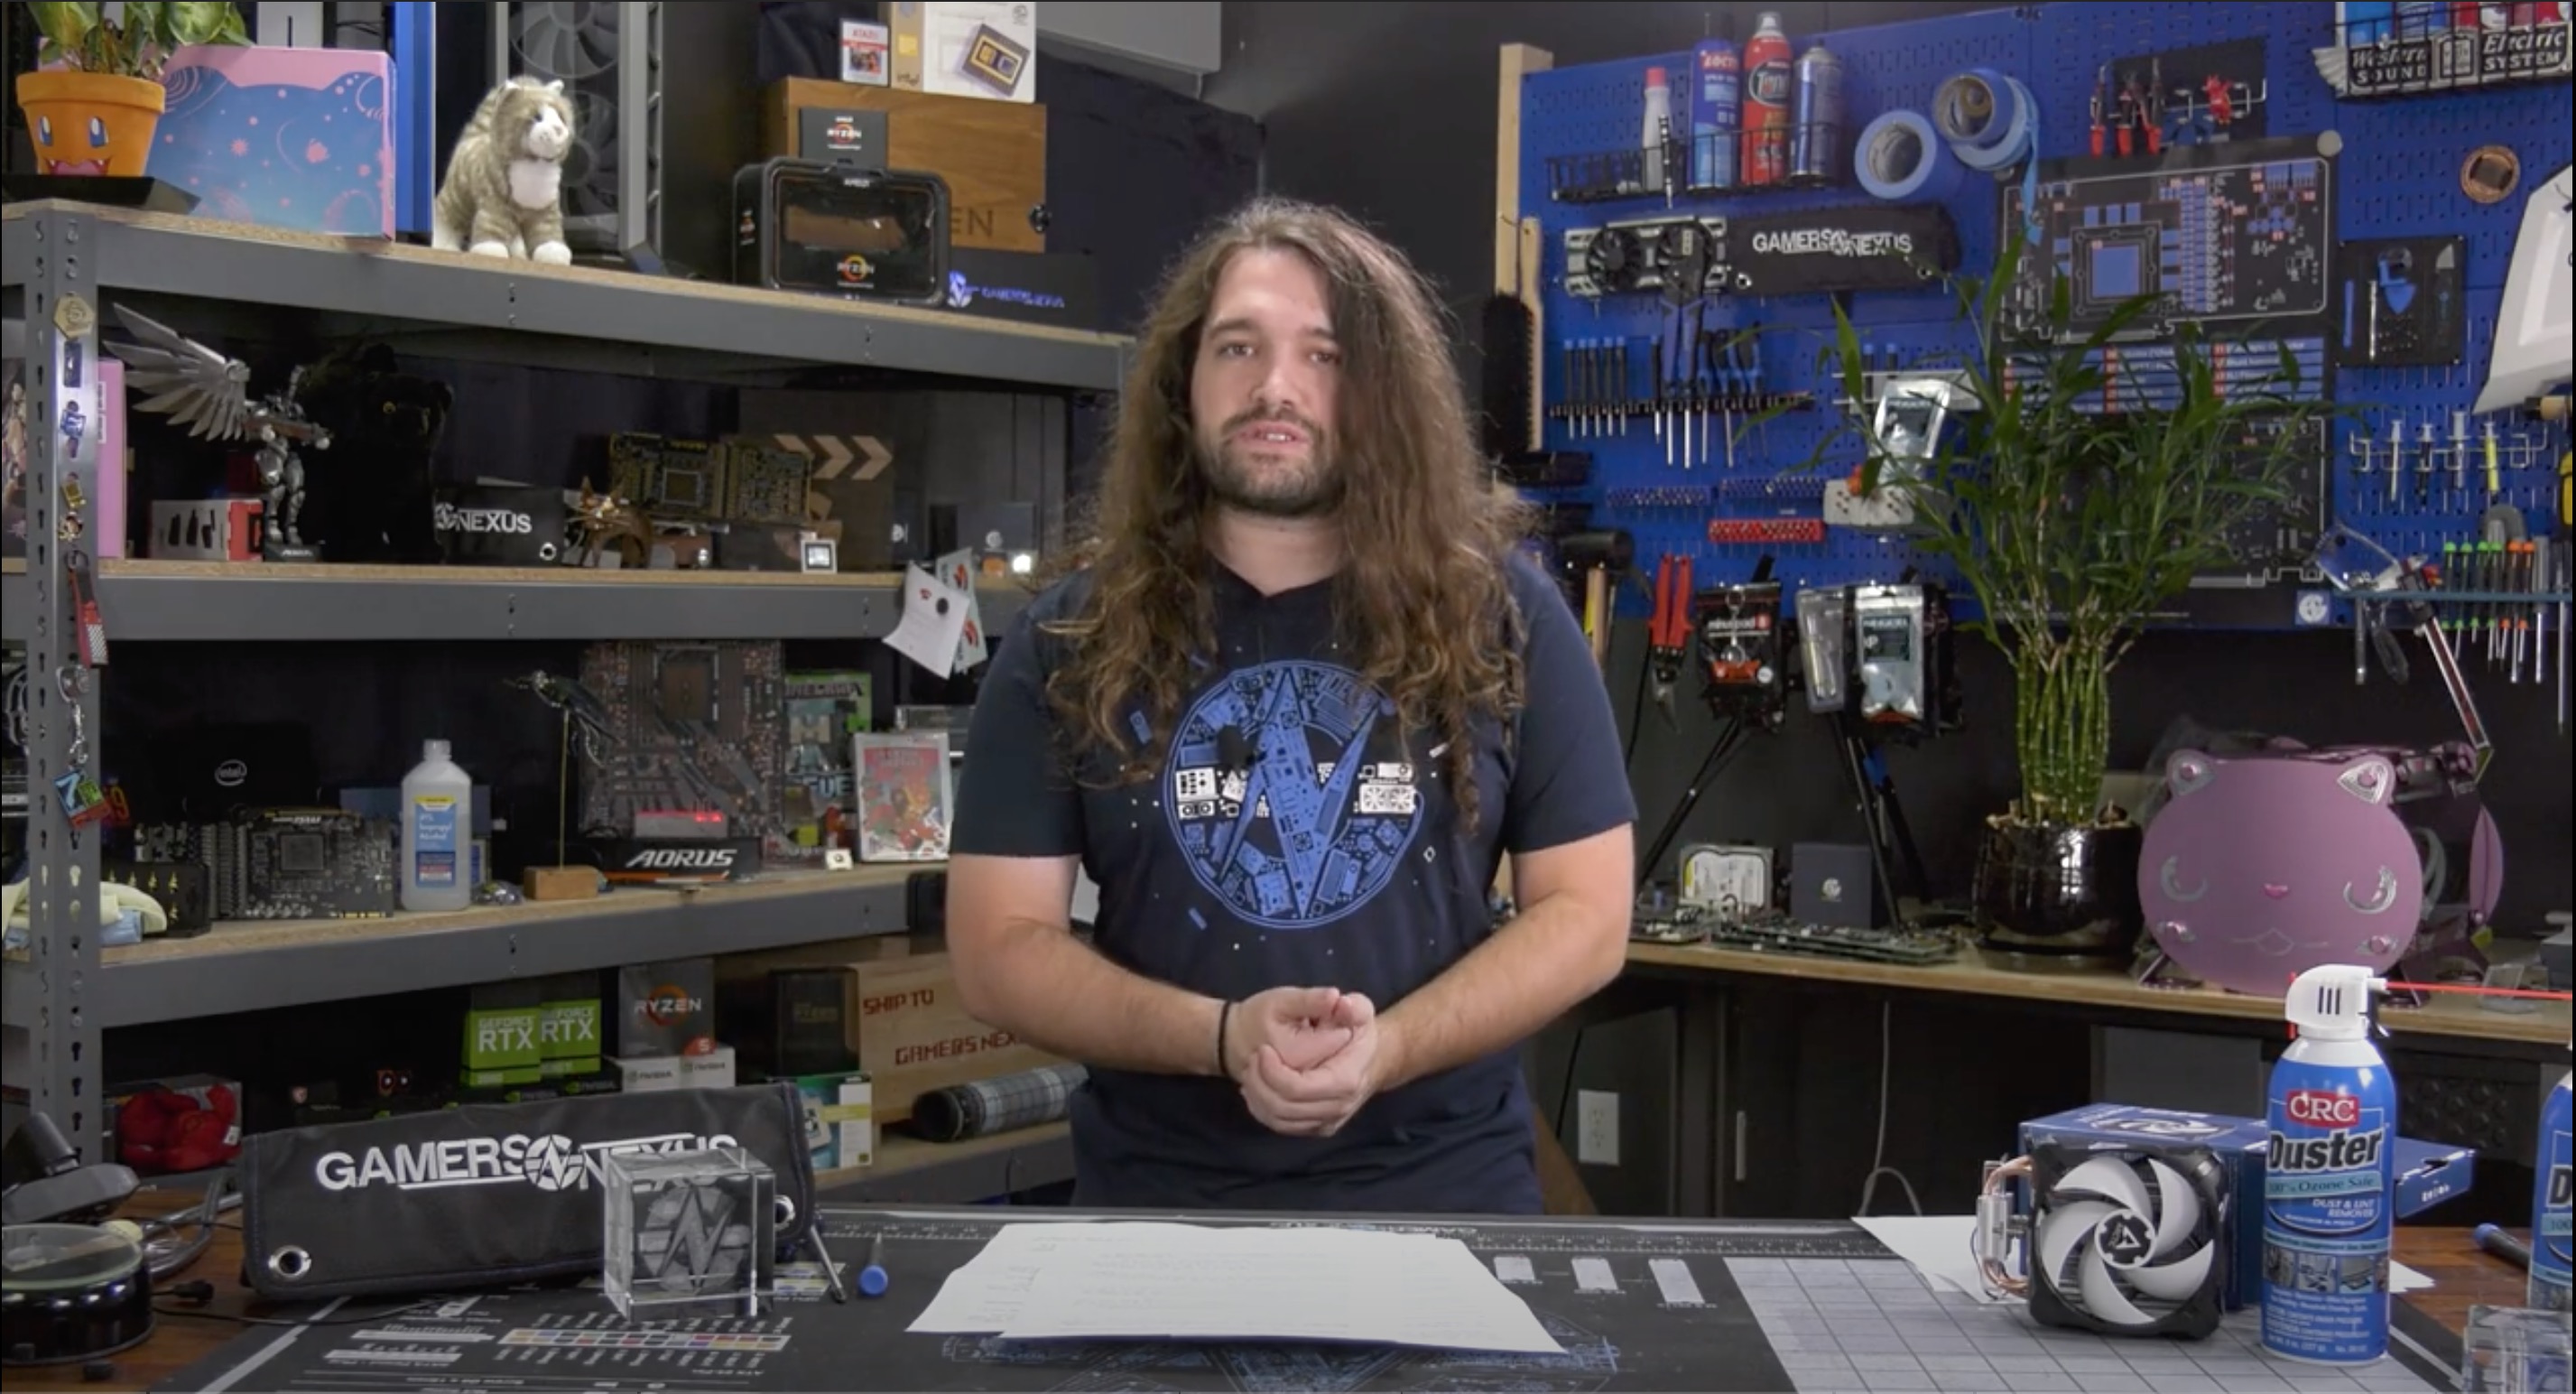
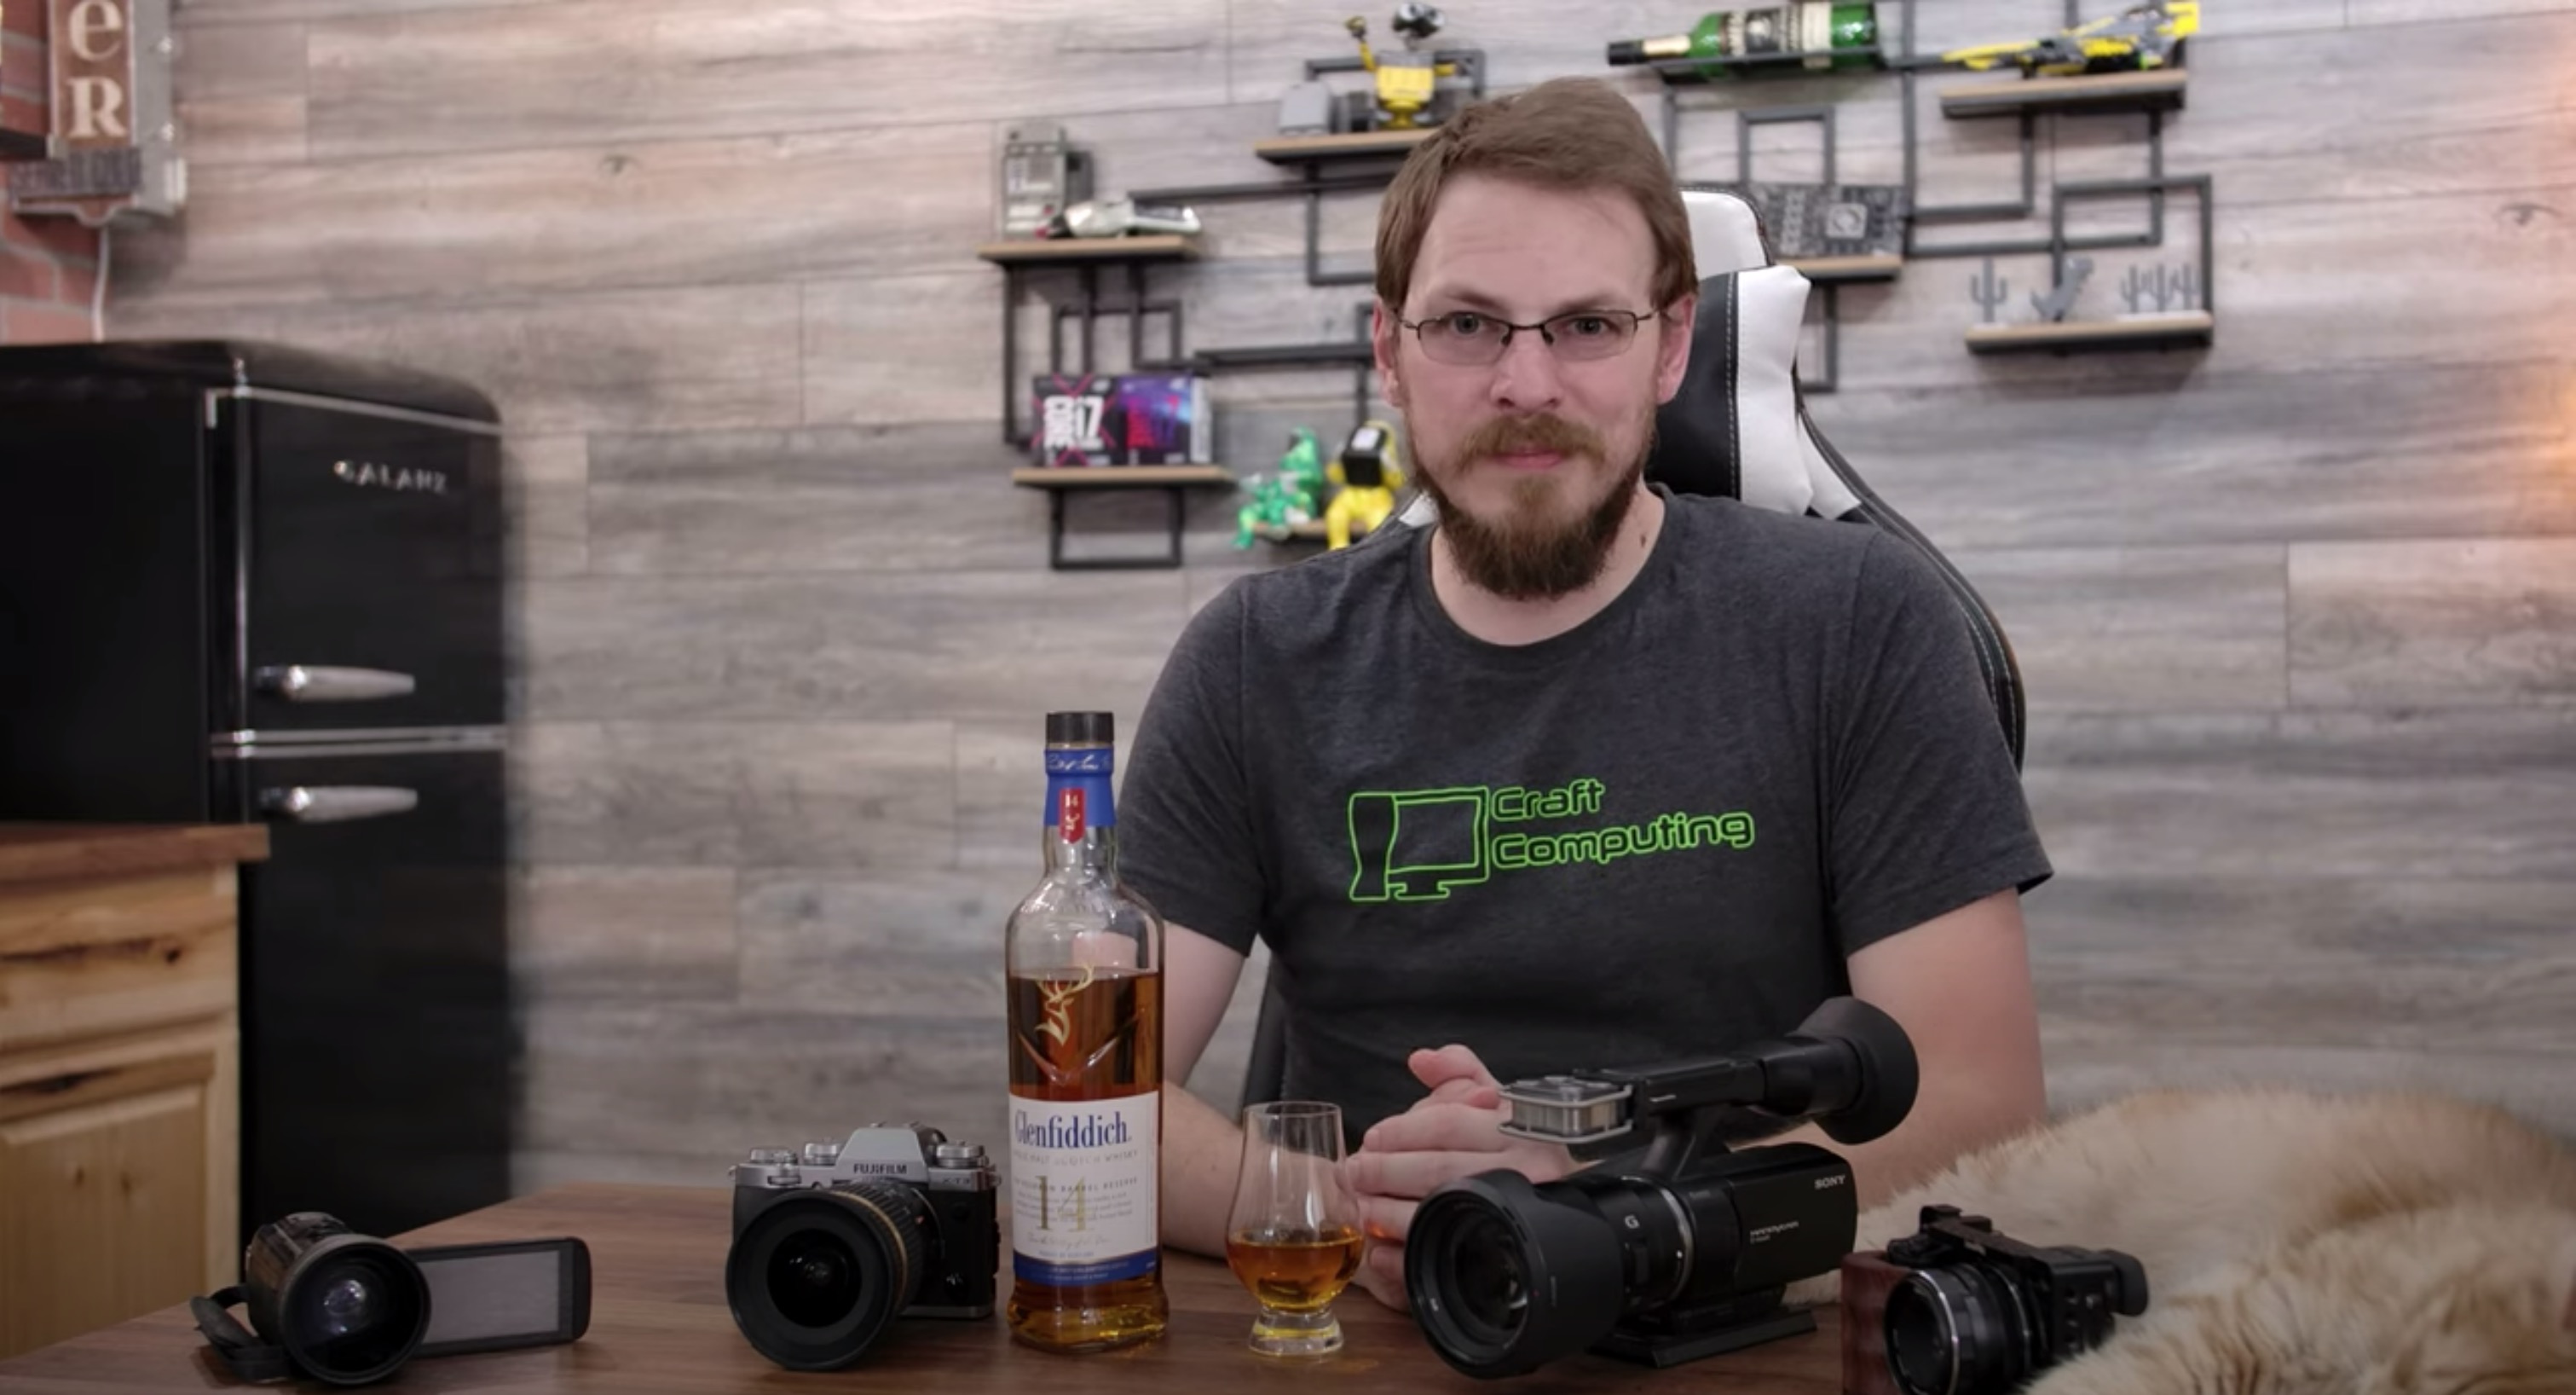
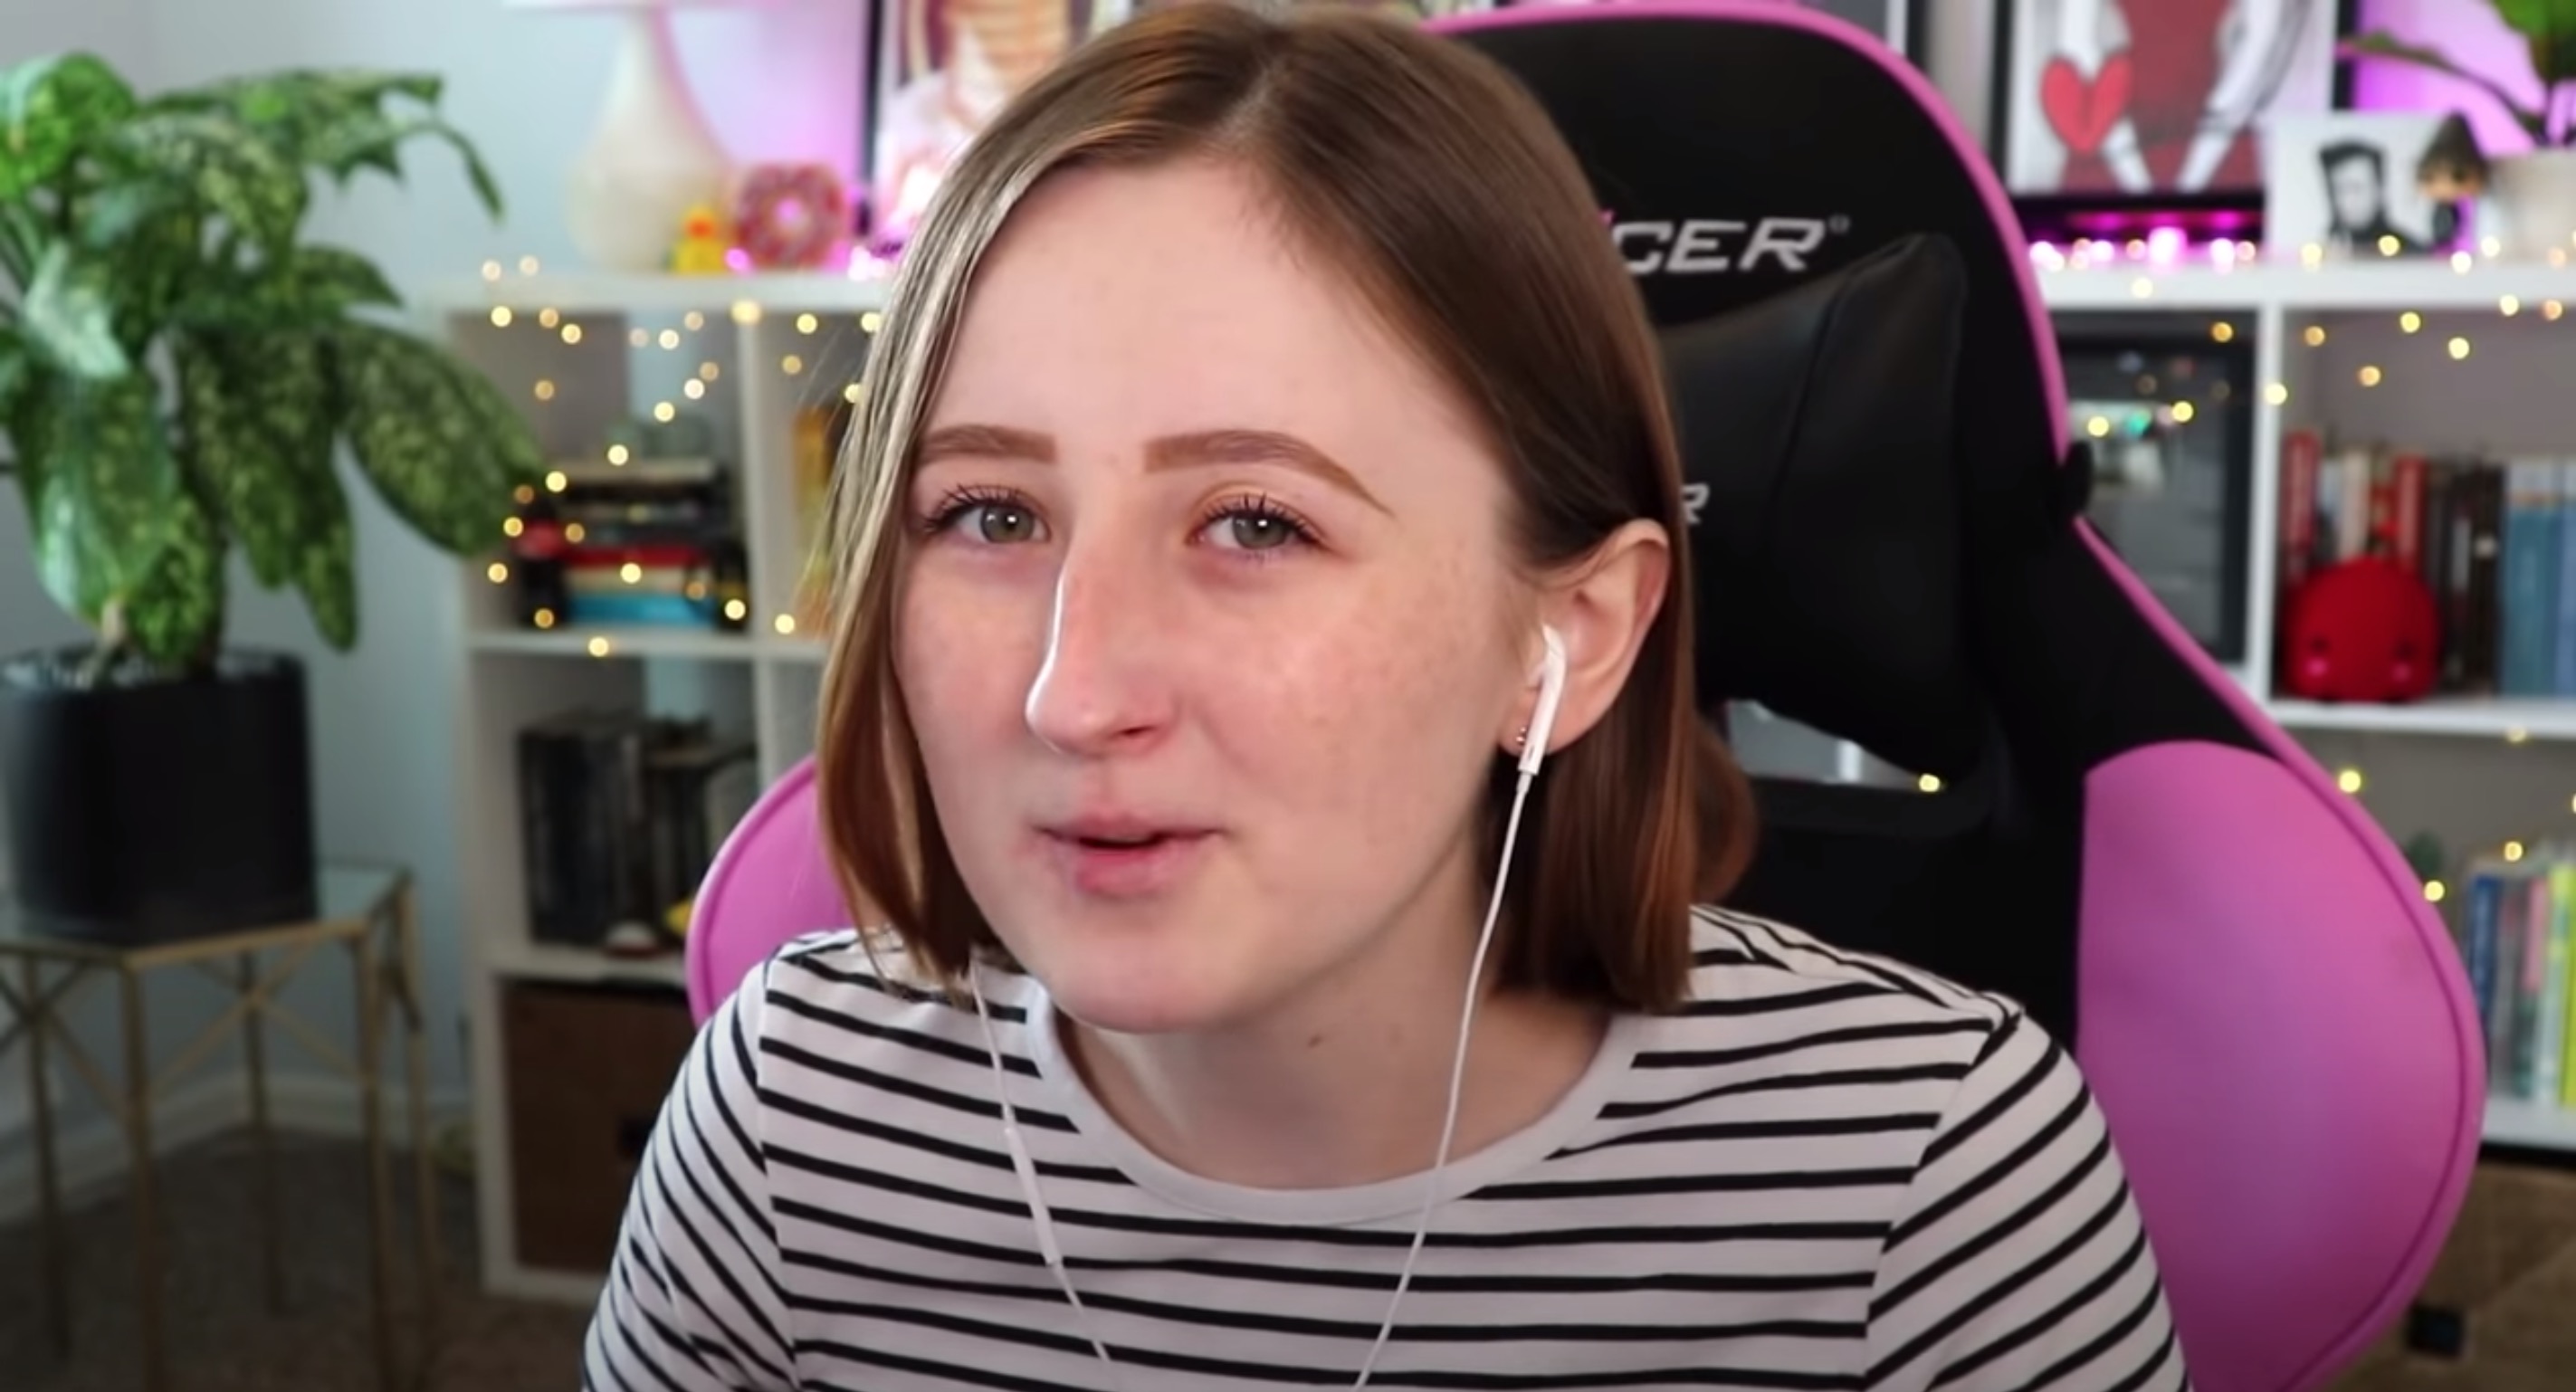

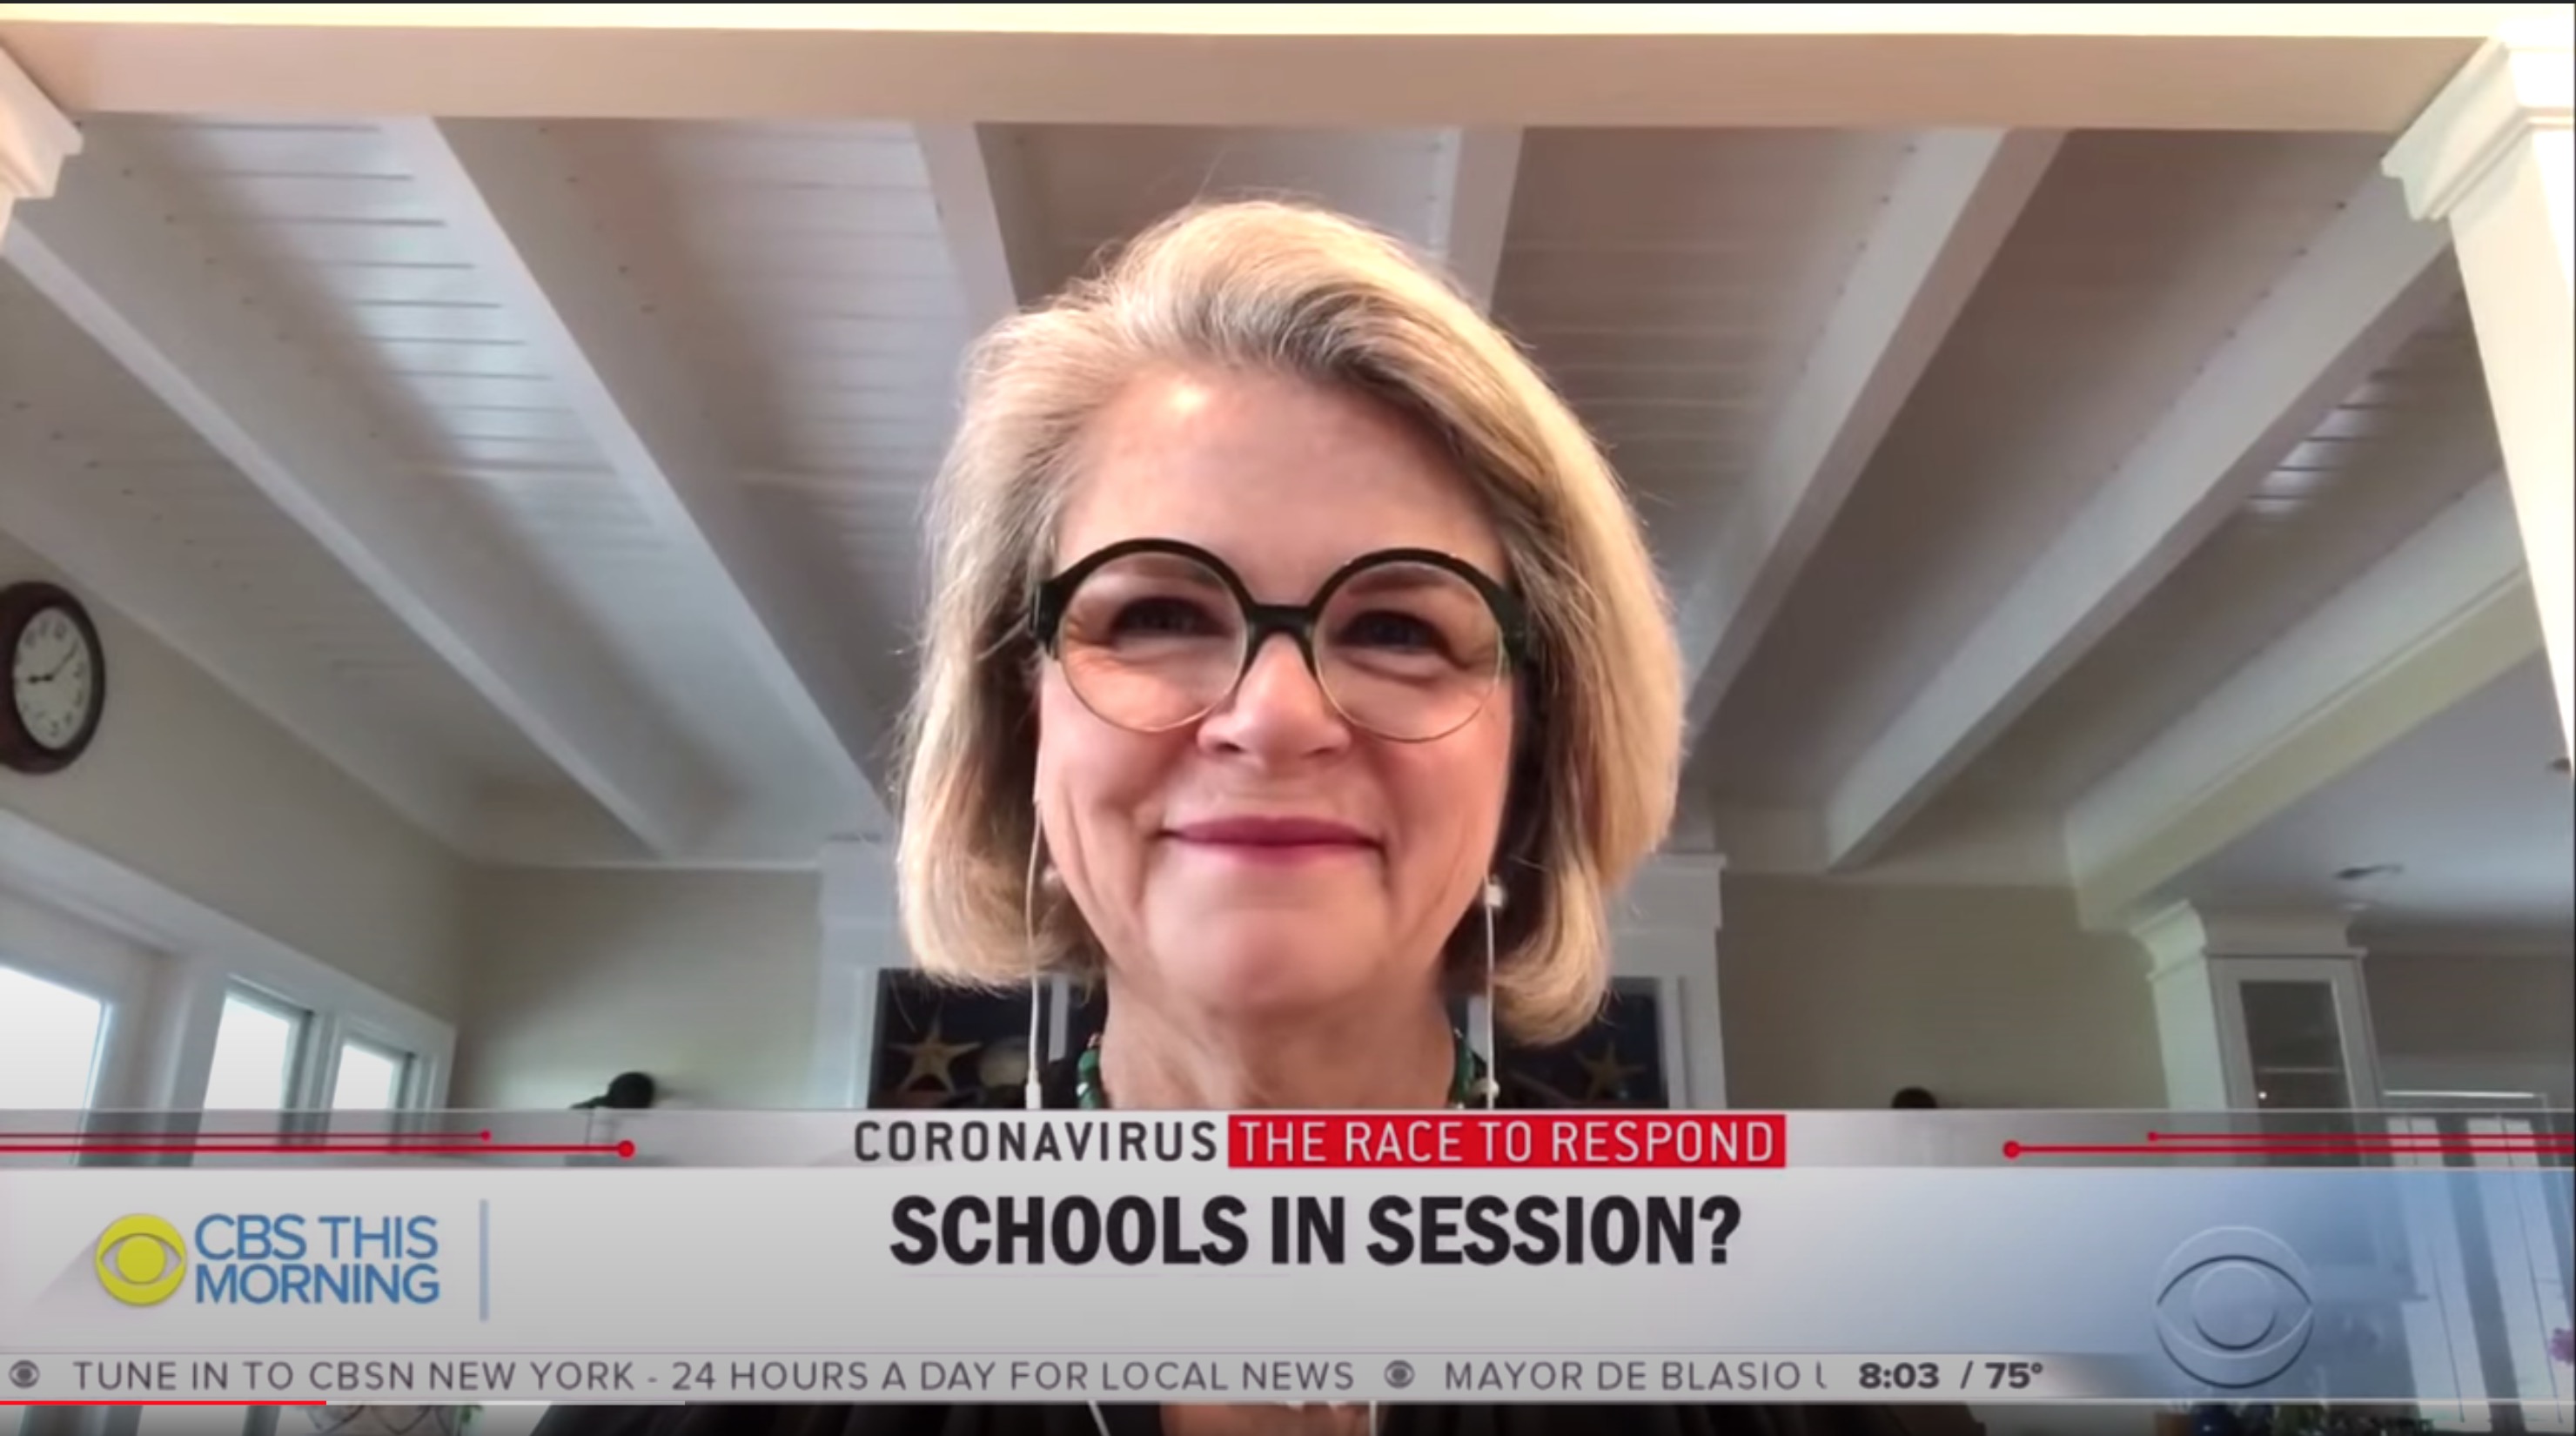
Something else to notice in some of the images (in particular, the YCImaging, Technology Connections, and Margaret Spellings examples) is that the background also serves as a frame that draws the eye towards the speaker. This is a useful composition technique that I'll talk about more below, but I just wanted to draw your attention to them while the examples are still fresh in your mind.
Lighting and Composition
The thing that separates professional-looking video recording from others, even when the same equipment is used, is lighting and the composition of elements on the screen. While I'm not going to suggest that anything I've produced remotely approaches professional level, I have noticed that taking just a bit of effort to try to properly light the scene and conscious thought regarding how the scene draws the eye has improved the end result drastically. This is what Hull is referring to when she suggests that you "check your lighting," "consider the background," and "note the camera angle;" what Royles is concerned with in his "setting up" section; and what Kelsky means by the third and fourth bullet points of her "challenges for candidates" section. If you've looked at any of those, they're largely just admonitions regarding what not to do in the case of Kelsky and Hull. Royles provides some good examples to draw from, but he doesn't talk a lot about some possible issues that have developed with the rise of CFL and LED lighting that might be worth taking into consideration, as well. So here I want to take briefly about some terms and concepts to be aware of when selecting your lights before talking about three possible lighting setups you may want to consider.
Lighting Concepts
Color Temperature
Most lighting for photography is measured against a "hypothetical black body radiator" which radiates at different brightnesses depending on what temperature it is in degrees Kelvin. Any light source that is meant to replicate a "regular" light source like the sun (as opposed to, say, an RGB light which projects an almost pure red, green, or blue light source) can be measured accordingly.

Effectively, what this means for you is two things: first, the light sources you are using to light yourself when interviewing or recording are going to have a color value attached to them whether or not the lights themselves explicitly say they do. Second, your camera is going to either explicitly or implicitly balance the color white to a particular color temperature and everything else in the scene will then adjust accordingly.

To illustrate this I've taken a picture of a piece of white foamboard under 60 watt bulbs made by the same company in three different temperatures: "soft white," at 2700K, "bright white," at 3000K, and "daylight," at 5000K. Note that daylight is usually considered to be 5500 to 6500K, so what I've done is taken pictures of all three bulbs with my camera's white balance set at 5500. As you can see, despite being rated at the same wattage the left two bulbs have a distinctly yellowish cast to them. Since most people have "soft white" or "bright white" bulbs in their home, you may want to set the white balance of your camera to 2700 or 3000 (or, if you cannot dial it in that much, set it for "indoor") in order for the room to look as you expect.
Color Rendering Index and Flicker
If you are using LED or CFL lights to help light your recording or streaming space you'll also want to keep in mind two other factors besides the color temperature. The first is the Color Rendering Index of the lights. Due to the ways that LED's produce white light (either by combining red, blue, and green LED light in differing amounts or by using a blue LED with a special phosphor coating that produces white light, depending) they do not always render color in exactly the same way that an ideal black body radiator (or, to be more practical, an incandescent light of the same type) might. The CRI of a light, measured on a scale of 0-100, indicates how close the light gets to rendering colors accurately and vibrantly.
Similarly, many commercial LED and CFL bulbs that have the ability to dim achieve this by switching on and off at speeds beyond our ability to notice—a phenomena known as Pulse Width Modulation. Depending how fast the frequency of this modulation is, it is possible for a camera to pick up on the lights flickering even when the human eye cannot. This doesn't matter for an interview, usually, but it may for recording so it's something to be aware of. Unfortunately, most commercial lights don't give the frequency they pulse at, so some experimentation may be in order to make sure there is no problem with a particular set of bulbs.
When putting together your lighting setup, then, the two factors you want to look at if you're buying bulbs for lights you already have are the color temperature of the bulbs and their CRI. Most prosumer and professional-grade lights will have CRI numbers above 95, while many commercial lightbulbs for home use have numbers between 90 and 93. Avoid bulbs that don't mention the CRI, as they may be low enough to actually cause problems.
Light Sources
Once you've picked out your space you want to take a look at what sorts of options you have for lighting. If you think you might be recording videos frequently or that it may become part of your daily routine for a while it may be worthwhile to consider investing in some studio lights. These come in various pricepoints, but unless you're looking to do some sort of serious photography or video work (such as that seen in some of the example videos in the bibliography) I don't know that anything beyond a pretty standard two or three LED or softbox lighting kit makes a lot of sense. They're unfortunately most common on Amazon, but they rarely cost above $200-300 dollars and depending on how you decide to set up your lighting kit can produce decent results.
While the studio lights mentioned above encompass a lot of types of lights there is one in particular I feel like I should mention as it directly plays into one of the possible lighting setups I'll mention below. Beauty vloggers and also celebrities doing remotes from home seem to swear by Ring Lights. These are designed to fit around the lens of the camera and are supposed to capture the focus in the eyes of the subject. They also tend to create a sort of even glow around the face, which is why I think they're popular with beauty bloggers and beauty Youtube channels where the face is the natural focus and it doesn't matter whether or not you're defined in three dimensions. I'm not sure they work quite right for the purposes of interviewing because you're actually not often looking directly at the camera (and depending on your camera choice mounting one may be awkward) but I feel like I'd be remiss if I didn't mention them.If you like the effect but don't like the price you could, in theory, place a powerful directional light directly behind your camera to try to achieve the same result.
If you're just looking for a lighting setup to help you with your interviews, on the other hand, I wouldn't buy any sort of professional rig that you're not going to use after you get a job. Instead, I would look at the kinds of lights you already have at home or hit up thrift stores for cheap desk or clamp lamps—although if you go this route pay attention to the wattage those lamps can take. The rise of cheap LED lighting has created a class of lamps whose wiring can actaully overheat if more than about three watts are run through them. That limits the power of the bulbs you can use, and you may want more powerful bulbs if you feel the amount of light you're getting from the lamp you've got is inadequate. Another possibilitiy is inexpensive work lamps like these from Home Depot. If you do purchase these the wire guard can be useful for putting diffusion material over, but the clamping mechanism's connection to the light itself is awful. Similarly, some photographers that are just starting out use standard professional worklights intended for construction, but these can have issues regarding CRI so I would be careful if you go that route. The goal in any case is to have light that you can direct to hit the spots you want to hit. The bells and whistles the professional setups provide are there for ease of use, not because they always demonstrably provide better lighting.
Direct versus Indirect lighting
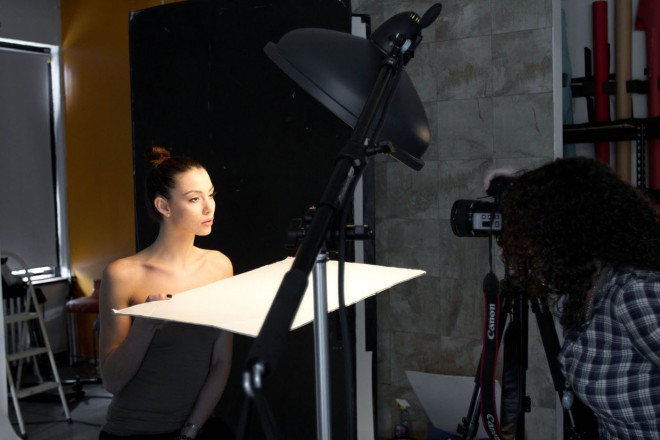
You'll notice that all the lights I've talked about so far assume you're going to be shining them directly on the subject. This has benefits and detriments that you should be aware of, and knowing them can help you to light yourself to best effect. A direct light might focus a lot of light on a fairly narrow part of your face, which can create harsh shadows that are interesting from a photographic perspective, but probably distracting when your primary goal is to convey information about yourself or your subject of study. The larger the source of the light is, the less likely this is going to be a factor, which is why most of the studio lights above either spread their light out over a fairly wide area of single pixel LEDs or use a softbox or diffuser to help to scatter that single source of light in order to have it seem to eminate from a wider area. This can be spread still further through extra layers of diffusion (although obviously with some loss of light as some is blocked by the diffusion material) or through the use of reflectors or bounce cards—white, silver, or gold panels that can take a light and reflect it. These both cut down on the intensity of the light and spread out the area that it touches. A lot of professional umbrella photographic lights tend to use this to good effect by aiming the light at the umbrella and having it bounce off the curved surface, thus lighting a wider area with the same intensity of light. I showed an example of this bounce effect, albeit with a flat surface, with the white foamboard I shone the 60watt bulb onto in the images above. That white foamboard directed the light back at the camera, taking what was a single 60watt desk lamp and making it eminate from what appeared to be a larger source. If it had been covered in aluminum foil or some other reflective surface it would have reflected still more of the light, but lost some of the diffusion ability.
One possibility, then, is to have a single powerful light source and use bounce cards or reflectors to direct the light to the areas where you want them to be. If you happen to have such a light investing in a few sheets of foamboard (or, althernately, a few pieces of cardboard covered in aluminum foil) might serve you as well or better than an expensive lighting setup. One thing I wouldn't recommend: although I've seen videos able to pull it off I don't think using solely bounce cards and reflectors along with the light from a window is a good idea when interviewing or recording. It is an inexpensive option, but finicky as it relies on the position of the sun as well as the intensity it's shining at at a particular moment.
Lighting Setups
In this section, I'm going to talk about some different lighting setups that you might consider when lighting yourself for your interview, to stream, or to record yourself for teaching a class. The thing to remember in all of these cases is that it's not so much about having multiple light emitters as it is about having multiple sources of light. Those sources can and often are actual lights, but they can also be the ambient light in the room, a bounce card or reflector, or a window to the outside if it's particularly bright out. You'll need to experiment to determine the setup that provides you with the best look—which is part of the reason why you want to give yourself time to prepare your space if interviewing in a new location.
I'll begin with the three point lighting setup, as it's a standard for interviewing. From there, I'll talk about two point and single point lighting and how they differ in setup. In all cases I'll talk about when it makes sense to use actual lights and when it might be more useful to use bounce cards or reflectors. It's also worth noting that I'm not worrying about lighting the background (which is sometimes called "four point lighting"), as you'll want to focus to be on you by and large. The one exception to that in my mind is when background lighting can serve to help draw the eye towards you as the speaker, which we'll talk about a bit below.
Three Point Lighting

A three point lighting setup will have three light sources that are generally of different intensities. The most direct source, that illuminates the scene, is known as the key light. It is usually positioned to the side of the camera at roughly a 45-degree angle to how you'll be facing the camera. Because the light is so intense, using it often will create shadows on your face that can come across as harsh. The side or fill light serves to fill in these shadows, and is often less intense than the key light. In fact, this can be a good place to use a bounce card with either the light from the key light or a smaller light shining directly at it serving as the actual light emitter. It can either be set at a 45 degree angle to your position on the opposite side of the key light or directly to the side, depending on what you feel is necessary to fill in the shadows created by the key light. The final light, known as the back light, hair light, or "kicker", serves to illuminate you from behind and to differentiate you from your background. It is usually either immediately behind you or more often set opposite to the fill light. It is usually lower in intensity than either they key or fill light, and can be diffused in order to spread the light out.
Two Point Lighting


A two point lighting setup is similar to the three point setup but will generally have lights configured in one of three ways. The first is with the key light and fill light set at 45-degree angles to the subject, as with the three point lighting setup. You'll lose the differentiation created by the back light, but if you're already fairly differentiated from the background or if the background is a light enough color to reflect some of the light this may not be an issue. The second places the key light immediately behind and above the camera. This is usually done during a standard interview where you're not facing the camera directly, so you may want to be careful with this in a standard academic interview where the camera is also the means by which the interviewers see you. The final way has a reflector, rather than a fill light, in the lap of the subject immediately off frame. What this does is eliminate any shadows in the face, and for this reason it's fairly popular with beauty bloggers and those that might be using a ringlight as their key. If you want to take this approach, you'll want to place the key light either immediately behind the camera or use a ringlight if possible.
Single Point lighting
A single-point lighting setup relies much more heavily on angle than the other two, because you don't have any way to mitigate shadows should your setup produce any. The best way to avoid this is to diffuse the light either through the use of a softbox or other diffusion material between the light and the subject or by bouncing the light off a bounce card rather than shining it directly onto you as the subject. That way the light will wrap around you and hopefully avoid the sorts of harsh shadows you see with a direct key light in the other two examples. I'm not sure it makes a lot of sense in this particular instance to provide an example, as I have with the two and three-point setups, but if you are confused examples of multiple single-light setups are available in the links in the bibliography.
Accent Lighting and "Practicals"
So far, we've talked about the direct lighting from either one, two, or three sources. You may find that the sources you are using still have too many shadows or don't show you off to best effect even when you've found what you believe is the optimum position. The solution to this is smaller, "kicker" light sources that direct the light into those areas that are generating too many shadows.
Another possibility to consider with lighting is to use it directly on camera in order to not only light a scene, but also to serve as a kind of accent. You might do this with lights turned down low enough that they're not going to really affect how you're lit as the subject, or by placing colored lights in strategic locations to provide an accent to the background, particular objects, or perhaps even your hair via a colored fill light. This is a situation that has to be handled carefully, as it can distract an interview committee or audience just as much as it might help to provide interest to the background or scene. What I would suggest if you do decide to do this is to be sparing and to make the lights draw the eye towards you as the speaker rather than to objects in the background or other parts of the room.
Skintone
It's a known truth that there's a difference between dark and light skin when it comes to photography and video. It's a problem that feeds into everything from misidentification by AI systems to sensors in bathrooms not turning on faucets for Black patrons. While there are still systemic issues in how technology deals with different skin tones the technical hurdle is a direct result of most photographic systems being designed for white skin. Essentially a racist society encoded that racism into the design of the tools it created, and now those tools are unintentionally reinforcing that racism because it's simply less expensive to produce equipment that works flawlessly on white skin than it is to produce equipment that operates on darker skintones.
If you have darker skin and you're looking to light yourself for an interview or class recording this creates a set of hurdles that I really have no personal experience with. And since I use myself as the baseline, as most people do, when thinking through these sorts of things my advice is going to skew towards what makes me look decent. This may or may not work for you, and I recognize that. I don't want to give you a bunch of suggestions that assume I understand the problem fully, either, because I don't. As a white man, for me it's an abstract problem to wrestle with, not a lived, day to day thing. And you don't need my abstracted, tone-deaf advice. You need tips and tricks that will work for you.
What I've done, and will continue to do, is collect videos and articles from people of color or professional lighting technicians explaining what they think about when considering the space for lighting their own skin or that of darker-skinned models and actors. I'll put them in their own section under the lighting section of the bibliography at the bottom of this post for ease of reference, as well. As a starting place, I would suggest looking at the Mic piece on the lighting of the HBO comedy Insecure, as that show is receiving a lot of praise from the other sources I've found. It's included in the bibliography along with some videos about the program and other pieces about how to light darker skin. The rest of the lighting section, and the links in the bibliography about lighting, are intended to be technical aids for anyone to help deal with their particular situation. In both you should be able to find some good suggestions for cheap ways to do at least part of what Berkofsky is able to accomplish with multi-thousand dollar rigs. Aundre Larrow also has some good advice you may be able to use for staging and composition as well as lighting, although his lighting advice tends towards photography rather than video. The video linked here and an article he wrote for Adobe are included in the bibliography, as well. Finally if you have any suggestions you'd like to pass along or if you've done your own tutorial please contact me and let me know. I'd be happy to either include the advice or link to your tutorial, with all due credit given.
I should also note that it's possible to correct how your skintone looks in postprocessing, but there's still problems with darker skintones when you attempt to do so due to how it can make the rest of the scene look in comparison. I've provided some links to how to postprocess video and take skintone into account, but the less postprocessing work you have to do the more likely it is that all of the colors, both of your skin and the environment, will look good in something you've recorded.
Composition
The Rule of Three
The rule of three also applies to composing the frame for your image, but in a slightly different way than it does in terms of decorating and staging.
If you look at most interviews, the subject is slightly to one side of the screen or the other even when they're talking directly at the camera. This is because most times photographers and videographers want to avoid appearing to split the screen in half. There are a lot of reasons given for it -- balancing light and dark in an image, Proper positioning of the head relative to the rest of the frame in order to focus on the eyes, and the use of the Golden Mean to divide up an image in a way that's visually pleasing.
In order to achieve this (which I do not do in several of the videos connected to this post for reasons I'll get into below) you want to think of the camera frame as divided into roughly nine equal sized boxes. If your camera has the ability to do so, you can use a grid overlay to help visualize this. Once you have your grid marked out, your ideal position is with your body along one of the vertical lines and your eyes at the juncture between the topmost horizontal line and that vertical line. This will give you the proper headroom and put you at an angle. It also has the benefit, if you're recording, of creating a space to the side which you can use for textual overlays illustrating concepts. Furthermore, you can use this method (or really any method derived from the Golden Mean) to subdivide your image frame with a picture-in-picure of the screen of your computer, a video you may be commenting on, or anything else you might want the audience to look at simultaneously.
When you're interviewing for a position, however, the fictive illusion is that you're participating in an in-person conversation with the committee, and you may want to engage them face-on because of this. It certainly is what they're expecting even if the slightly off-center, three-quarter view of your body might be a more pleasing composition aesthetically. So for an interview, what I would do is break the rule of three in terms of vertical composition, but make sure your eyes still rest on that topmost horizontal line. That way you're still providing the proper headspace while acknowledging the conceits of the online interview as a format. To make this work more naturally, however, you may as part of your staging want to create a natural frame from some shelving or other elements of the room.
Framing
Framing basically means to put background or foreground elements in the image that help to draw the eye to the subject (which should be you). One quick and easy way to do it is to make sure that the brightest portion of the background is immediately behind you. If there isn't one, you can make one with background elements you stage, accent lighting, or by shifting the position of the camera slightly. Also consider any horizontal or vertical lines created by elements of the background and try to make sure they follow the rule of three if you can. You can also put these elements in the foreground, but it's not something I would do with an interview as it will be distracting to the committee.
If you are recording for a class, you'll want to keep the rule of three and framing in mind as well. the negative space created by two bookshelves to either side of where you sit, for example, can be used to place illustrative bullet points in post processing. Likewise, any chyrons or extraneous elements used to draw attention to be placed into the scene in such a way that they naturally follow the rule of three and don't distract from the main subject. If you decide to do something like record a computer screen with your head in a smaller window, it may be a good idea to place that window so that it covers the lower right portion of the screen and to conduct any work in the upper portion. Remember in that sort of situation you are no longer really the focal point—the information you're conveying on screen is.
Cameras
Obviously, the first thing you need if you're going to capture yourself on video for streaming or to record lectures is a camera, which can be a problem. Decent cameras are expensive, especially if you're dealing with a graduate stipend or adjunct instructor's salary. The "default" webcam used by most people, the Logitech C920, can run close to if not over $100. A decent point and shoot camera like the Sony RX100 series can be close to $500, and a true DSLR or mirrorless camera can run anywhere from $600 to multiple thousands of dollars for just the body of the camera without any additional lenses. And while in the audio section I can (and in most cases do) showcase a sampling of microphones of different types and at different price points I simply don't have the money to do that here, largely because I've been either a postdoctoral researcher or adjunct instructor so far. Rather than being a hardware review or comparison, then, this section is going rely mostly on treating the actual camera hardware as categories, using what I do have as examples to talk about concepts.
Another reason not to worry too heavily about the camera choice is that I firmly believe that you should prioritize your bandwidth, then your audio, then your image quality. The most pristine image in the world isn't going to matter if it's not getting to your students or the committee, and a good picture combined with bad audio is going to be more frustrating than good audio combined with a slightly grainy image. Don't break the bank on your camera choice. If you feel like you have to spend, then I would spend on your computer first if you're going to be doing things live. If you're recording, then I would spend first on your audio. The whole reason I'm able to work with a DSLR when I shoot videos for my classes or interview is because I purchased one for unrelated research purposes. If I were buying things solely for interviewing or classroom instruction I'd consider the C920 perfectly fine. If you have the money, however, and want to achieve results similar to YouTube and TikTok influencers (which may be worthwhile as a means to meet your students halfway), then a dedicated DSLR or mirrorless camera might be worthwhile. It's important, though, to keep in mind that while each level provides greater options in terms of getting the exact image you’re looking for those options mean more overhead in terms of preparation and computing power. Test any setup to give yourself time to troubleshoot any issues as they come up.
The last piece of general advice I want to note before moving into the various classes of camera is that many of the ways to get the best picture technically, such as dialing in your framerate, shutter speed, and aperture, can only easily be done on a dedicated camera. This itself may cause you to want to improve your hardware depending on your environment. That said, there are sometimes pieces of software that will mimic the effects for your integrated or dedicated webcam, and I'll note those when available.
In talking about these cameras I'll mention things like resolution and framerate in the first bit, on the standard laptop webcam. I'll then use that baseline as something to refer to when discussing the other options.
Standard Laptop Webcam
Resolution
The webcam that your laptop comes with is actually a pretty low-resolution device. If you look at the specifications of my laptop (a 2015 Macbook Pro), for example, it states that the camera is a "720p HD" webcam. Looking at it through a tool like the webcam test at Webcamtests.com shows that the maximum resolution of the camera is 720x1280, which equates to a little less than one megapixel. This is not a bad resolution to send over the web as it's not likely to break even a modest internet connection, but it also means that the video is going to be grainy, especially when blown up to full screen size on a large monitor.
Framerate
The framerate of a camera is the rate at which it captures video over the course of a second of shooting. Somewhere between twelve and sixteen frames are necessary to fool your eye that what you're seeing is a continuous image rather than a series of pictures replacing each other, but the more images that can be captured, the more lifelike the video will seem. This is similar to how video is displayed on a computer, as well, and you may be used to thinking of this the other way around if you tend to play first person shooters or other video games. Most laptop cameras capture video at 30fps, which is good enough to capture video in all but the most constrained of bandwidth situations. If your laptop camera can shoot in 60fps that allows you to have a more lifelike range of motion and, when combined with the right lighting can elevate the visuals accordingly.
Positioning
Besides the limitations of the built-in webcam in terms of resolution, another important consideration is positioning. Since a standard webcam on a laptop sits a the top of the screen it becomes very hard to compose the image in a way that is both flattering and allows you to continue to use the laptop as a computer. We've all seen pictures of people precariously balancing their laptop on their lap with the screen pointed out towards their face, affording the viewer a stellar look at their nostrils but not doing much to make them look good. To counteract this you might consider placing the monitor so that the screen is equal with your eye height and using an external keyboard and mouse (whether wired or wireless) to controll the screen should you need to. When I am talking with an audience via my laptop's webcam I'll often have it balanced on a stack of books in a spare conference room, with a cheap bluetooth mouse and keyboard balanced in my lap should I need to do anything with the screen.
Despite this limitation of built-in webcams, it can also be a benefit as the camera's position relatively close to you can make it look more like you're looking directly at the committee or audience. While this is important with any camera, the fact that the camera is integrated tends to encourage you to look like you're looking directly at the committee or class rather than slightly up or down as might otherwise happen. This can be further encouraged by using a post-it note or tag on top of the monitor to draw the eye—which is a tip my brother suggested to me when I was polling people for ideas for interviewing. He likes to draw a face on the post-it as further reinforcement, so that may be something to consider as well.
Dedicated Webcam
The Logitech C920 can function as a roughly 2 megapixel camera, giving a maximum resolution of 1920x1080 pixels. This is in keeping with the camera's specs, which states that it's a "Full HD," 1080p camera. It shoots at thirty frames per second, which is similar to the laptop's dedicated webcam, but at a higher resolution. If you use the software provided with the camera you can crop this 1920x1080 image to a 640x480 one, which gives the visual impression of being zoomed in and cuts off the left and right sides of the screen. Other cameras in the series, such as the C930e, tend to have similar stats in terms of resolution, but with features like a superior low-light visibility and the ability to encode the video in the camera versus on your PC.
With the rise of streaming there's a slew of "content creator" webcams that are starting to show up with associated software packages that apes some of the functionality of a mirrorless or DSLR camera. In my experience playing with one such tool, Logitech's Capture application, the benefit is largely offset by some fairly significant processing overhead. This overhead resulted in images becoming laggy or otherwise not syncing to my actual movements in front of the camera. I suspect you have to have a specific computer and camera combination to take advantage of the software to its fullest, so you'd likely be better off concentrating on composition and lighting rather than trying to eke a bit more out of your webcam hardware.
The Cell Phone as a Webcam
NewTek's NDI protocol allows you to use your cell phone as a webcam, so it is in theory possible to use your phone as a camera if the quality of the video it takes is better than that of your webcam (or if you don't have a webcam at all). I wouldn't recommend this as an option, though, because NewTek's app seems to be limited solely to iOS phones at the moment and requires you to jerryrig some kind of stand for the phone that may or may not be easy to do. Clip-on mounts exist if you do a search for "cell phone monitor mount," but they seem to be a very niche product.
If you do decide to use your phone as a webcam, make sure it is charged and that there is an NDI output available to that tool. In most setups I've seen as of the time of this post the software chain to make this work seems to be NDI to OBS, Wirecast, or some other streaming tool, which then serves as a virtual camera that Zoom may or may not recognize. It is doable, but you're adding levels of complexity and processing overhead with every tool you add into the mix. And that complexity may result in lag which your interviewers or students will notice. If you feel like you have no other options there will be links to how to set up NDI in the Bibliography, but I have to stress you need to test the setup and test it again. You're doing things here that at least one aspect of the software chain was not intended for and it may break on you.
"Real" Cameras as Webcams
There are many differences between a "real" camera like a mirrorless, digital single-lens reflex, or camcorder—or even a good point and shoot—and a webcam that might cause you to consider it a viable option for recording or streaming. I think three in particular are worth noting, however. First, a "real" camera often has a larger image sensor (or sensors!) than a webcam, which allows it to take a more detailed picture at longer range. Moreover, that sensor is often of better quality than the webcam's, which will cut down on the amount of "graininess" you see in the finished video. Second, the level of control available to you is greater with a "real" camera; rather than the limited functionality of the program that comes with your webcam or a possible third-party controller you can make adjustments directly to the camera and deal only with the output of the image sensors. This can reduce strain on your computer. Finally, while it is not true for point and shoot models a DSLR, mirrorless, or camcorder will often have the ability to switch lenses, which can give you still greater control over the final output and almost certainly will make the image you produce look better.
Despite these benefits, there are definite downsides to a "real" camera versus a webcam. A top-end "prosumer" DSLR or Mirrorless camera can cost multiple thousands of dollars for the camera body alone; the lenses then have be added to that cost. Even a point and shoot is going to cost two to three times what your webcam might cost you if it's a quality model. There can also be problems with using 'still' cameras for video even if they camera has a dedicated video mode. DSLRs, in particular, sometimes have issues with overheating when put into a video-shooting mode, which may be a problem if you're recording a long lecture only to have the camera shut off minutes from the end. Even the sleekest point and shoot camera is usually bulkier than a webcam and requires more to set up for streaming, which means you will be carrying more gear with you if you have to interview in a spot other than your home office. And finally, they may not come with a built-in microphone and even if they do the quality of that microphone is often suspect or hindered by picking up the sound of the camera's mechanisms. For all of these reasons, if you don't already own a camera that you could convert to streaming or recording, don't want to invest in a separate audio setup, or don't envision yourself doing more than interviewing a few times or recording one or two lectures I don't think this is a cost-effective option. Concentrating on your audio and lighting can provide benefits even with a webcam and may be a wiser investment.
That said, you may already have a camera for other reasons and want to see if you can use it to help with your interviewing or recording. If that's the case, then the information below should help you to get the best possible video you can. Note, however, that the information below is really intended for point and shoot or DSLR cameras rather than camcorders. I don't have a lot of experience with those, there seems to be little they can do at the "prosumer" level that cannot already be done by a mirrorless camera, and the trule professional grade "cine" cameras are incredibly cost prohibitive both in terms of the camera body and in terms of the lenses. If you are lucky enough to have a quality camcorder you may find the "Connecting" section useful to connect it to your computer, but the other information probably just repeats things you already know.
Connecting
One of the first differences you may notice with using a "real" camera over a dedicated or built-in webcam is that there is no immediate way to connect it to the computer. Generally, your camera has the ability to download pictures or charge via USB, and it's this connection that you'll use to connect to to your PC. Because of that, you may want to invest in a long USB cable, perhaps two to three meters or six to nine feet in length. Practically, you probably won't need this much length if you position your computer next to the camera, but it never hurts to have a bit of play when it comes to cabling.
If you're lucky, when the physical connection is dealt with the camera will automatically be recognized as a webcam and you'll be set. Usually, though, this is not the case and you need a piece of software from the camera manufacturer or a third party in order to make it recognizable. Canon, Fujifilm, Nikon, Panasonic, and Sony have all come out with programs or instructions to help you use your DSLR, mirrorless, or point-and-shoot camera to serve as a webcam. Provided, of course, you have the type of camera the program was intended for.
If you don't, or if you want to use a second screen as a "webcam" for the purposes of recording, then you might want to consider a video capture card. There are many out there are differing price points, but for the most part they all have an HDMI input from the camera's HDMI output (this is the connection a camera will use to connect to a TV or video monitor) and a USB output to your computer. You simply plug the camera in to the device, plug a USB cable from your computer into the other end, and you see whatever the camera natively outputs to a monitoring devide via HDMI. Because it is the camera's monitor output, however, you may run into an issue with the overlay with camera information appears in your shot as well. You can see examples of this in the slideshow under "settings" below, but if you are planning to go this route make sure your camera has what's called "Clean HDMI" output in order to avoid any nasty surprises.
Settings
The first thing I should acknowledge here is that the videos attached to this post don't always follow these suggestions. In part, that's because I'm taking video with webcams and in part it's because I'm often lazy and just put my camera on auto, feeling that it's "good enough" for my purposes because it's simpler. If you try out your camera on auto and things look ok to you, then you're set and likely don't need much else. If you would like to do more, however, or if your video looks off then these are the suggestions I've gathered from the sources in the bibliography. I will use the settings on my DSLR and point and shoot, which are a Canon and Sony respectively, to help illustrate this but know that your settings may differ.
You should use the camera on manual, if possible, because there are specific apature and shutter settings that mimic what our minds expect from a movie camera. If this isn't possible, or if you don't trust yourself to get a good quality image on manual, then use either aperture priority or shutter priority and allow the camera to adjust. Generally, you want to try to record with a shutter speed roughly twice that of the fps of the camera. Know, though, that you may not be able to be exact. In the case of my camera, which shoots at around 30fps, the shutter speed is 1/60. The aperture of the camera should be 2.8 (or as close to it as possible) because you want a shallow depth of field. That shallow depth of field will ensure that you as the subject of the video are the primary focal point for the audience. f2.8 is seen as a good medium ground between a really shallow depth of field and a sharp subject. If you decide you don't like the shallowness of the depth of field you can always close the aperture up to something closer to 5.6, which will make the background sharper
(One note here I should mention before continuing—that blurry background you get with a shallow depth of field is generally called bokeh, and it works really well to hide distracting elements from your background. You may not want to close up your aperture if you're trying to avoid having to stage your background. In essence you're getting what the Zoom and Skype filters are trying to do for you for free, so why waste that?)
Depending on how open or closed you have the aperture of the camera you may notice that things have gotten noticably darker. Take a moment and check the white balance of the shot by looking at the meter. If the mark is not centered, you may want to adjust the ISO setting. ISO (which comes from the same International Standards Organization as the ISO 9000 management standard) orginally meant the speed and sensitivity of a piece of filmstock. Now it stands for the setting that indicates the sensitivity to light of your camera sensor. A lower ISO is less sensitive to light, but tends to provide a sharper image with less "graininess." For this reason, you should shoot with the lowest ISO you can, but don't go so far that your brightness suffers and the overall image becomes dark.
Lens Selection
One of the nice things about a mirrorless or DSLR camera is the ability to use different lenses. In fact, a different lens can actually change how the shape of your face appears on video. Generally speaking, you'll probably want to stick with the lenses you already have with your camera and try to shoot in the 40-50mm range. Anything longer and you'll have a hard time getting yourself in focus, and anything shorter and you'll likely capture too much of the background and lose yourself as the focal point. This is also why dedicated webcams are not always the best option—some of them are designed for viewing an entire conference table and so they have an incredibly wide field of view, when really what you want is a frame that centers on you.
Tripods
Finally, you'll need a tripod or other stable surface you can place your camera on while recording. This can be as inexpensive as $10-20 dollars or multiple hundreds of dollars. I use a Manfrotto 055XB tripod, which does not appear to be available anymore. Really, though, the kind of tripod you use is going to depend on the weight of your camera. A fairly lightweight camera could easily use a fairly inexpensive tripod from a big box store like Best Buy, but heavier cameras and camcorders need more weight to serve as a base and avoid the camera vibrating when you stand on the floor. Really, though, your setup is going to be based on how the area you are recording or interview in is laid out, so it might be worthwhile to take a look at different types of tripods or camera mounts to get a sense of what will work with your particular space. Ultimately, though, a heavier base is more stable, and that space can either be built into a tripod or mount or be a shelf or table that serves as that solid base.
Live Processing
If you want the full range of control over your image you might want to consider using a tool like Open Broadcast Studio as a webcam. If you do this, you can use various color grading tools, multiple cameras, picture-in-picture options, and full chromakeying (rather than being limited to a green screen) live while you're streaming. I'll include a number of links to OBS tutorials in the bibliography for those of you that want to add this option to your streaming and recording, but know that adding OBS into your workflow can cause some significant processing overhead, especially because you need to have both OBS and the OBS-Virtualcam plugin for your particular platform running at the same time. So in essence when OBS is added there are three pieces of software between your device and the tool you're using to stream. In addition my laptop, at least, tends to slow down the image and make it noticably out of sync with my movements. If your machine is like mine and lacks the ability to add more memory (or if you've maxed the memory of the machine already) delays due to that processing overhead cannot be overcome easily. When recording, however, processing can occur after the fact (which I'll touch on below) and that allows the processing overhead to be more distributed between both hardware and software.
There are also other options out there, but they are paid products so may be beyond your budget and may not offer more robust webcam integration.
My Setup
So keeping all of this in mind, I want to take a moment to talk about the setup I use interviews and online instruction. This is not meant to give you a definitive example of what you must do to achieve quality videos, but rather as a jumping off point for your own thinking about the setup that works best for you. Everybody is in a different situation, and because of that there can be no one size fits all solution. That's one of the problems I've had with the previous examples; because their advice was intended to fit the widest possible set of circumstances they didn't really get into the particular technical aspects and arm readers with the tools needed to best apply that general advice to their specific situation. So in this section I want to go through my plans for the interview space I have to give you an idea of how you can apply these general ideas to your specifics.
So let's talk about the space I have and what I might do with it. As a reminder, this is the space that I'm planning on using for interviewing at the moment:
I'm using a Logitech c920, with its wider depth of field, to take this picture so it's showing a fairly wide-angle view of the room. However, as mentioned above I purchased a DSLR for research purposes a few years ago. My primary goal in doing so was to find a camera that worked with my existing lenses but still had a high resolution, as I had to both take pictures of objects that were hundreds of feet up on cathedral ceilings and walls and of small blemishes in manuscripts and on wall paintings and carvings. Video, at the time, was not even a concern. The camera I went with does have a very high resolution, but is limited to 1080p video at 30fps. Still, the ability to use different types of lenses tends to make it look a lot better than the similarly-spec'd for video c920 or c930e, which start with a wide field of view and then narrow down via software.
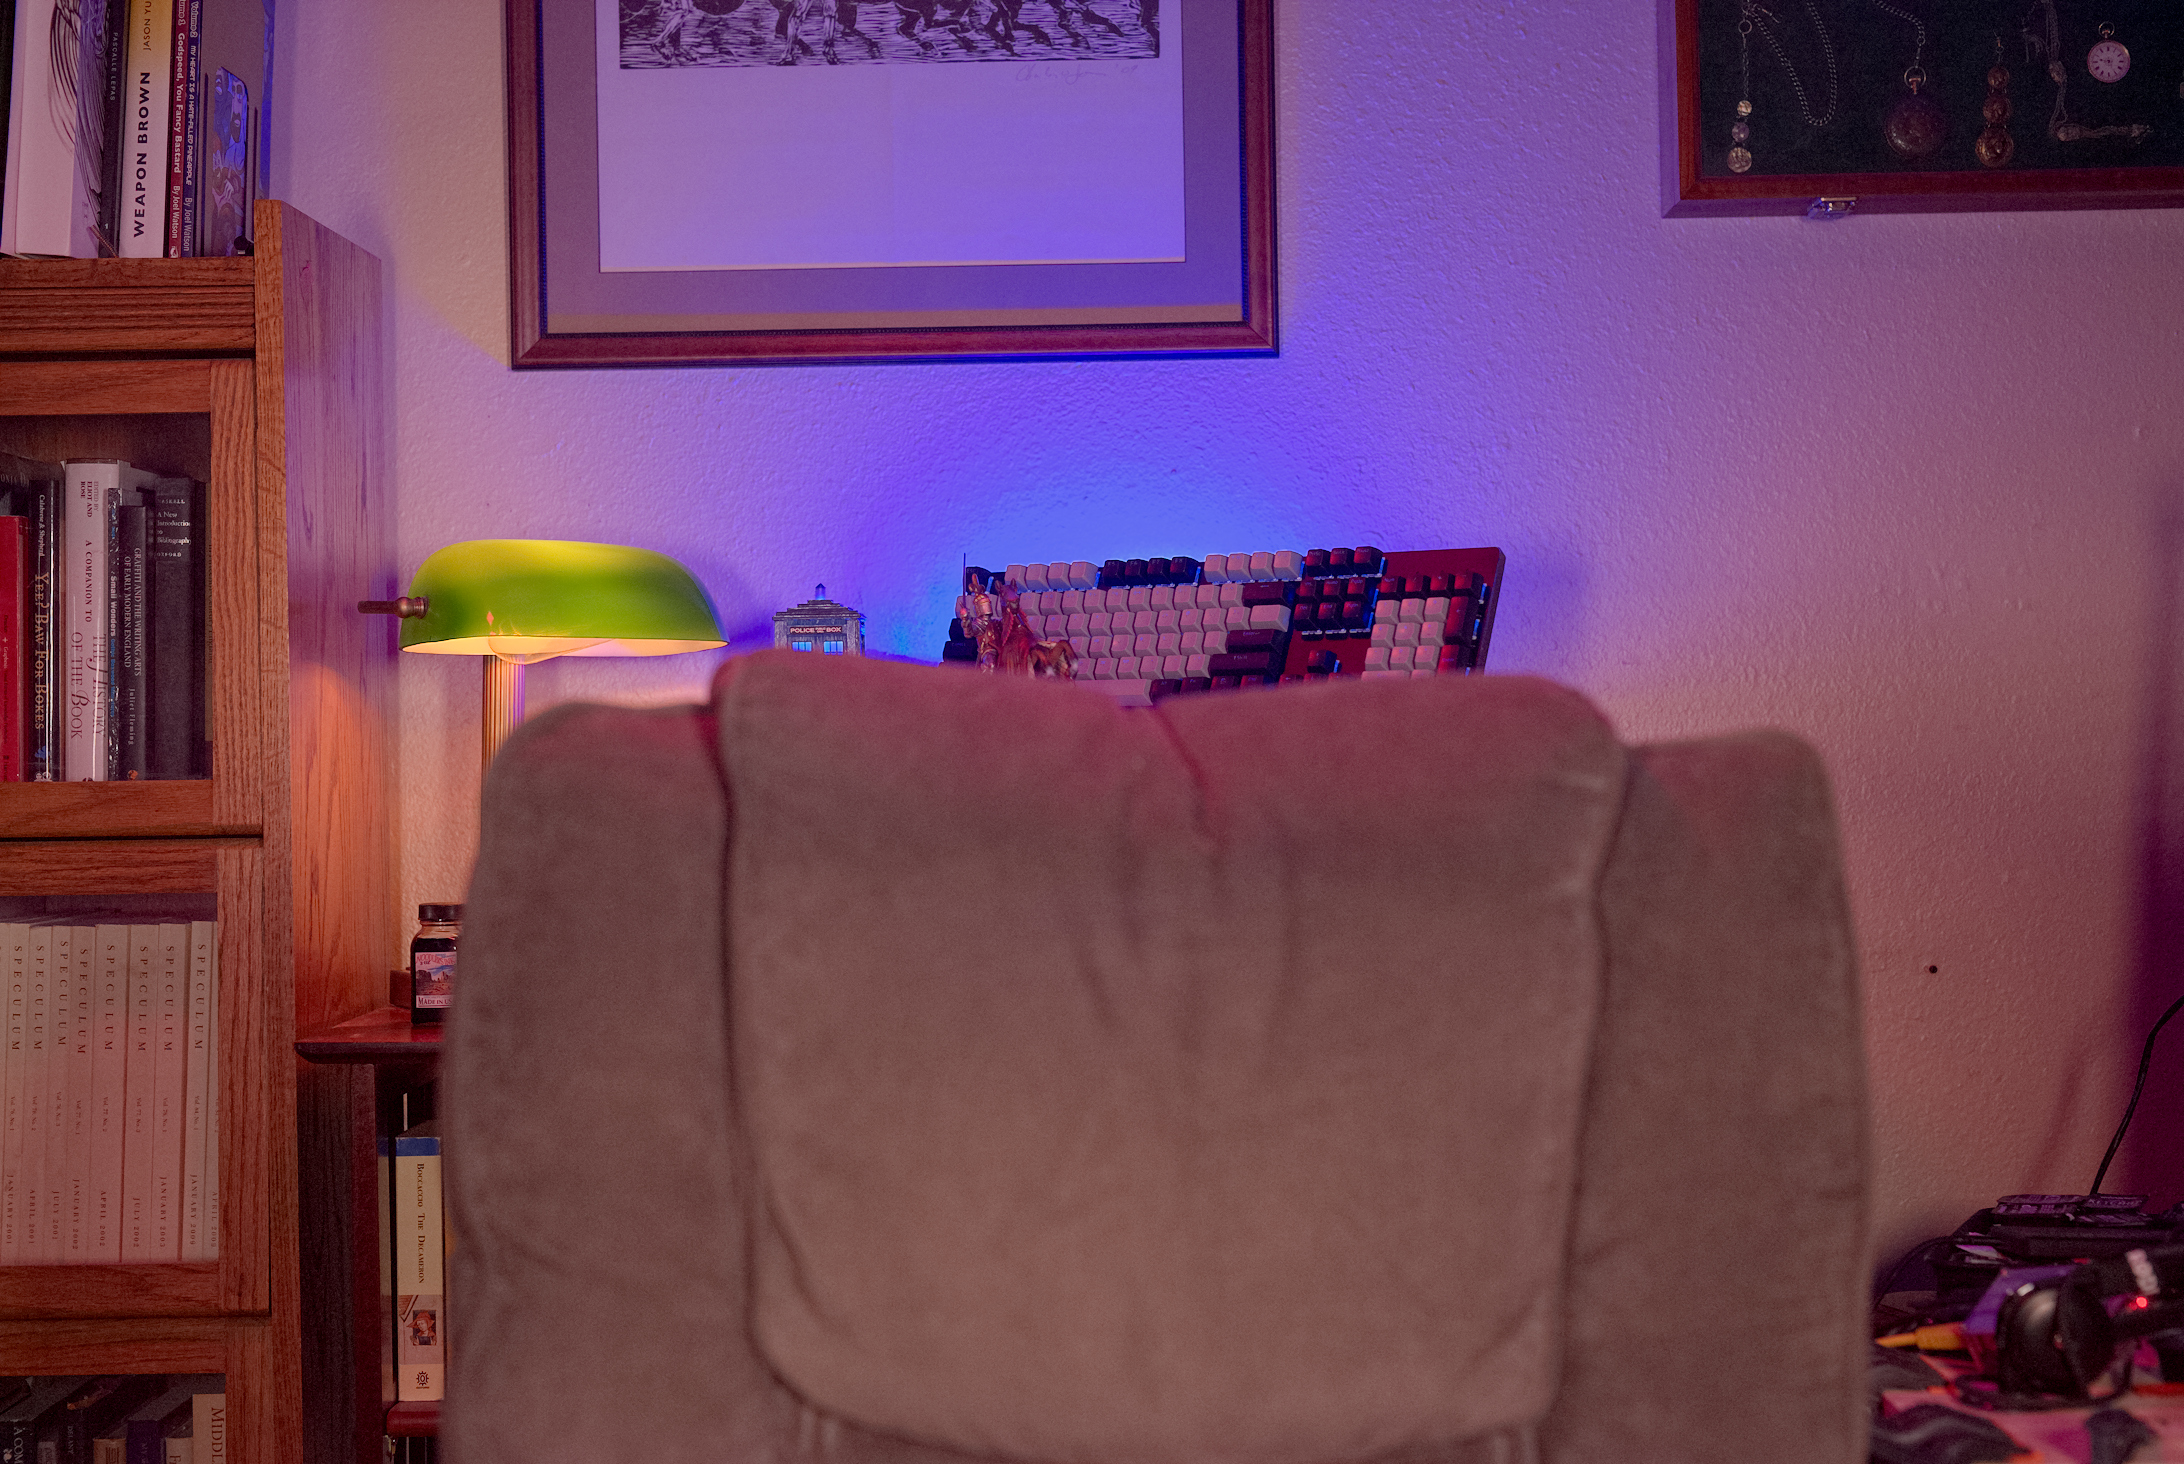
The actual viewable space with the camera and lens I've selected to use for interviews and teaching is not nearly as wide as what appears in the picture here, however. If you look at this clip from the microphone comparison video I posted in the audio section below you can see that the space really only has the leftmost portion of the tall bookcase, the smaller bookcase with things resting on top, and the mixer on the right in it. Since I can't really move the taller bookcase the real usable space I have is the top of that smaller bookcase and the desk on the right of the picture. The mixer helps to frame me slightly, and really shouldn't be moved because I run my microphone into it and then from it into my audio interface. The bokeh of the 50mm lens I use for my videos and streaming helps to de-emphasize the background, but the general shapes of things are still discernable.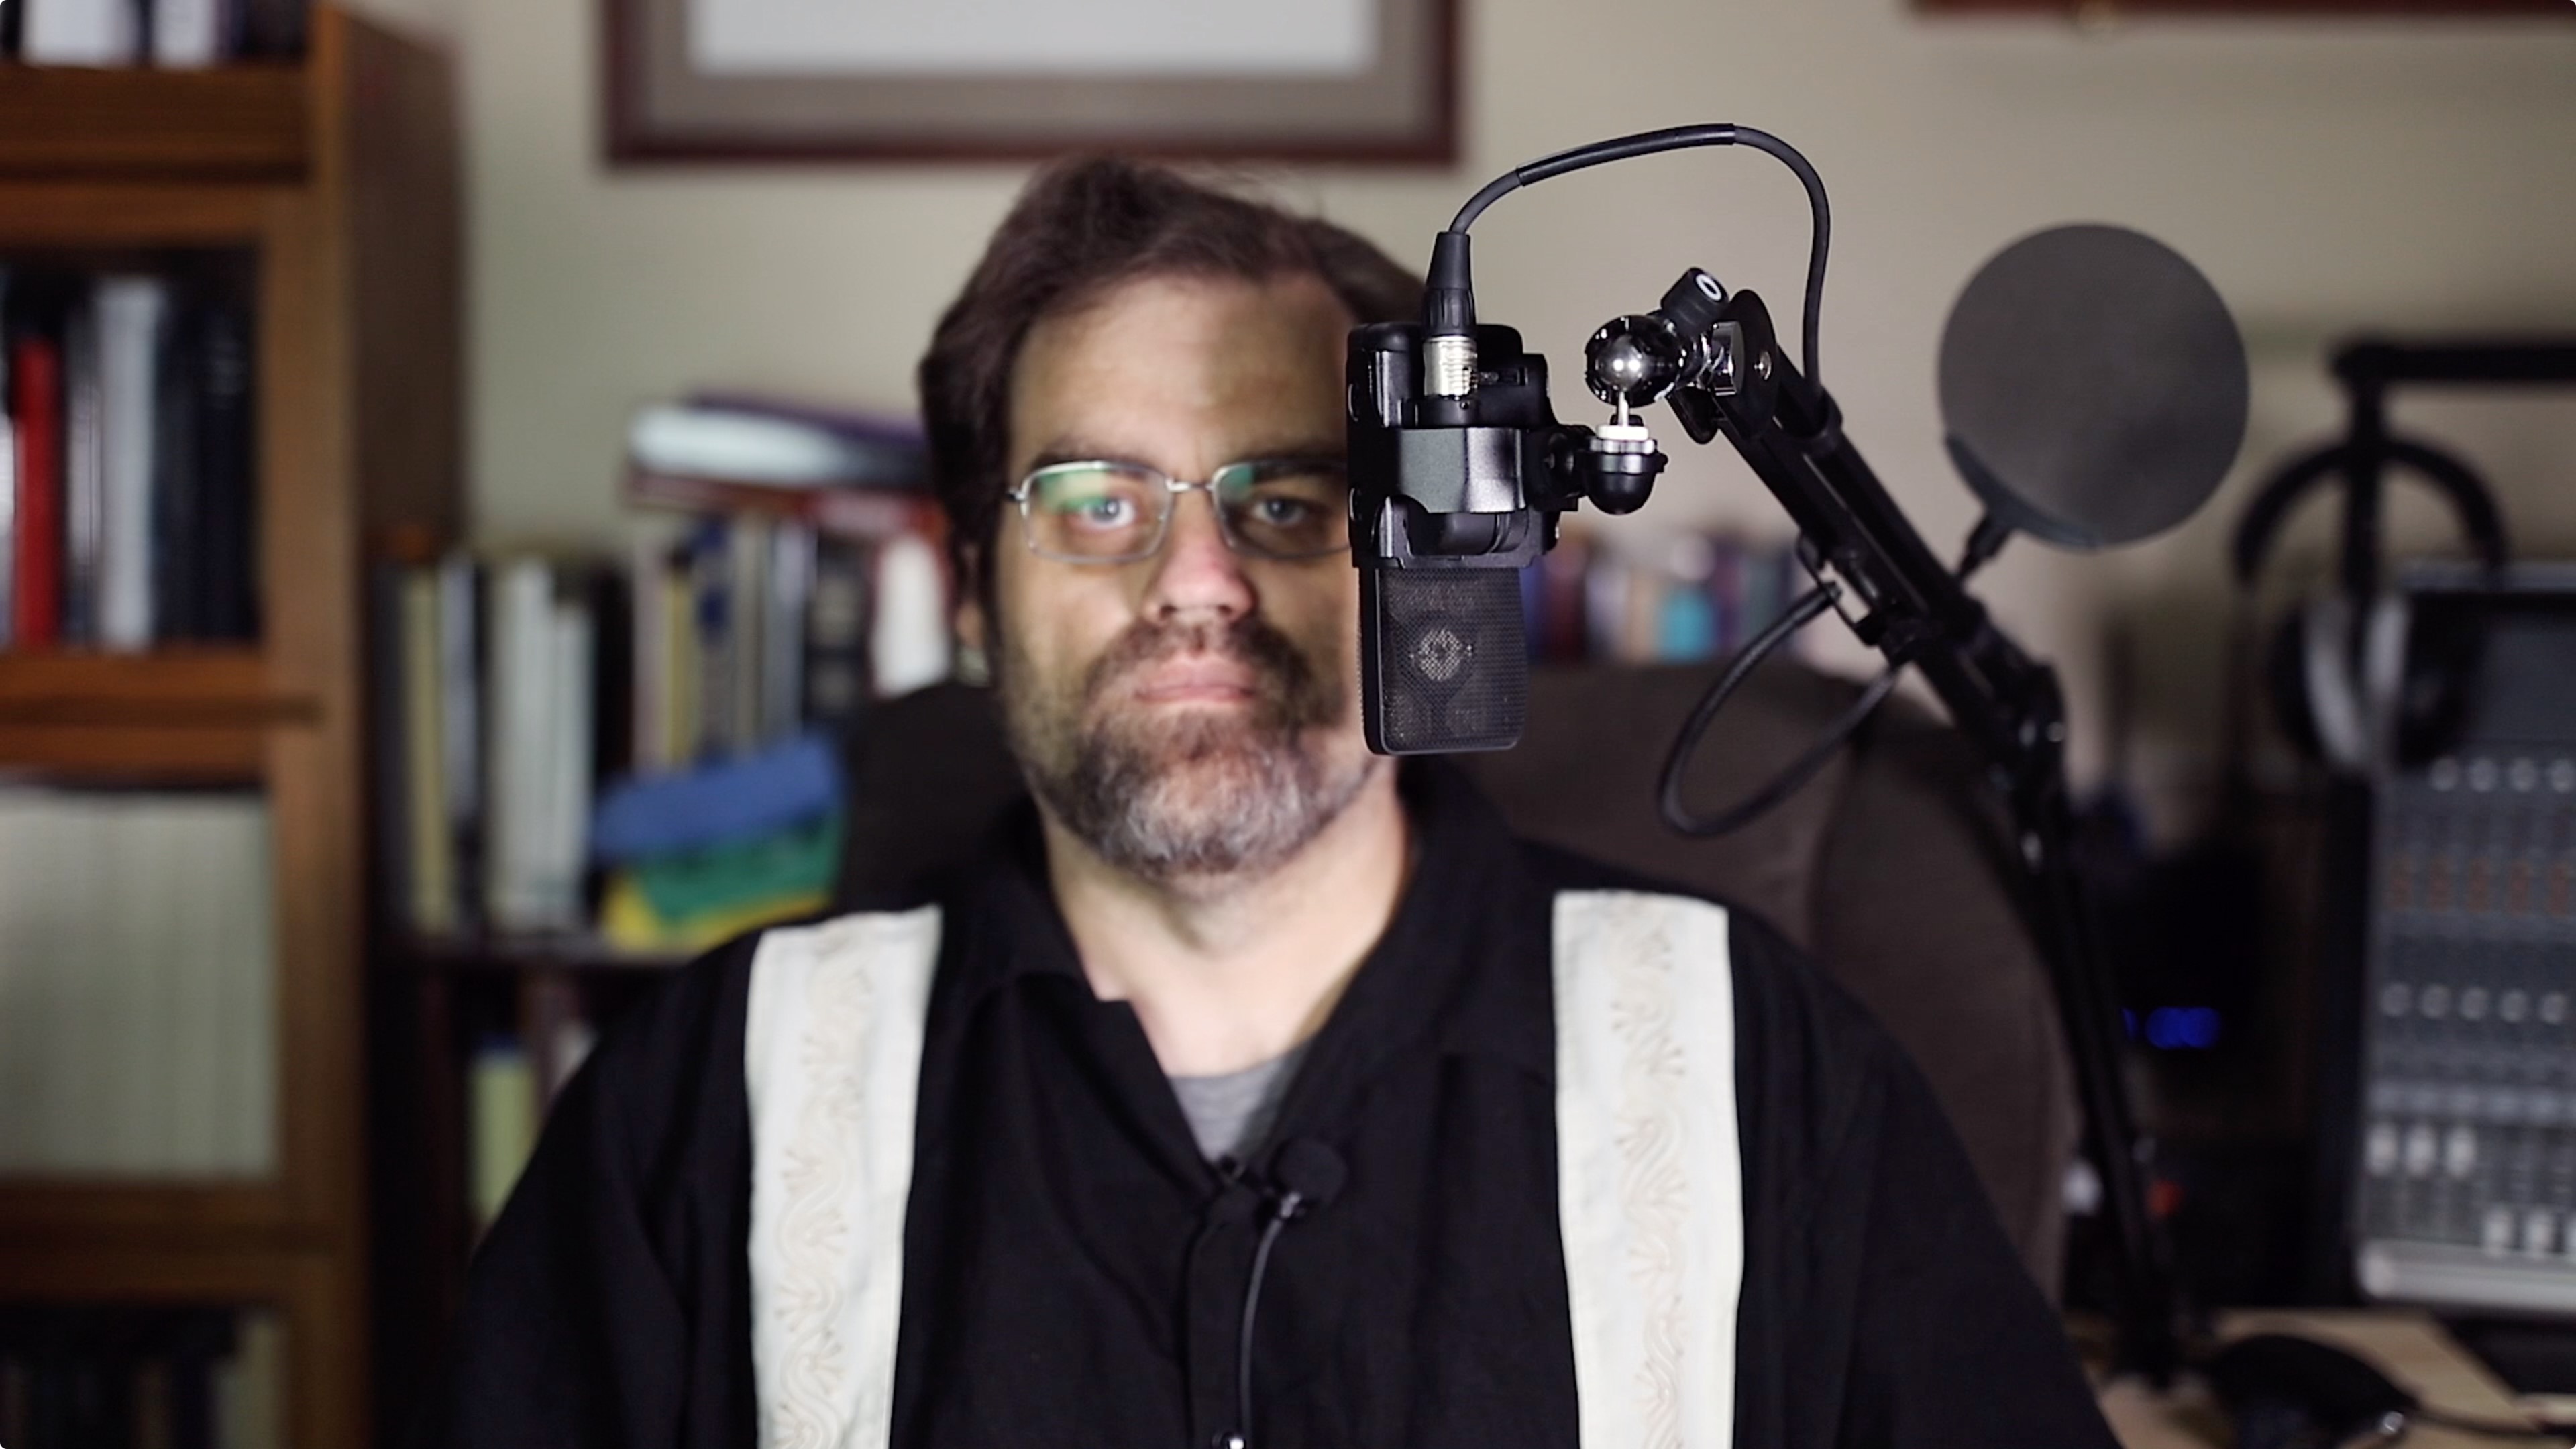
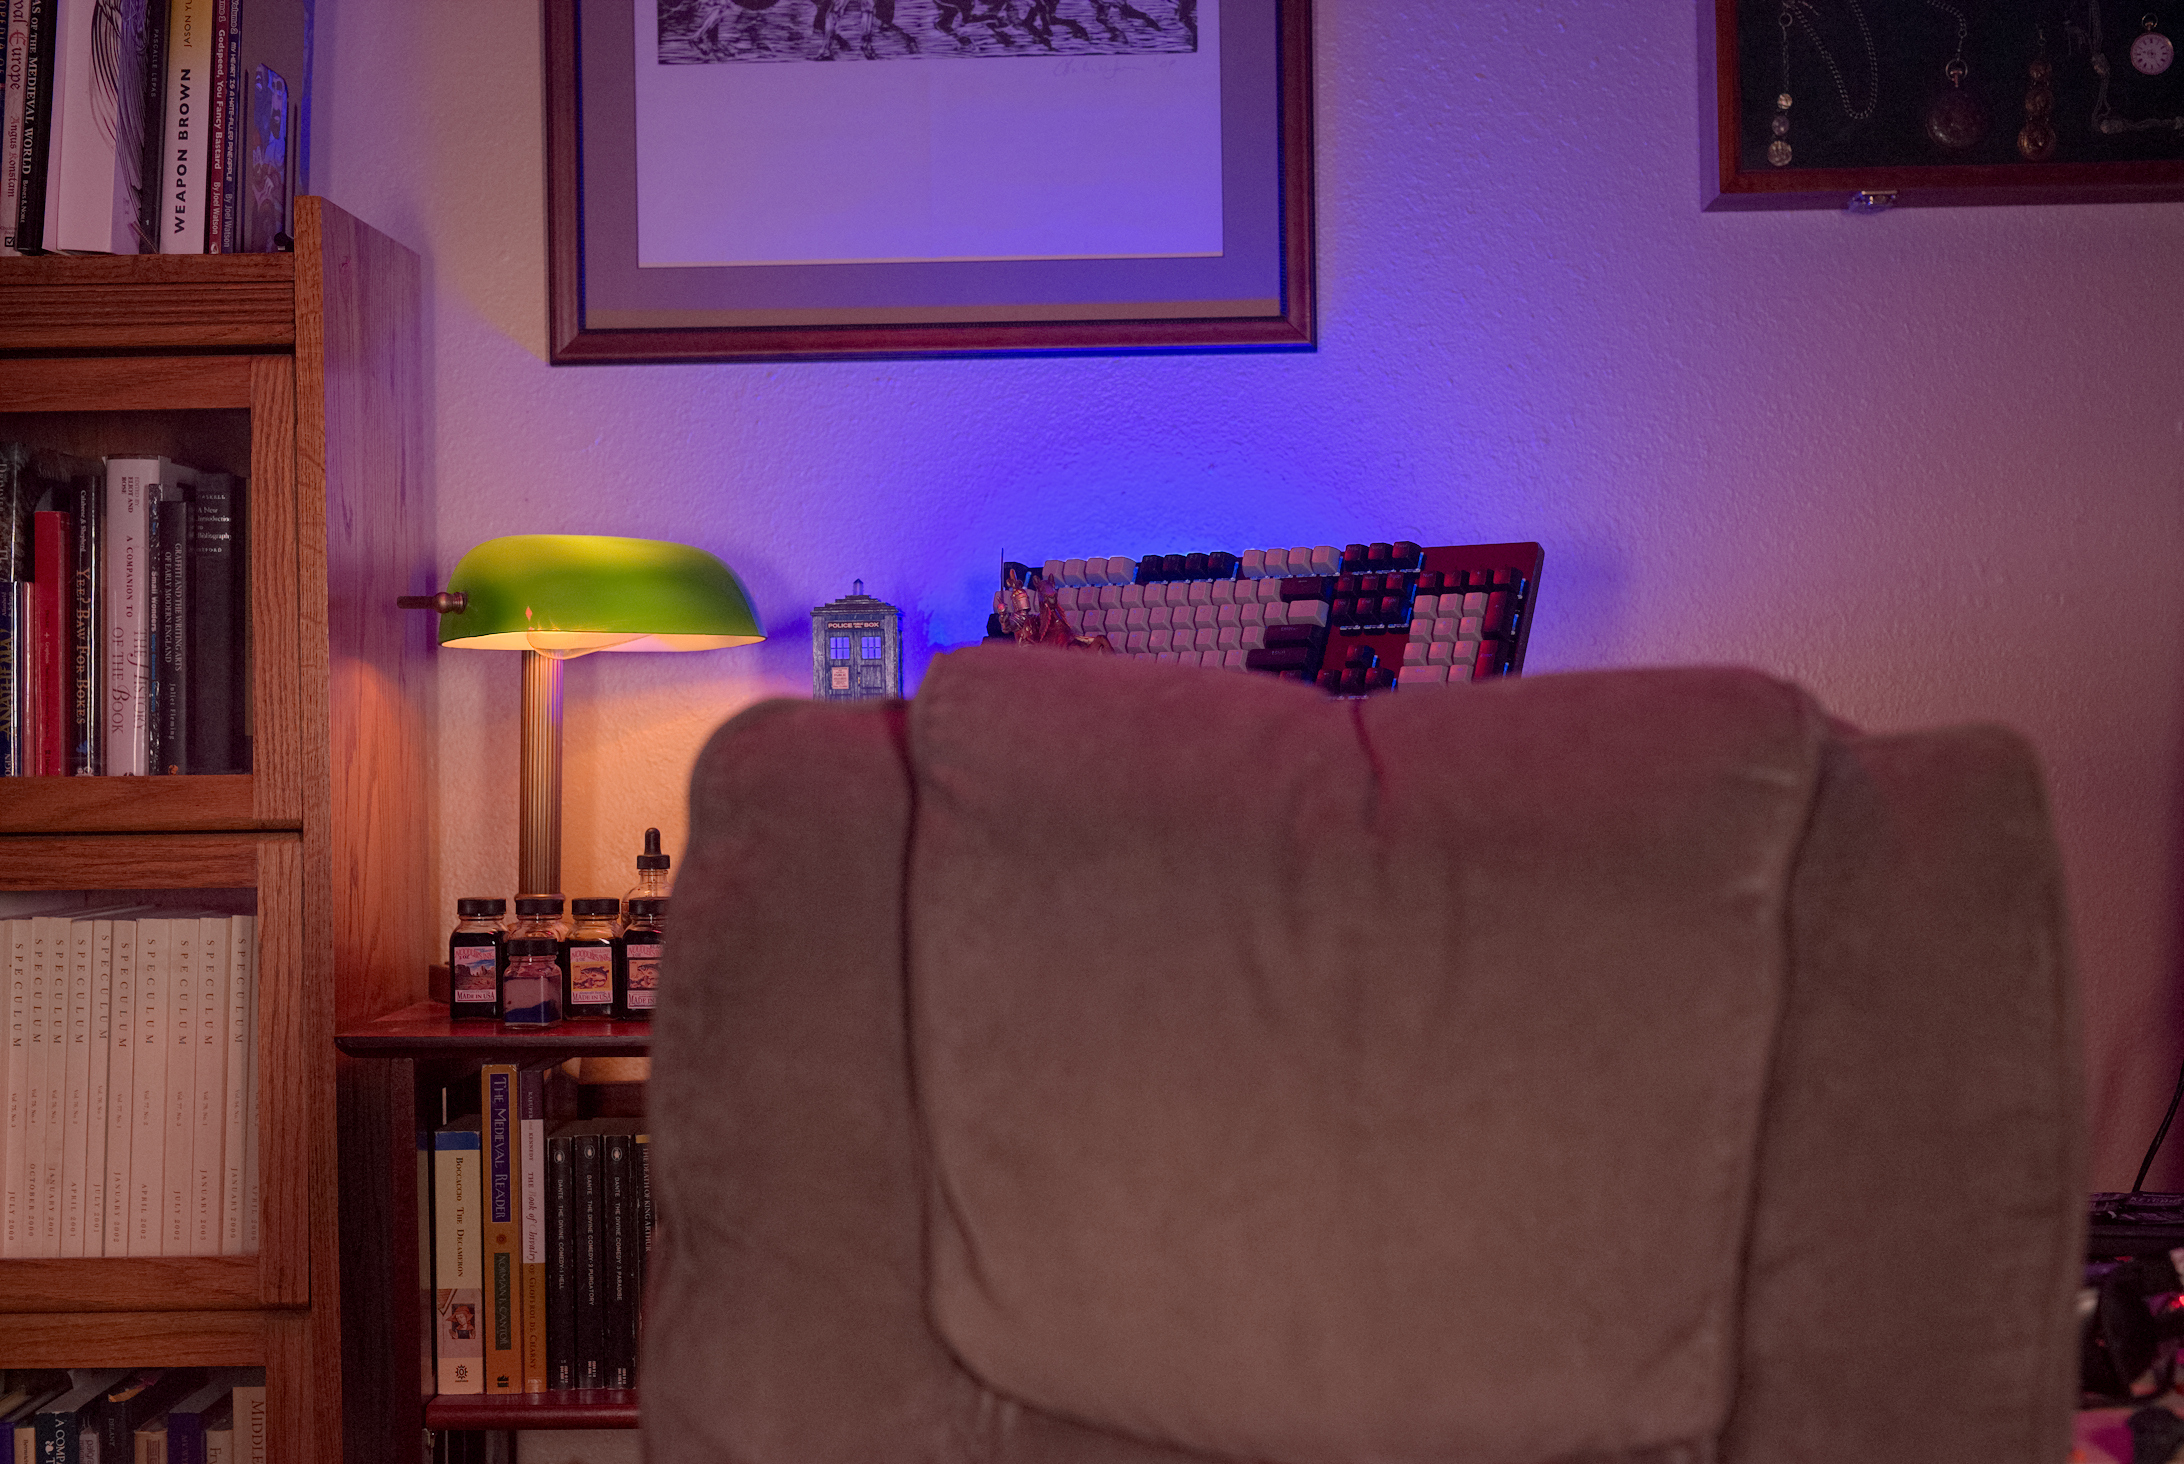
Effectively, then, the space I have available to me is the top of the bookshelf behind me, which is partially obscured by the back of my chair. This space needs to reflect some of my interests, draw the viewer back to me rather than to the bookshelves, mixer, or any potentially blinking lights of things like my router, and not be distracting in its own right. Furthermore, as mentioned above I have to dress the space for multiple types of positions.
The first thing I did, then was to create a raised platform so that any items I put on it would clear the back of the chair and be visible in the shot if I desired. During the last semester I had built a "recording" light out of under cabinet RGBWW lights that I had mounted over the door of the office; I repurposed this to create a blue "wall wash" light to rest on top of this platform in order to help draw attention from the viewer back towards me as the central figure and away from any extraneous lights on the right side of the screen. In front of this light I usually have an extra keyboard I use with my fileserver, here propped up in order to help avoid dust collection, along with a couple of knickknacks given to me as gifts. This way the space follows the rule of three. To the left of this platform I placed a reading lamp with a low amber light to serve as a kind of accent piece, and put my collection of fountain pen inks next to that light. As they are three separate heights I feel they're following good design rules, but if I had other items that worked I might put those there as well. The back of my chair serves to block the bottom of the platform, so I have my file server and the test tubes I use for mixing inks underneath that.
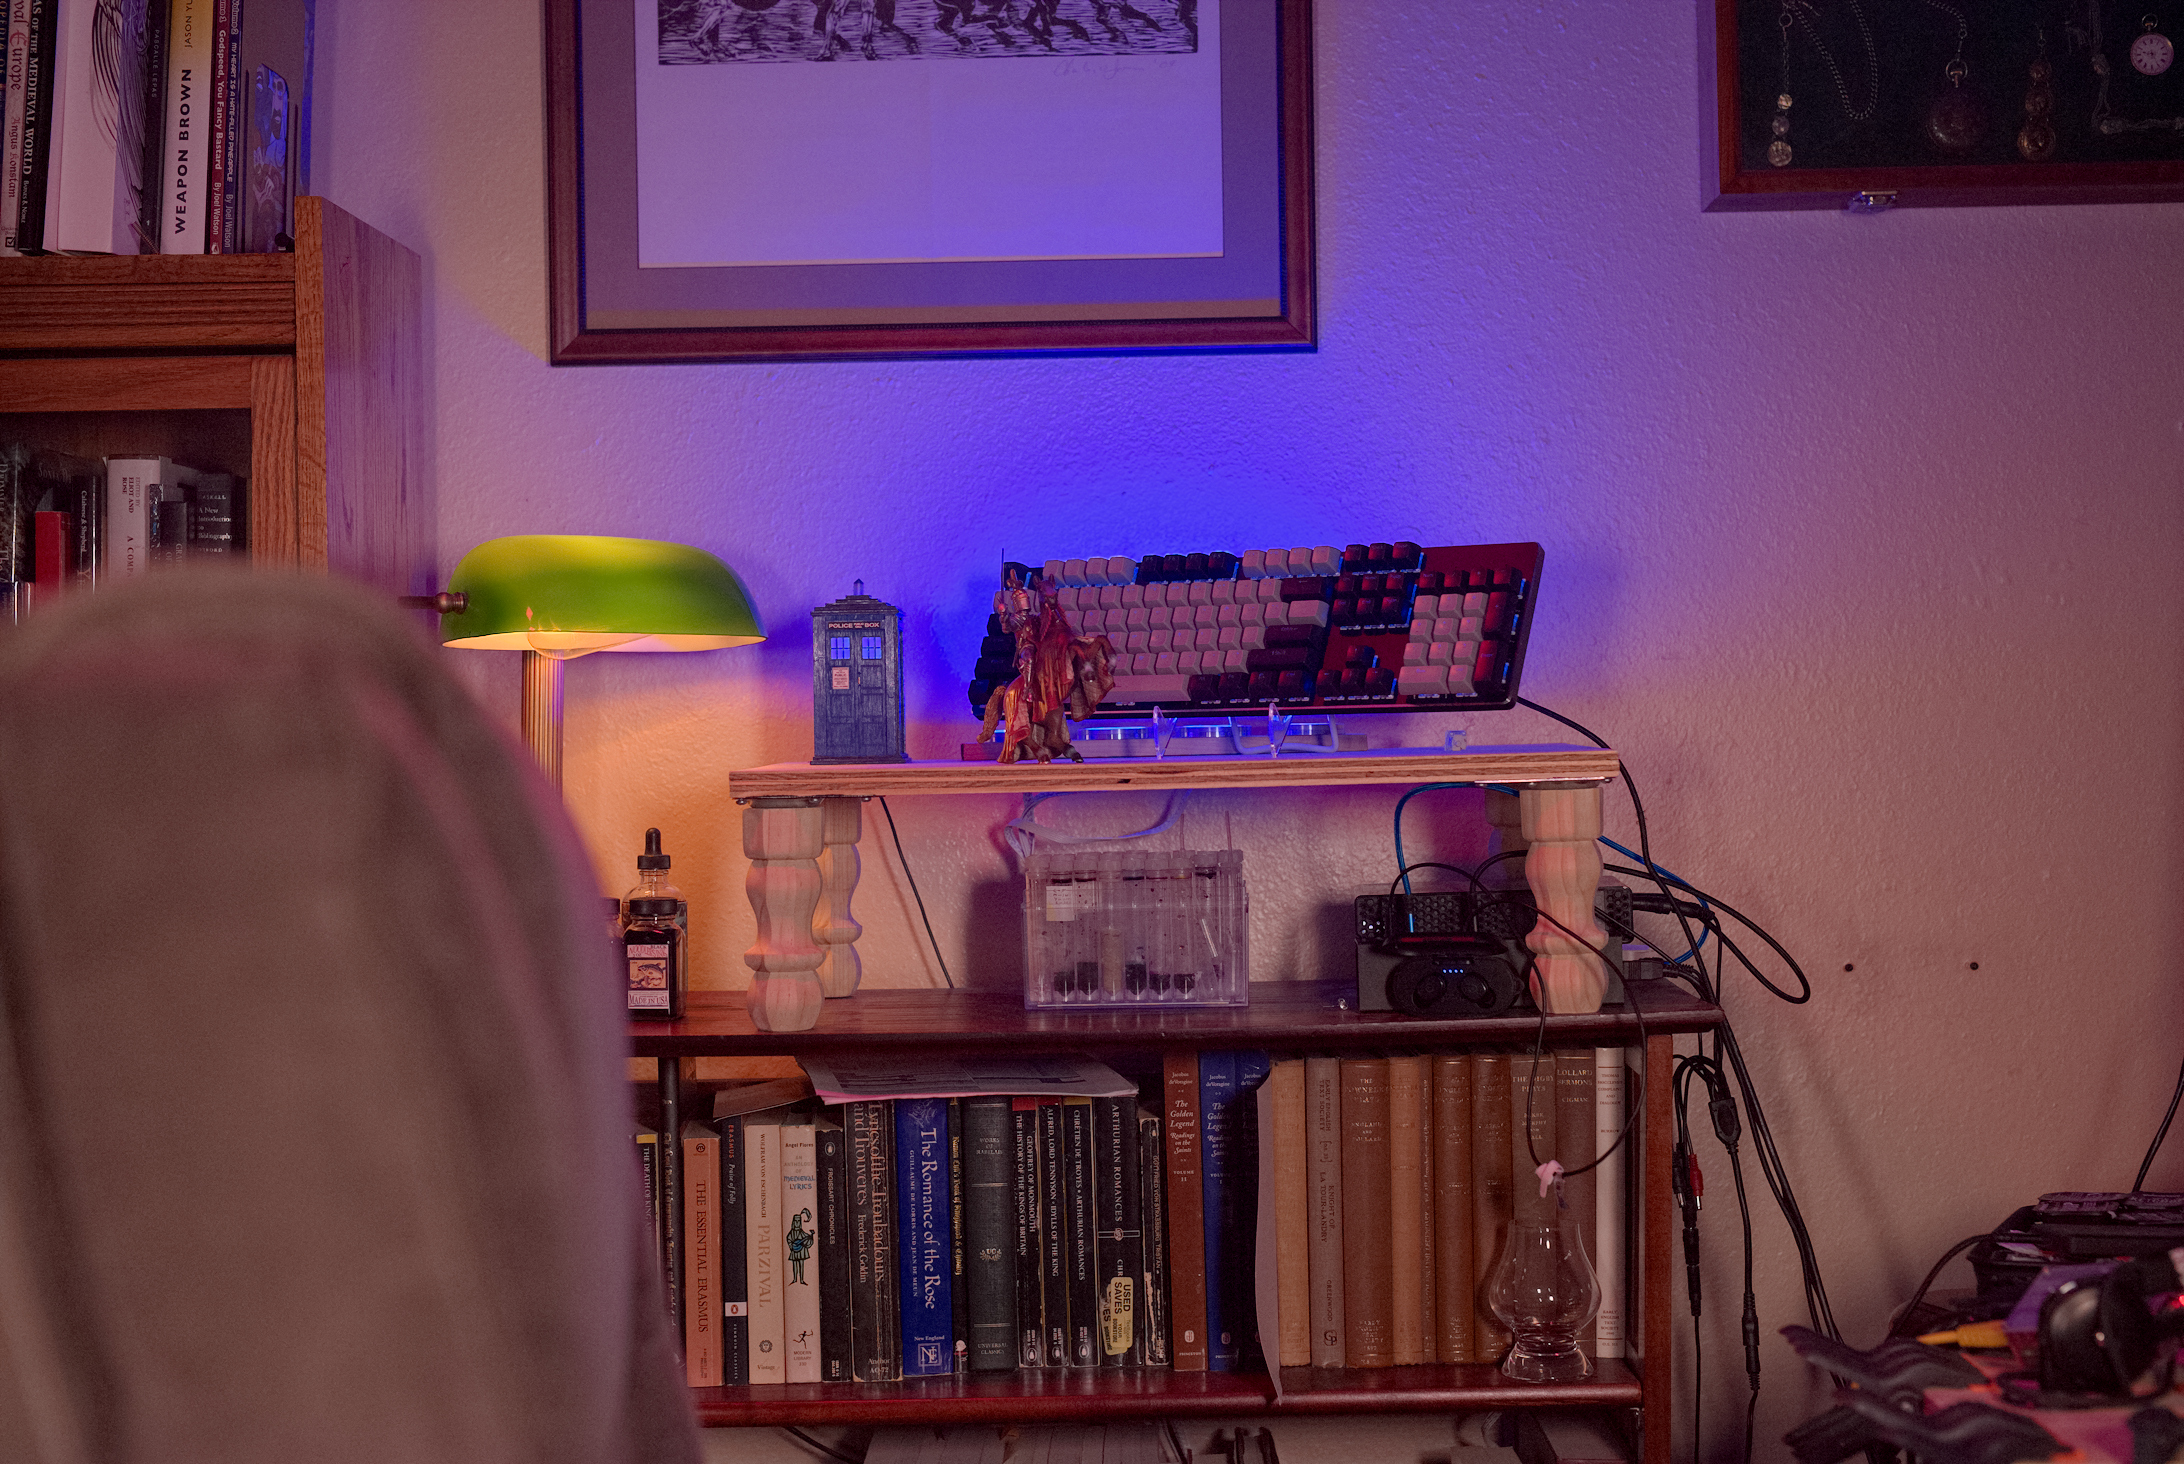
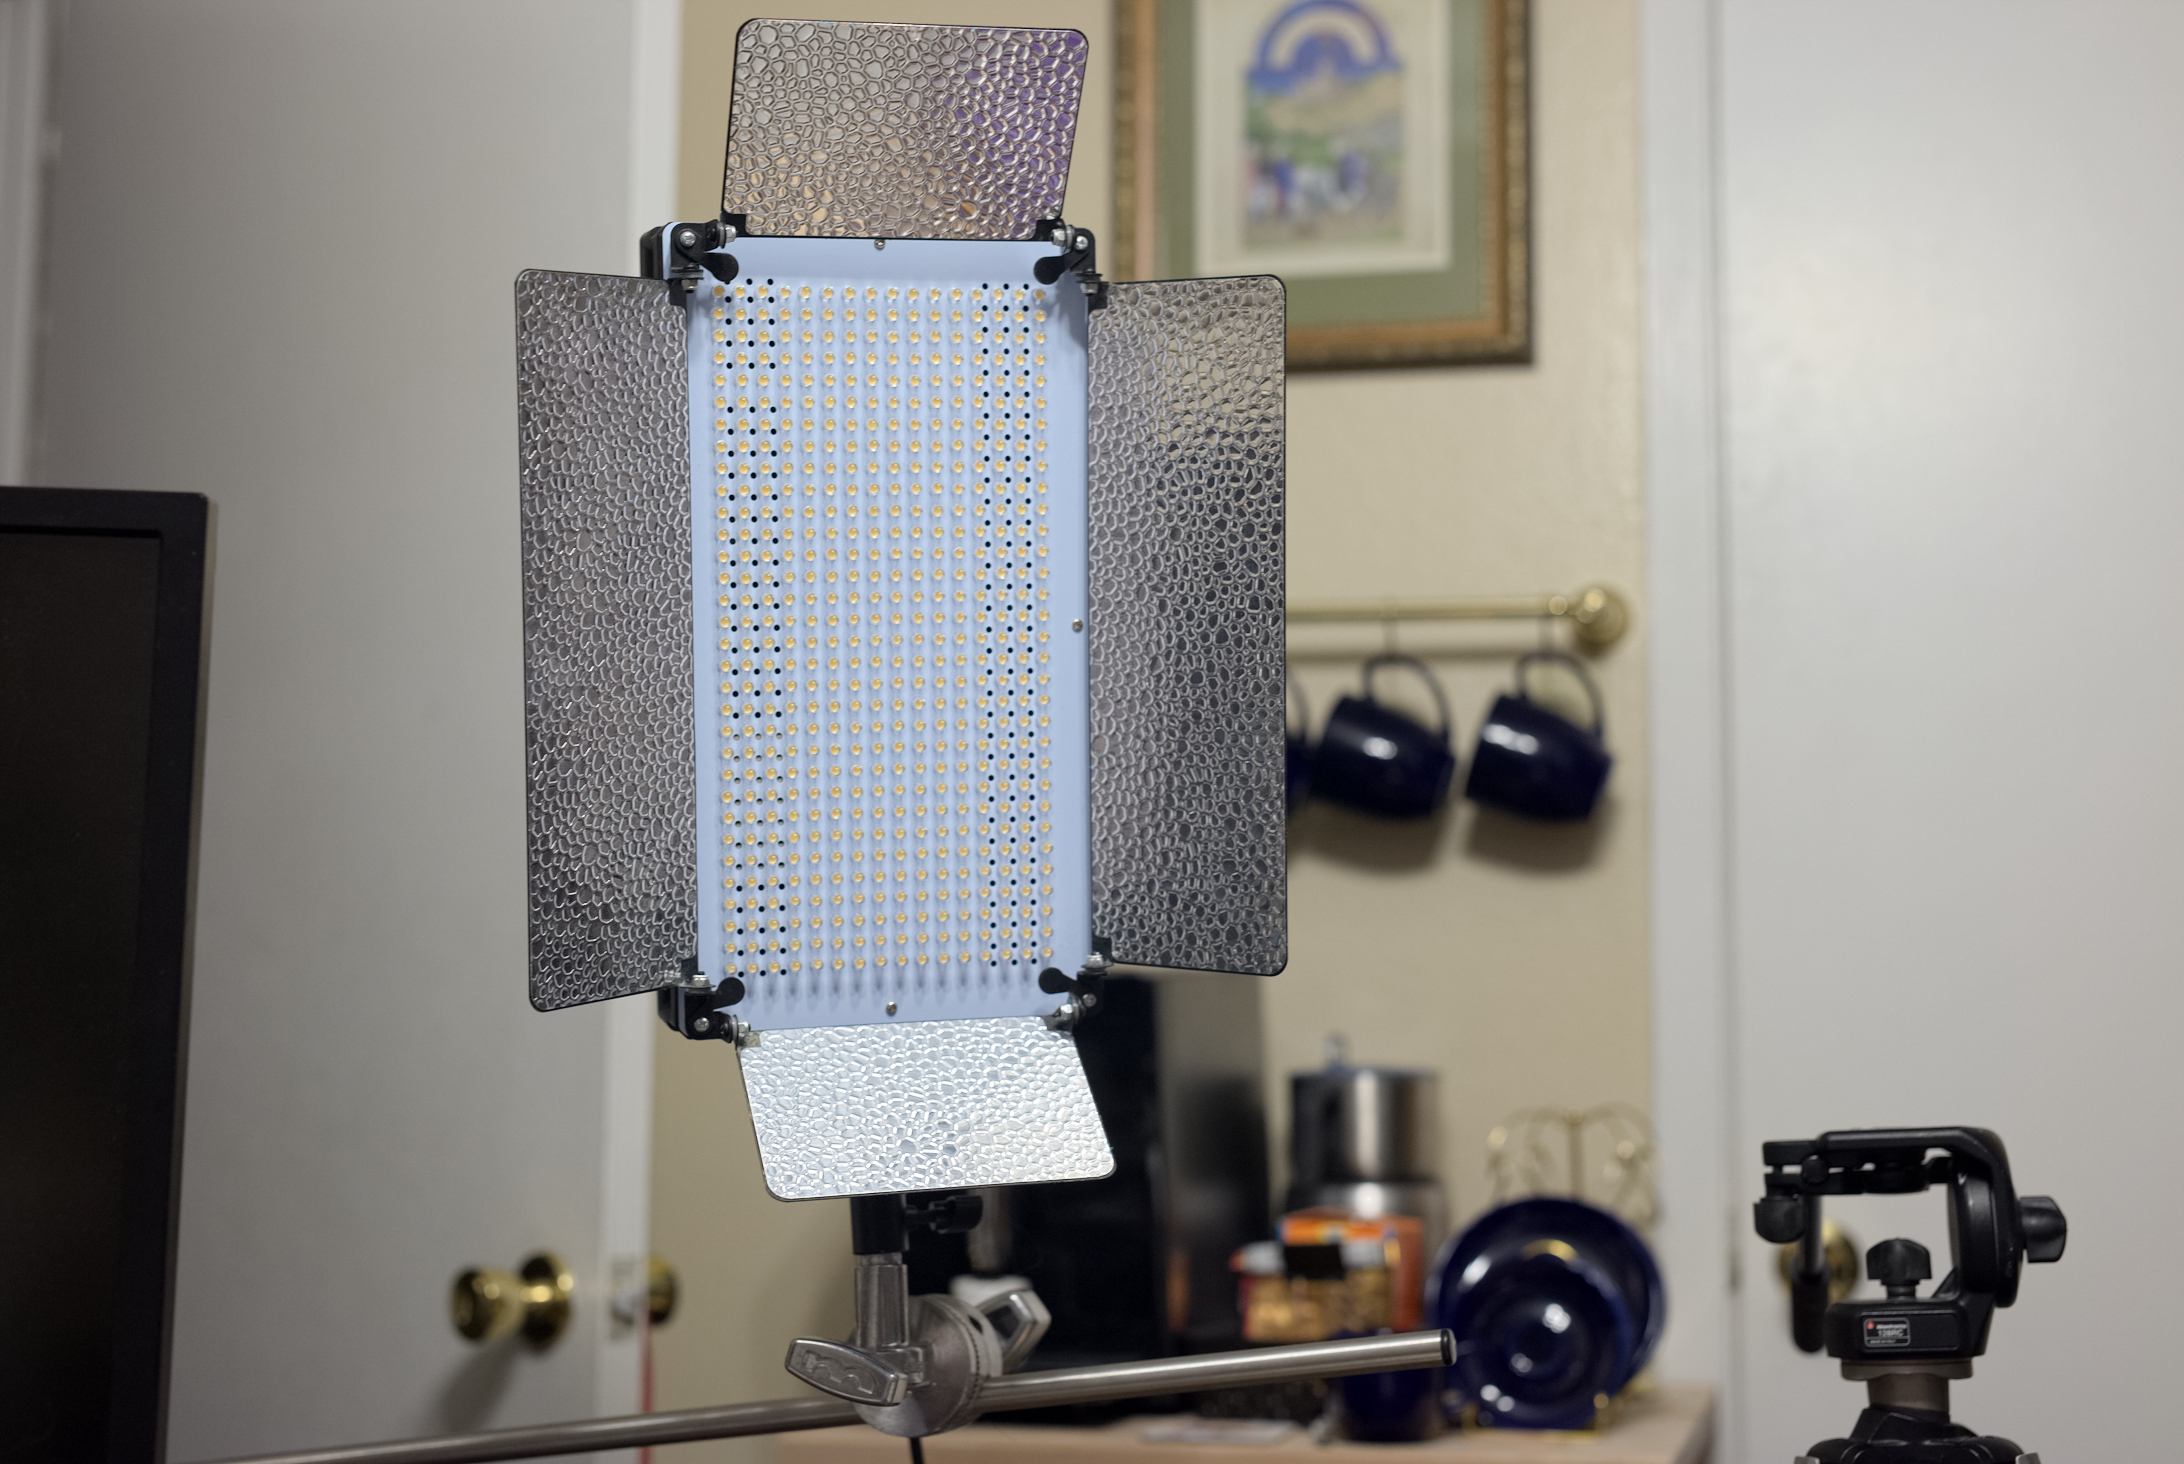
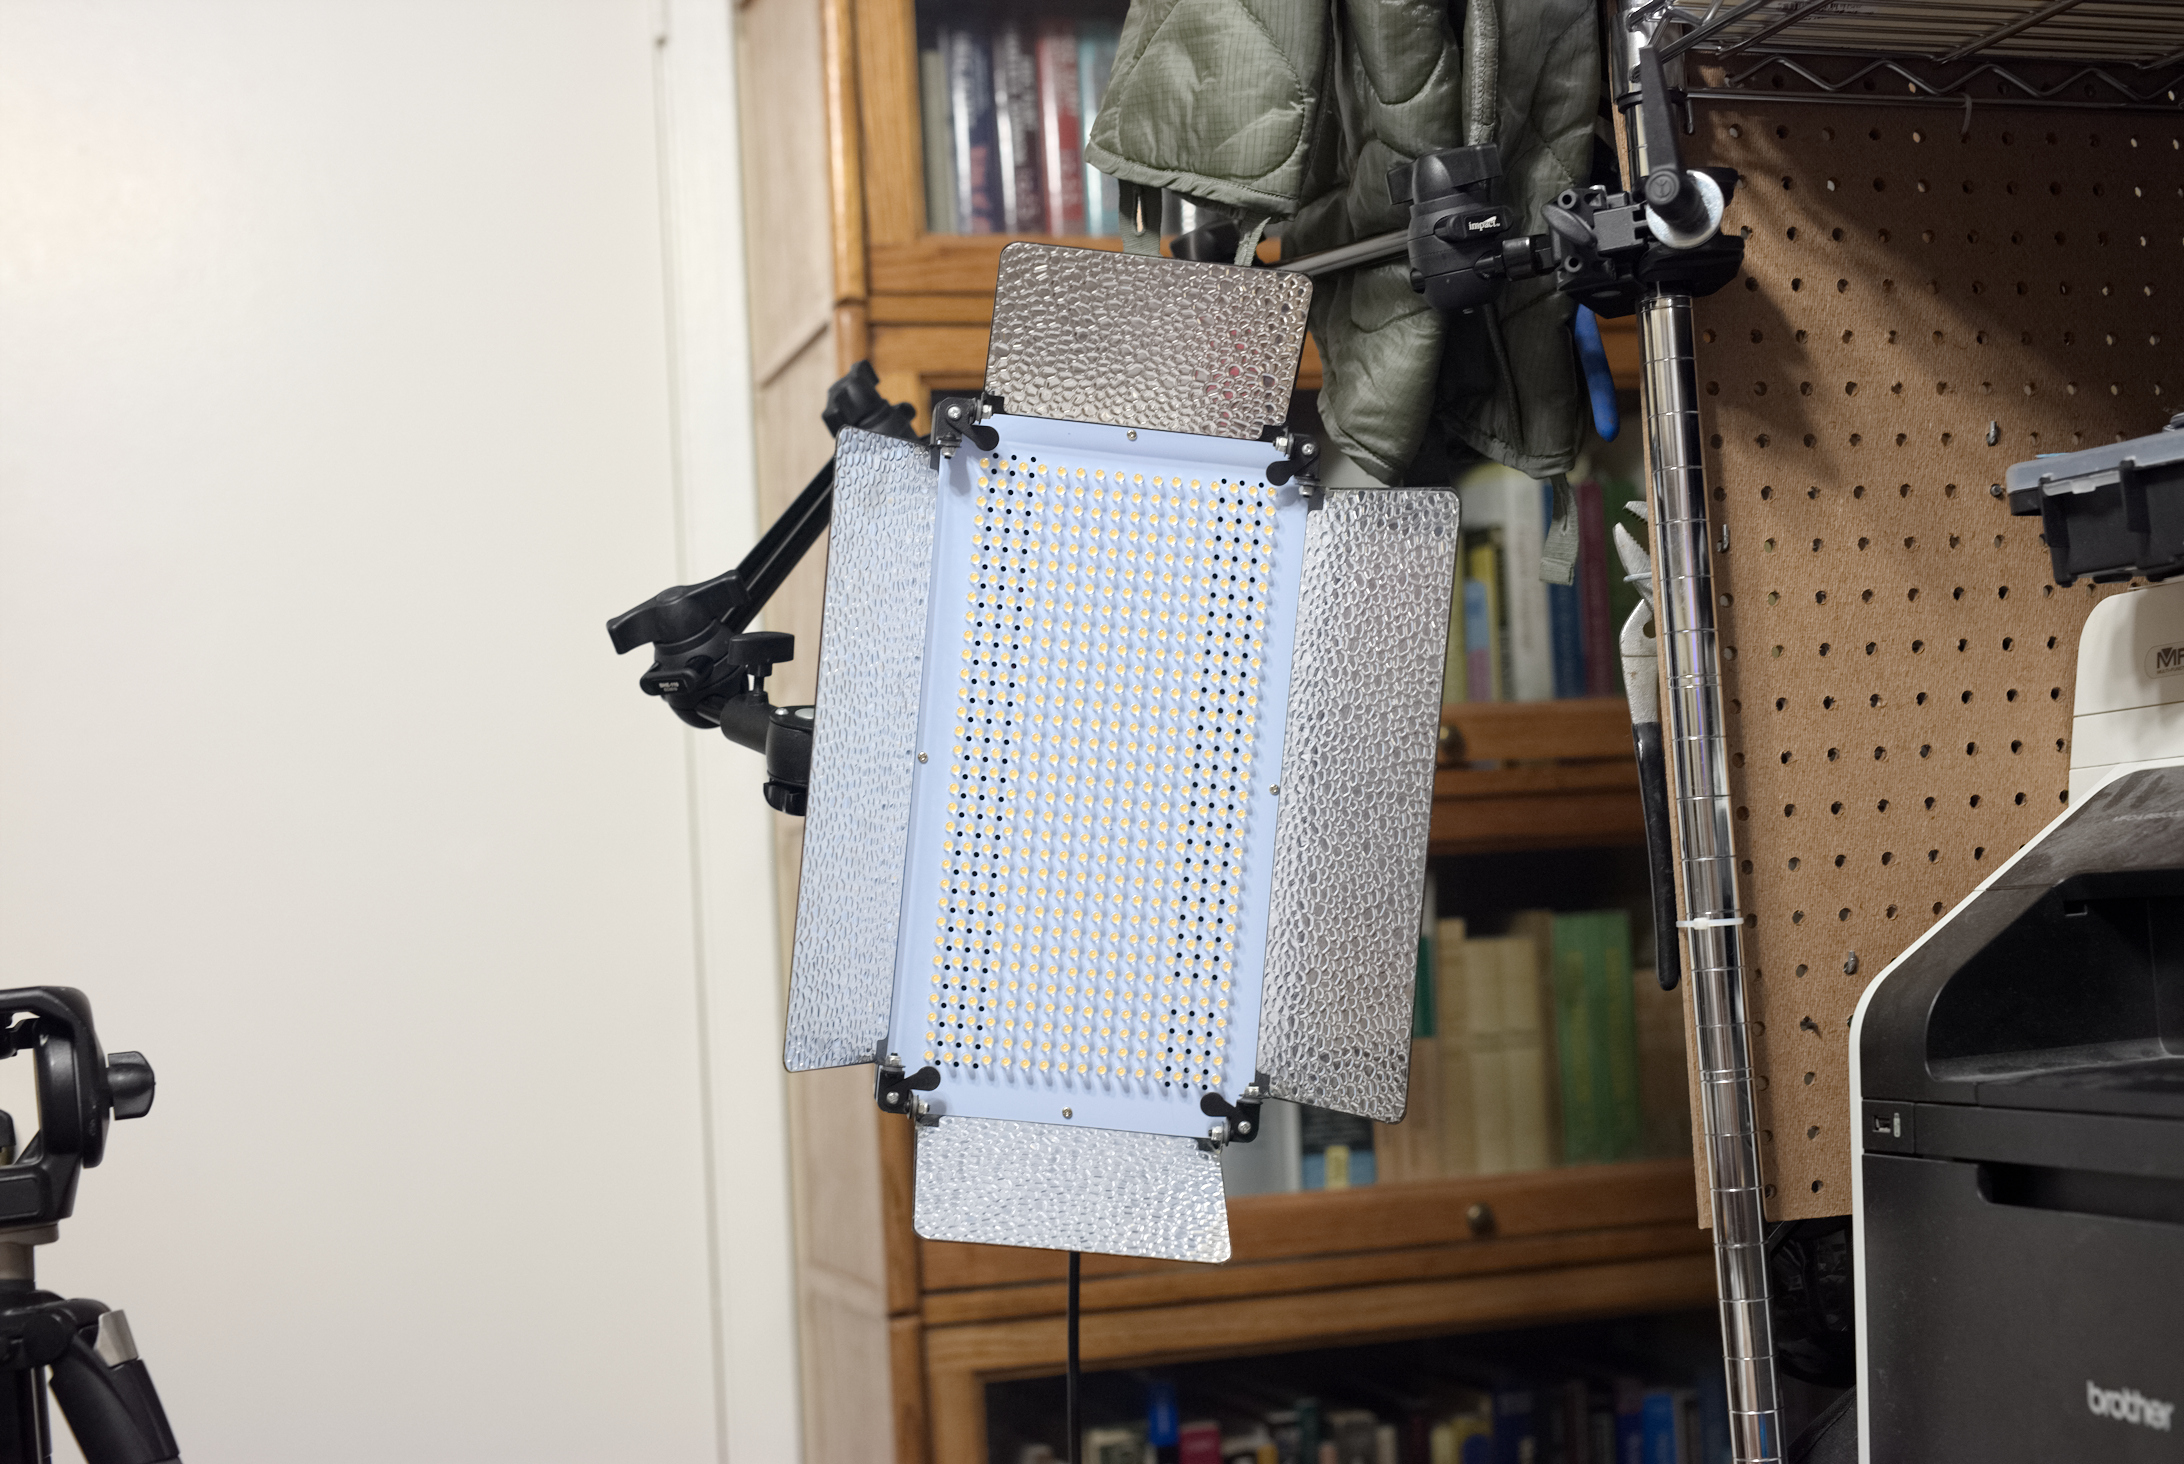
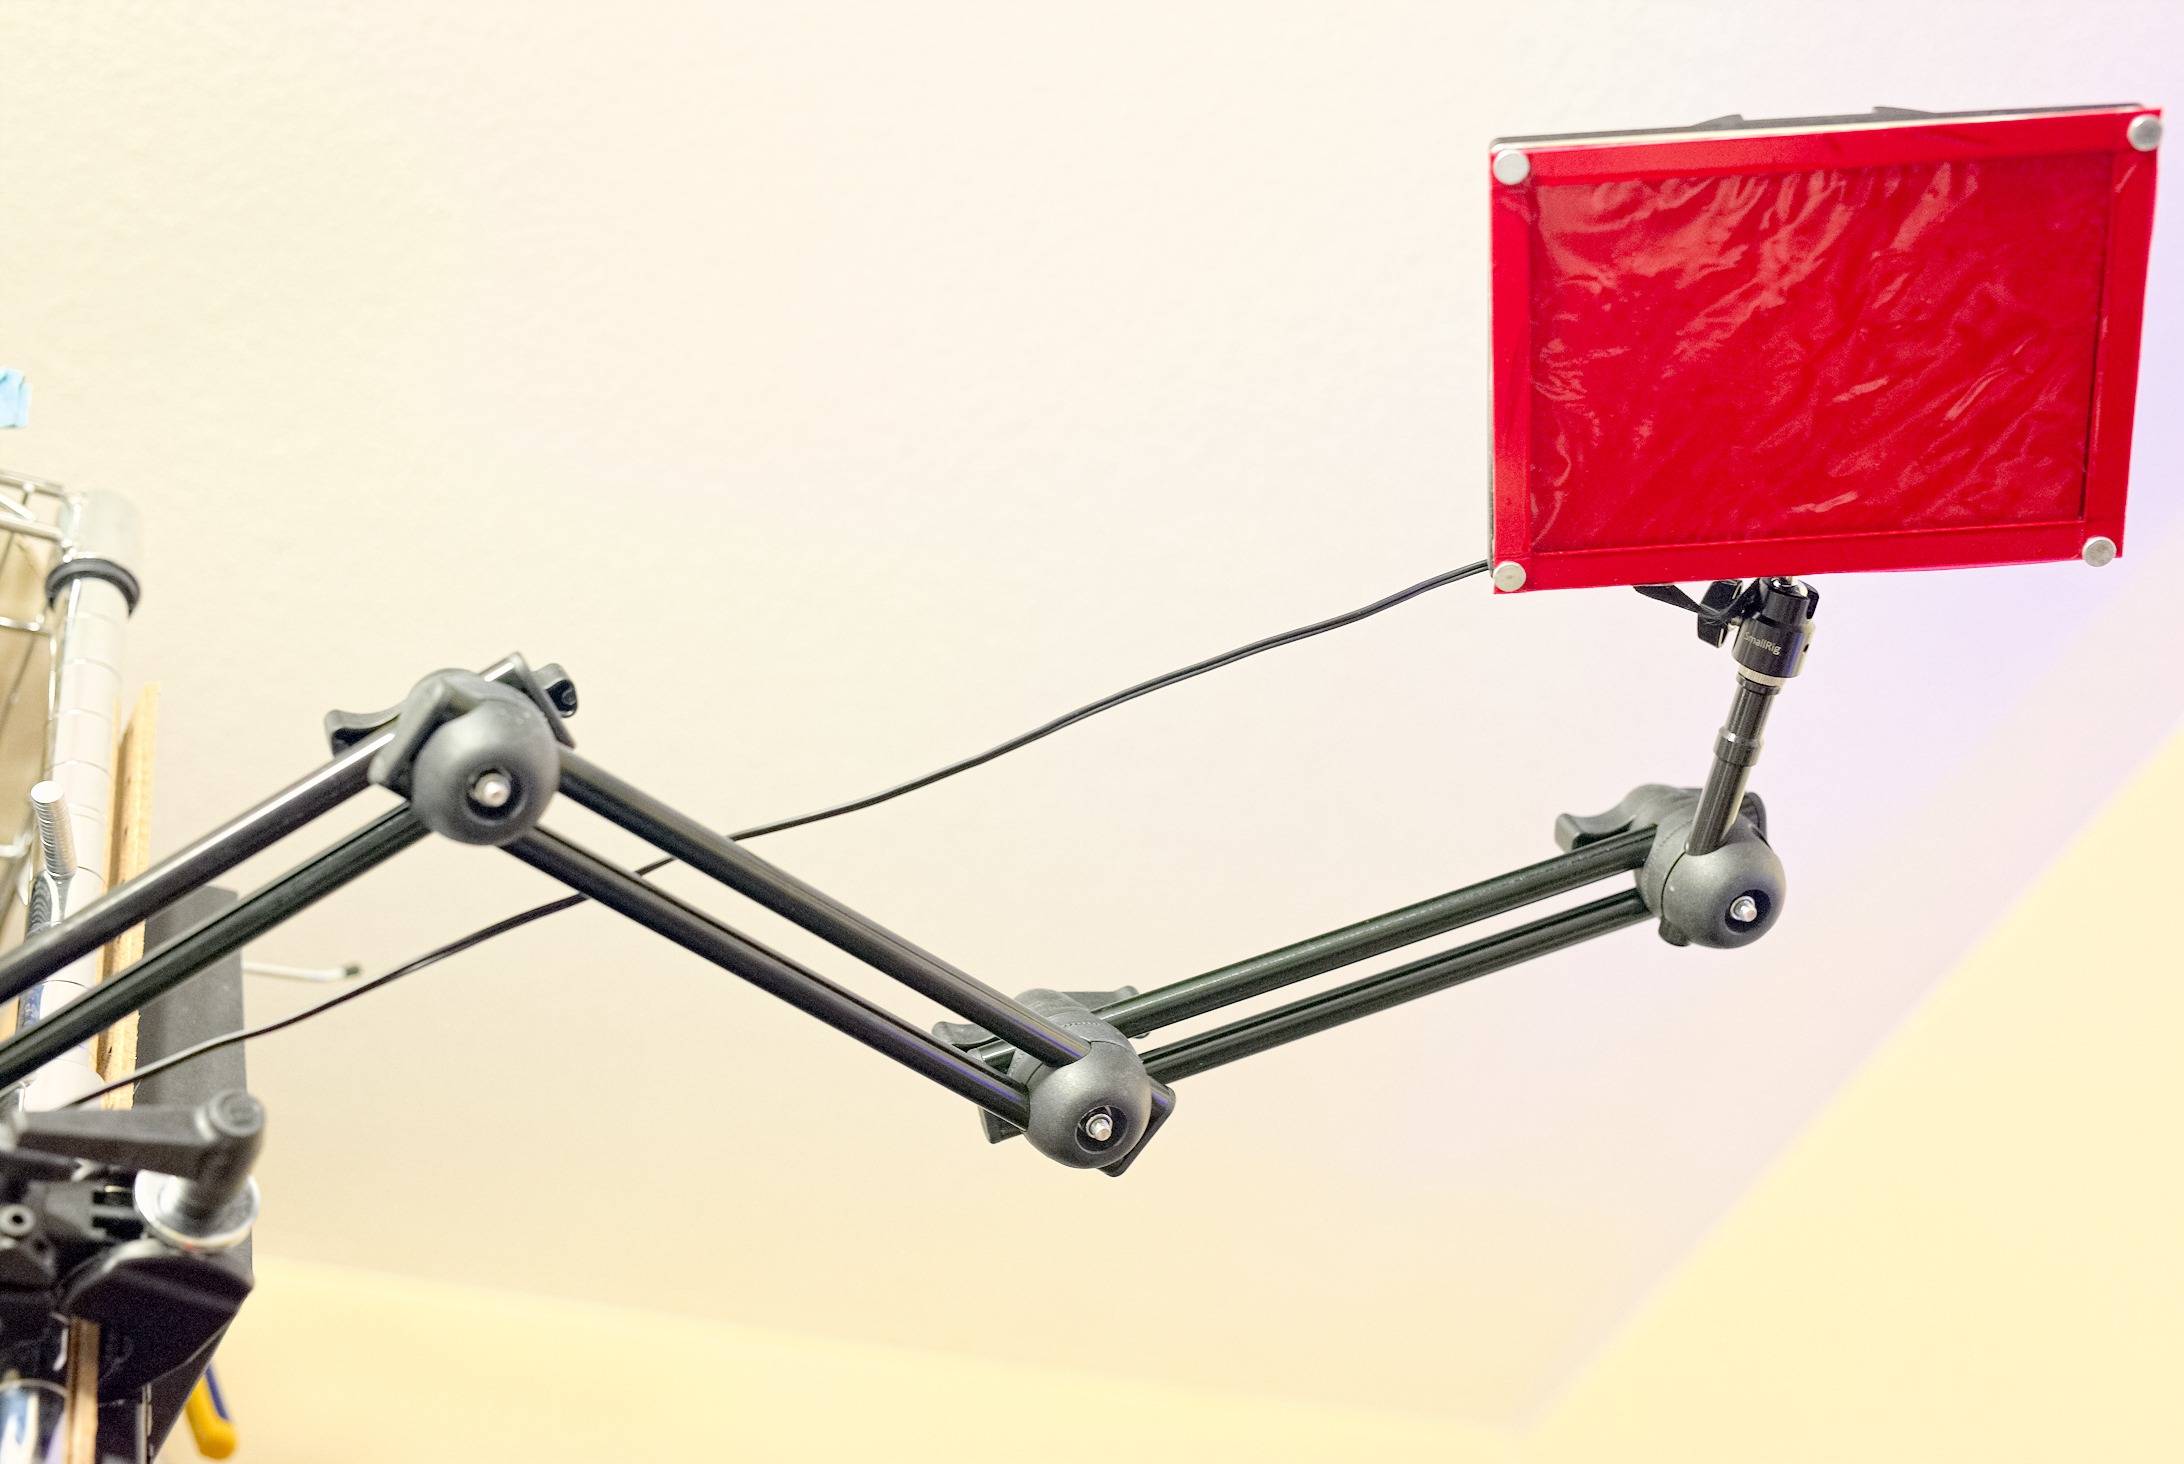
In terms of lighting I use a traditional three-point lighting setup with two out-of-production studio lights by Neewer as my key and fill lights. These lights allow me to dial in the brightness fairly well but are limited to 5500K in terms of their color temperature. For the kicker/hair light I use a smaller video light. To position these lights I have a number of arms and clamps I've purchased, which collectively cost more than the three lights did. I justified this at the time because I was tired of tripping over the tripods I originally used (and which came with the lights) and needed the setup to stay put together for day-to-day COVID-19 teaching in the relatively small space that is my office. I have no effective alternative for you to mount lights if you want to avoid tripods, so it may be beneficial to either stick with them or try out bounce cards and a powerful desk lamp if you're strapped for cash. In the pictures in the slideshow above I show how my setup looks from where I'm sitting as well as how I have the kicker light positioned on the arm you can see in the first picture in this section. One thing to note - I took a piece of polystyrene sheet and created a "gel" for that light using a couple of piece of red cellophane, as I liked the way it looked when placed in comparison to the blue wall wash in the background. Obviously, this is just me fooling around but so long as you don't get too crazy you can often experiment just a bit without someone noticing.
I feel this is a good "default" setup that is suitable for teaching or talking with students online.. If I were going to interview for a literature position I might replace the keyboard with one of the bookend sets you saw in the untreated shot above. I would probably still keep the wall wash light in that case, but place it behind the books. Similarly, if I were going to interview for a digital position I might move my stack of drives or file server to the left of the platform in order to accentuate my comfort with technology (although I'm not sure my current setup would do much in that regard, as it's not that visually impressive).
Audio Aspects
As mentioned above, it's my firm belief that a committee or class is more likely to forgive less-than-stellar video if the audio is solid than the other way around. We tend to accept fuzzy, imperfect video (take, for example, the video below, where my camera is actually focused on the microphone rather than my face) if we can hear what the person is saying. The other way around, we're more likely not just to notice it but to comment on it as well. And in an interview situation that is the last thing you want to happen, especially if you need to be answering questions.
For this reason, my goals here are to go through the various types of microphones, providing audio samples where possible,and what I think is probably the best solution for both interviewing and on-camera recording for a class. From there, I'll talk briefly about the types of equipment you'll need alongside that microphone and what techniques you can easily use to get the best sound quality out of the microphone you eventually purchase or are given by your department. Note, however, that I do not claim to be an audio engineer, and if you have access to one or find a better source you should absolutely listen to them (perhaps, even, in some of the links below). Like with video above, my goal is present multiple options at different levels of complexity so you can make an informed decision about what might work for you rather than present one definitive recommendation.
Microphone Types
I suspect that most of you aren't particularly concerned about how a microphone works so much as what microphone works for your purposes. It can still be useful when it comes to purchasing equipment, though, to have a sense of how it works so that you buy the best tool for your particular job. For this reason, I'll be brief and try to give you just the information you might need to make your purchases and provide links to more extensive information elsewhere.
There are two broad categories of commercial microphone you should be aware of: dynamic and condenser microphones. A dynamic microphone uses a plastic diaphragm (more on what this means below), which vibrates a coil of wire in a magnetic field.That magnetic field, in turn, generates an electrical signal from the vibrating coil which is interpreted as sound. A condenser microphone, on the other hand, uses a thin, electrically-charged piece of metal as the diaphragm, which converts sound waves to the electrical signal when it's engaged with. If you're interested in knowing more deeply about each type of microphone and how they might be used from a technical standpoint I'll include some links to where I got my information from when I describe each concept below. As with video I'll also include futher reading at the bottom of the post.
Generally speaking, a condenser microphone is more sensitive and able to pick up vocals better in the type of controlled environment you're likely to be speaking in—at least if you follow the advice above. A dynamic microphone is usually not as sensitive, so it might be a better bet if you are worried about a noisy environment. It also tends to be a bit cheaper and does not require additional power requirements (more on this below), so if cost is an issue it might be worth considering. It has a major drawback, however, in that it's going to be obviously visible on the screen. This is a problem with some condenser microphones as well, but not to the same extent.
One other thing to think about - condenser microphones usually require Phantom Power, which is a (usually) 48 volt DC current used (obviously) to power the microphone. I'll explain more about this when I talk about audio interfaces, as phantom power will come into play there as well, but just know that most quality microphones are not going to work with the standard 3.5mm jack you're used to.
Examples and Possibilities
Before getting into the minutiae of various types of condenser microphones, recording patterns, and then finally the sampling of recordings taken with various microphones in my possession I thought it might be useful to record a short video showing three of the possible form factors a microphone might fall into and how those form factors should be taken into account when using live audio versus recording with video versus simply recording audio.
While the video above gives you a very cursory overview of the kinds of microphones that might be of use it doesn't really speak to the terminology you might want to know when purchasing a microphone. The section below will address some of that, but if you aren't particularly interested in even a brief technical overview and just want to talk about various models and what might work best in what situation you might want to skip the "Microphones with Samples" section below.
Microphone address, patterns, cables, and capsules
If you're purchasing a microphone to interview you may just want to go with whatever fits within your budget. If you're purchasing something to record classes, field interviews, or other aspects of the actual profession, however, you may want to take a bit more time and compare models. In doing so, you'll notice them speak of four things fairly consistently: the pattern of the particular microphone, the size and type of "capsule" it uses as well as how you address the microphone when recording, the levels of a microphone going into your computer, recorder, or mixer, and what kinds of cables there are. Each of these subjects are addressed below.
Microphone patterns
The human brain is very good at filtering out what it considers to be noise. In fact, one the reasons why the anechoic chamber at Orfield Laboratories is so disconcerting is that it filters out most of the noise for you already, which results in you suddenly hearing things you don't notice in your day to day life, such as your heart beating, your digestion, or your regular breathing. Microphones, on the other hand, pick up everything that happens around them in the range they're designed to pick up. This can be problem when you're recording as it will pick up echos from the sound waves bouncing off of the far wall and coming back towards you.
While this can be mitigated by breaking up the space and causing the sound to scatter (a similar concept to light diffusion—see above for more information), microphone manufacturers assist the speaker by purposely designing microphones to pick up sound better from a particular direction in three dimensional space. The diagrams below show typical patterns for microphones, where the speaker would be at 0° and the microphone at dead center.
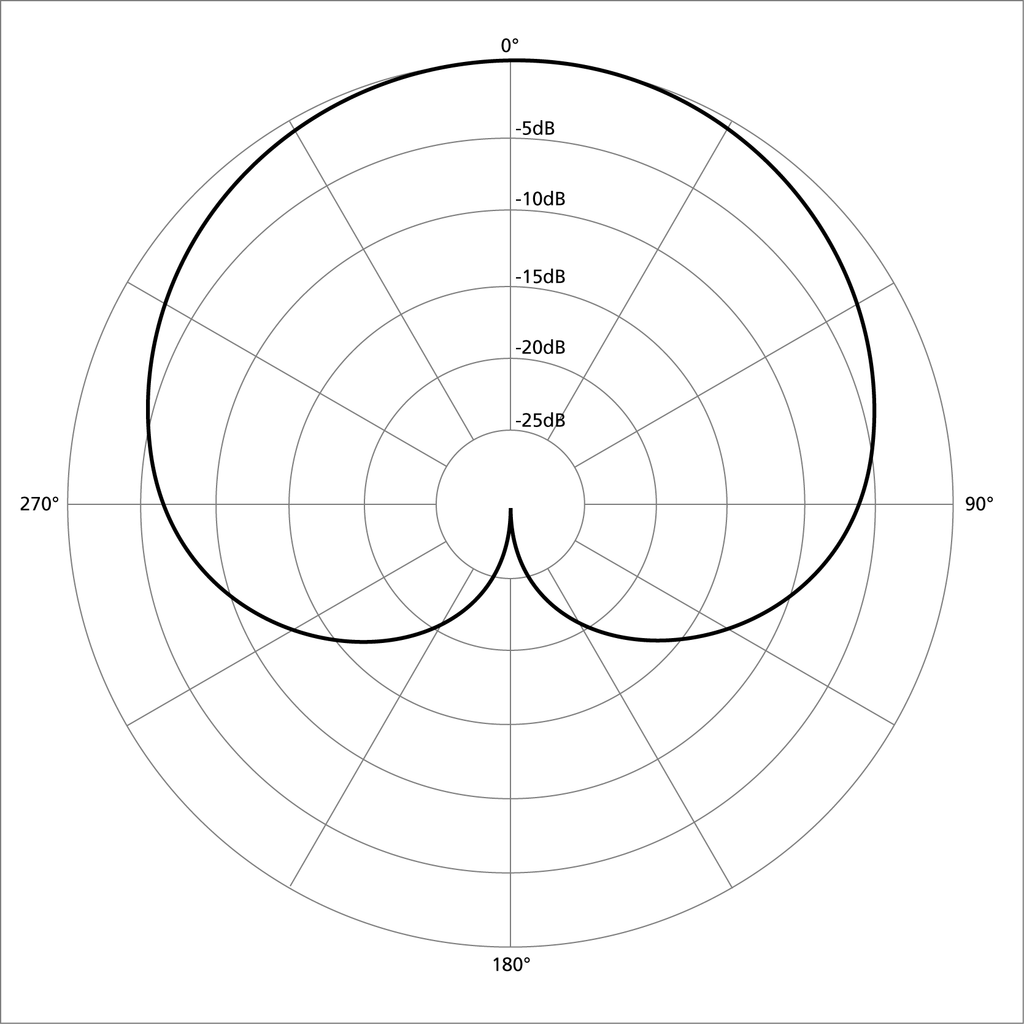

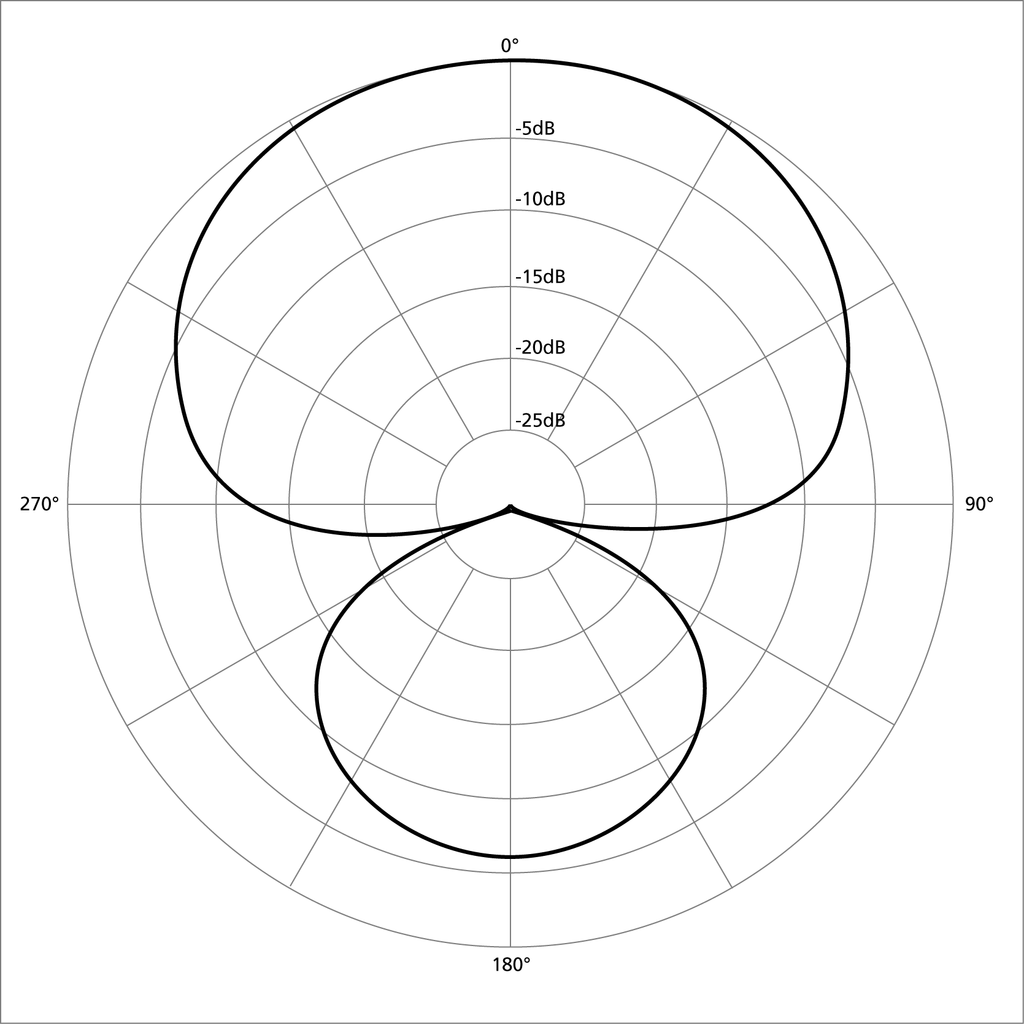
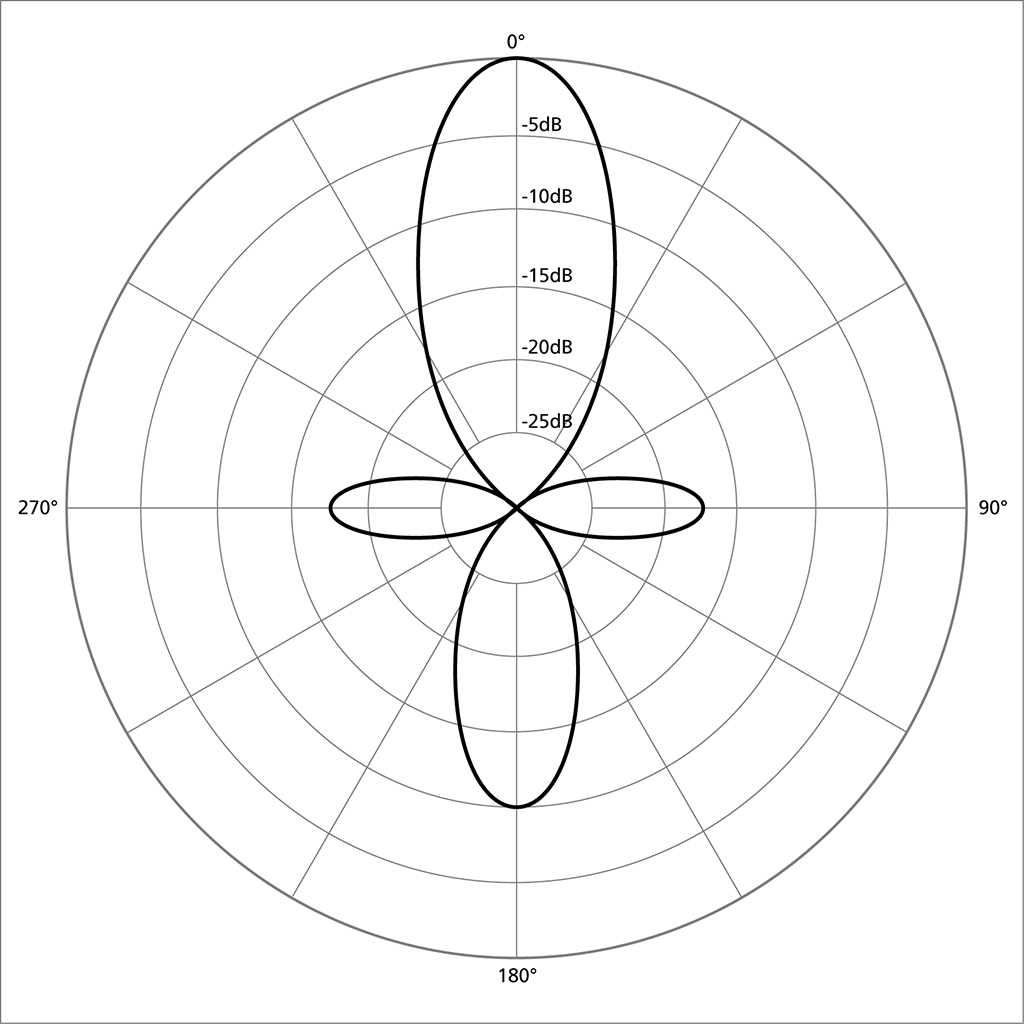

Ehomerecordingstudio.com has a more in-depth description of the various possible patterns, but generally speaking you're going to want to use an omnidirectional microphone if you're using a lavalier. Conversely, if you're using a shotgun or large-diaphragm condenser for interviewing or recording for class you're going to want to go with a cardioid microphone in most situations. Finally, if you are doing field work or recording interviews between yourself and a subject a figure-8 (in the case of the latter) or omnidirectional (in the case of the former) microphone may be of more use to you. It can be worthwhile, then, to think about the uses you'll put the microphone to rather than the pickup pattern when shopping for a microphone. That said, if the only microphone you have for an interview has a less-than-ideal pattern of sensitivity you can still mitigate any echoing somewhat by placing moving blankets (which, if you're like me, you probably have because you've been dealing with the nomadic academic life) or other absorptive material around the space and to speak in front of something like a bookcase that has sufficent mass and irregularity to diffuse reflected sound and absorb that doesn't get reflected.
Capsules and Address
When you see a microphone review or description talk about "capsules," what they're referring to is the part of a microphone that converts the analog sound waves into signals that can be understood by your computer or audio recorder. They consist of a diaphragm that vibrates when it interacts with sound waves. Electrodes pick up these vibrations and send the signal to whatever you are using as a recording device. Mynewmicrophone.com has an excellent explanation of microphone capsules if you're interested in knowing more, but generally the larger the capsule the richer the sound you're able to capture. You may see microphones referred to as "large-diaphragm" or "large capsule." This is a way of letting you know that the diaphragm of the microphone is over one inch in size and thus you might expect to get that rich sound pickup.
Another concept to be aware of when looking at microphones is "top" or "front" address versus "side" address, which is the term I used to refer to the large microphone in the video above. What I mean by this is that you're meant to talk into the side of the microphone rather than the top or front of the microphone, as we often see when we look at performers on stage. Generally, a side-address microphone can have a larger capsule than a front address microphone because there's simply more space for the capsule to be contained within. Mynewmicriphone.com has a good overview with examples that is not too technical.
Cables and Levels
If you are using a microphone or webcam with a USB interface, then you don't need to worry about this part as your computer will likely have the drivers necessary to control your equipment. If you're using an audio interface or mixer with a USB output, however, you may be in trouble. While it's likely that your interface connects to your computer via USB, the actual microphone most likely does not. Instead, it uses a cable in one of three common form factors: XLR, 1/4" diameter, and 1/8" diameter. I'll show pictures of each so you know what to look for, but before I do that I want to talk briefly about balanced and unbalanced cables and the notion of levels.
When looking at microphones (but even more when looking at interfaces and other equipment) you'll see the terms line level, mic level, and instrument level. All these are referring to the level of the signal coming through the particular cable. Line level is the standard level for the interface. It's what the output will be at when it gets to your computer or recorder. Mic level and instrument level, on the other hand, are generally weaker signals that are boosted to line level using a microphone preamp or a direct input box, respectively. While DI boxes tend to be external units you plug into microphone preamps are usually already incorporated into either the microphone or the interface. The main difference is that the signal from a microphone is balanced and the signal from an instrument is unbalanced, so the type of plug may differ and what actually happens to the signal between the microphone and your computer will definitely differ.
You'll also see the terms balanced and unbalanced used when shopping for microphones, cables, and other audio equipment. All this means is how sensitive they are to noise from electrical appliances, computers, radio, or other equipment. A balanced cable, because it adds a third wire which helps to cancel out any noise that appears on the line, tends to allow a signal to be sent for a longer stretch of cabling without degrading to the point of being unusable. You can read more about this at Ehomerecordingstudio.com, but suffice it to say that you're better off with a balanced wire rather than an unbalanced one for the kinds of interview or recording activities we're talking about in this post. (Unbalanced cables, if you're curious, tend to be used with instruments like electric guitars and can be converted to balanced signals when plugged into a direct input box, but that's really beyond the remit here. The link above explains how).
Types of Cables: XLR vs. Composite vs. TS vs. TRS vs. TRRS
Now that you have a basic understanding of the terms in play, let's take a look at the types of cable connectors you might run into if you're connecting a microphone to an audio interface or mixing board. There are custom or lesser-used connectors that some audio manufacturers also use (Blue, for example, uses one on its Blue Yeti Pro which I'll outline below), but these basic form factors will get you 75% of the way towards having your microphone connected to your computer in most situations. The other 25% is having an interface or mixer, a USB cable for that mixer, and reading the documentation of your equipment to understand what it can do.
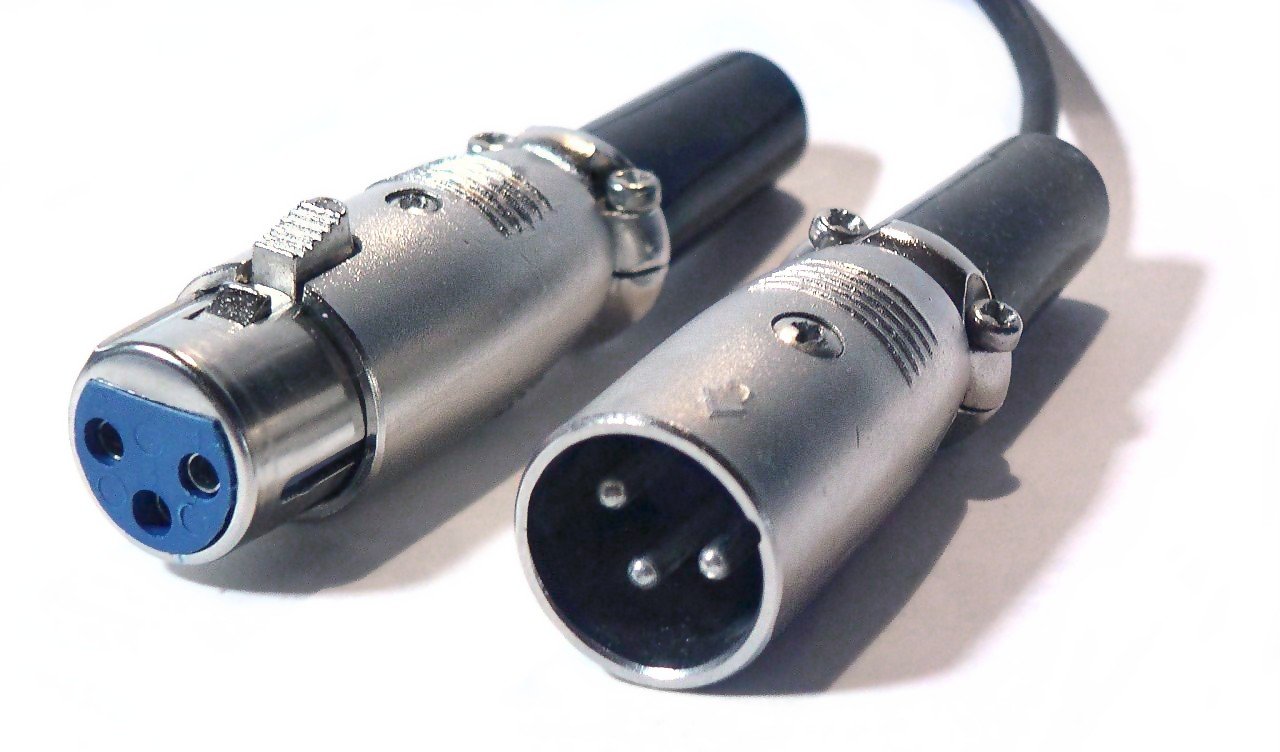
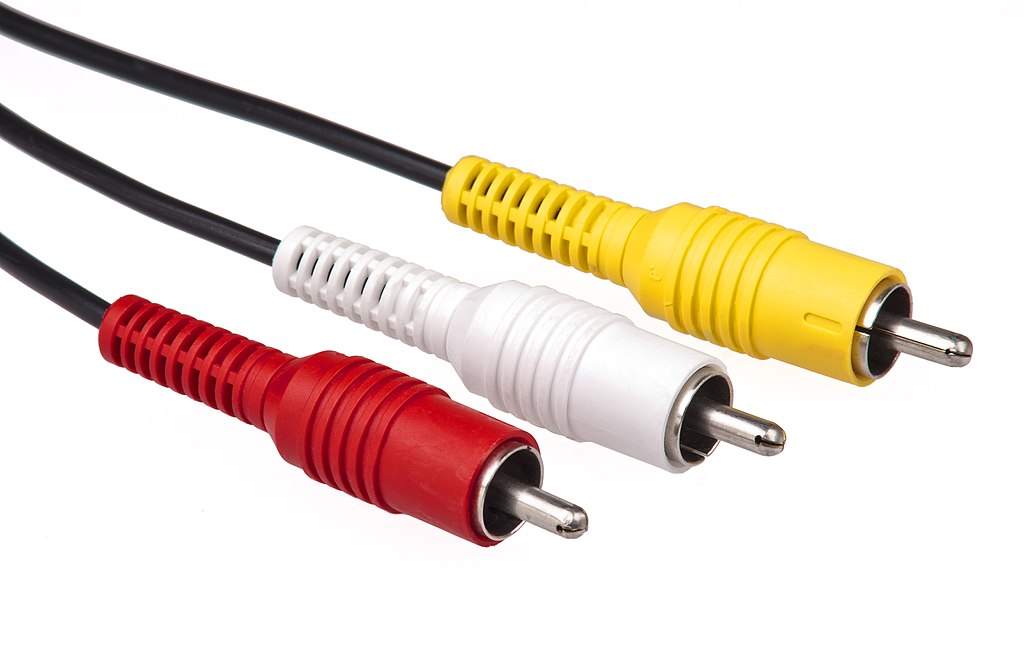
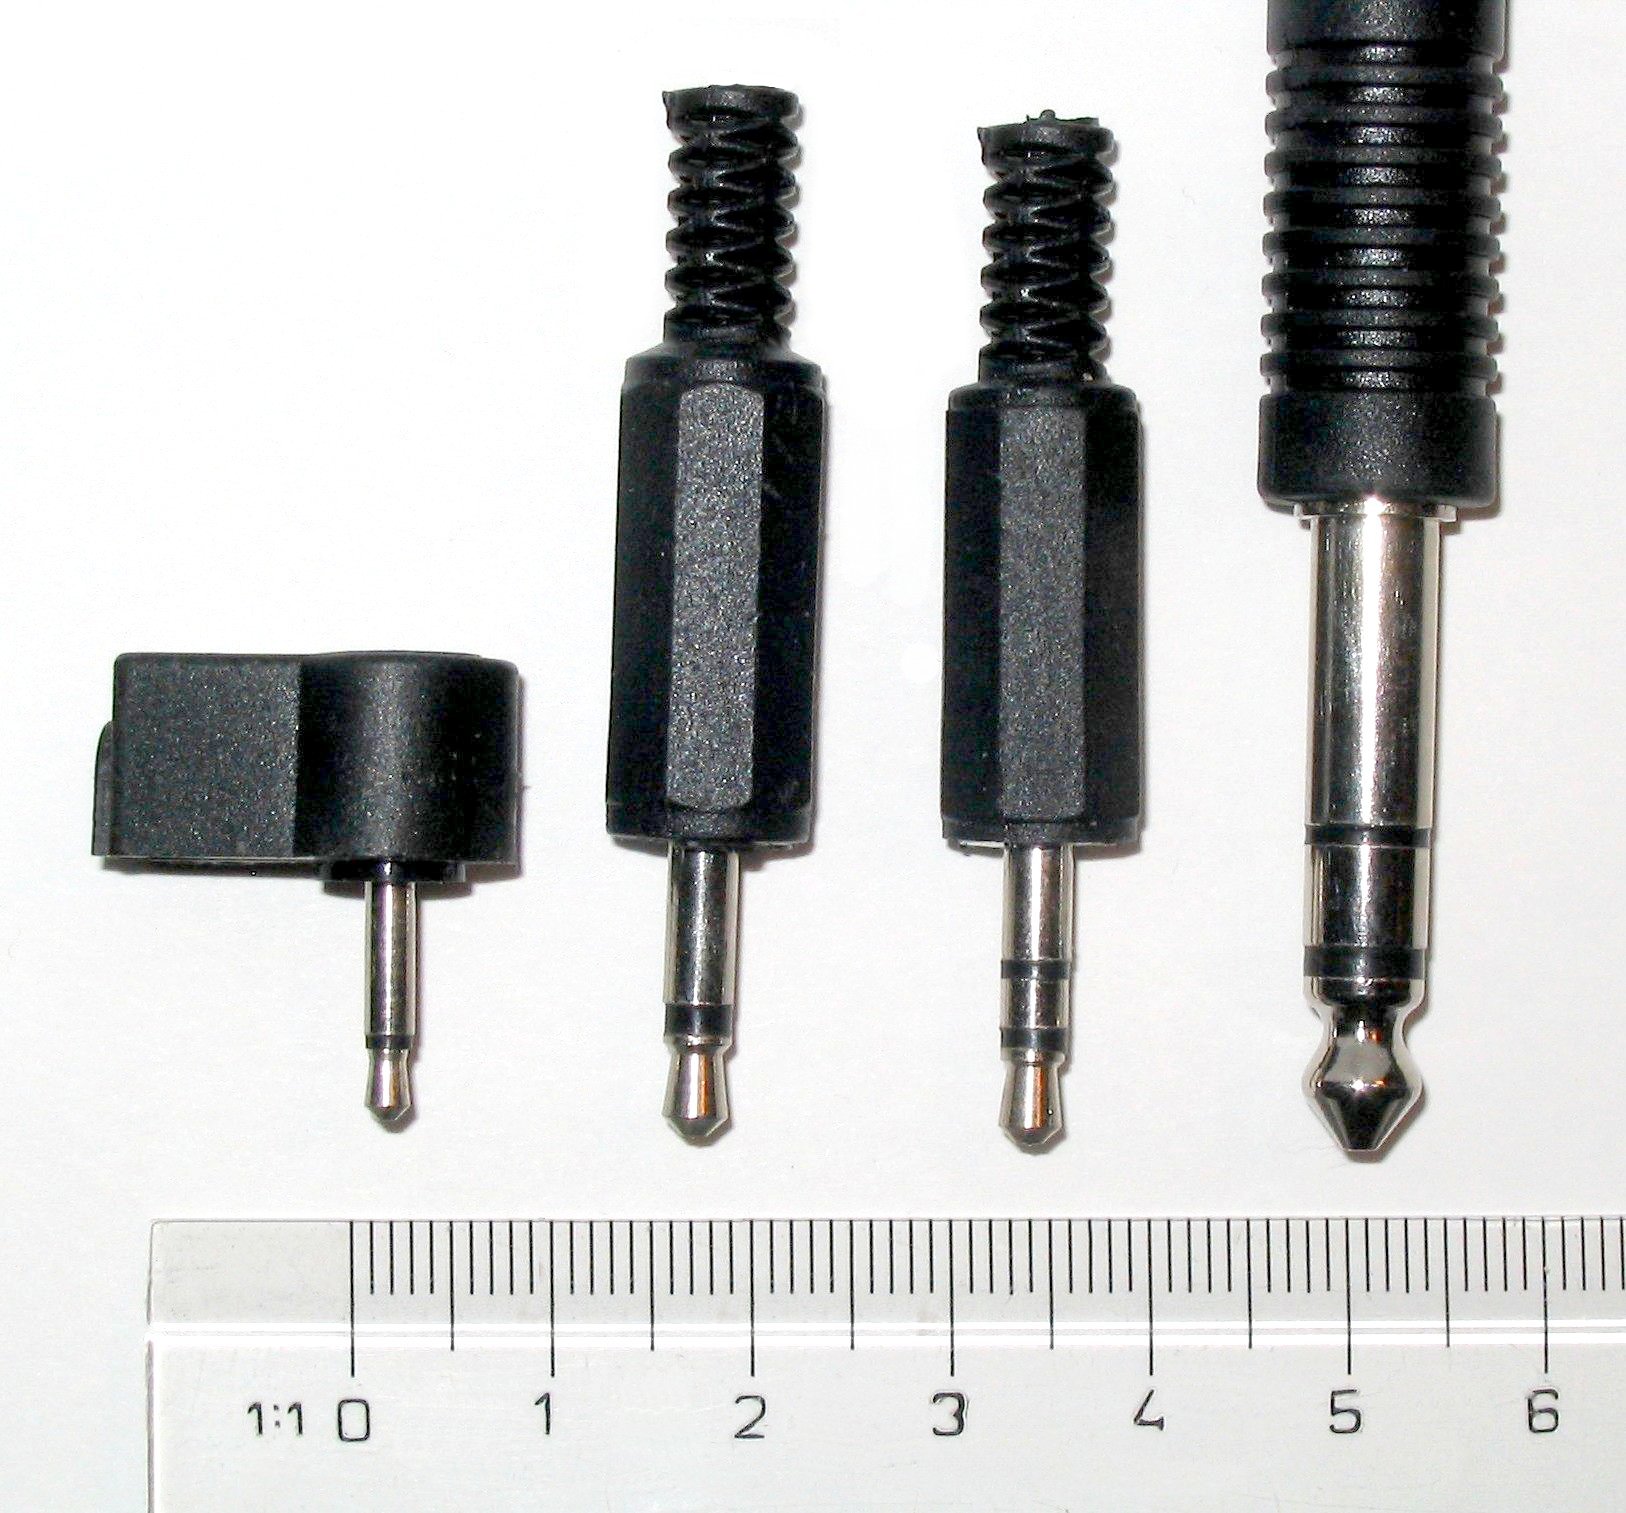
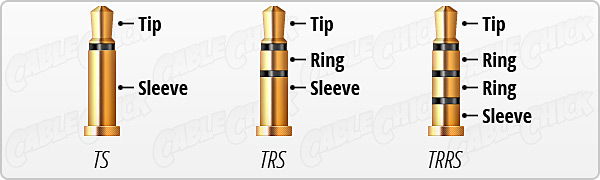
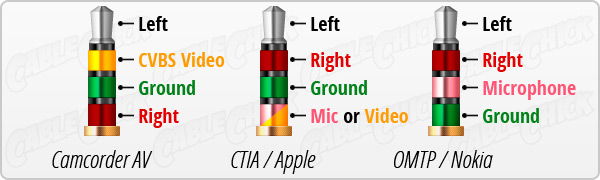
Microphones with samples
Some notes on these microphones: as mentioned above this list is meant to be a representative (but by no means comprehensive) sample of the sorts of equipment you might find easily or that your university might provide you with, based on my acquisitions since I started getting interested in doing videos for classes and saw the writing on the wall in regards to Skype interviews. I've included a link to purchase most of these microphones from non-Amazon companies (in particular B&H, because I've been happy with their service and enjoy their online commercials). They are not affiliate links, and I make no money off of any of my posts or recommendations. You may also be able to find cheaper prices if you Google for the name of the item or use a service like Drop.com to become part of a group purchase from the manufacturer. While I don't anticipate needing to buy any more microphones, if I gain access to others I'll add them to the appropriate category so that this can become more comprehensive.
The examples provided below are all condenser microphones. Where I think it might be confusing I've mentioned whether the microphone is front-address or side-address and the microphone's form factor. Additionally, most of these microphones record in mono rather than stereo. Where they do record in stereo, I've noted it. Beyond that, I'm not going to delve too deeply in the specifications, but I'll include links to both the manufactuer's specifications and, where available, the specifications from the B&H website if you are interested in those aspects.
One last thing to consider when selecting a microphone is whether or not you'll be able to tweak the audio before people hear it. Where possible, I've included a sample of the unprocessed recording from the microphone alongside the same recording run through the REAPER audio suite's Reafir dynamics processor (more on this, briefly, below in the postprocessing section). My thought here is that you might want to get a sense of how various lower-cost options would work for recording if you aren't going to immediately be using the microphone to interview or stream since a noisy microphone can be cleaned up in postproduction. There are also ways to do this postprocessing cleanup on live audio, which I'll include in the postprocessing section as well, but they are a bit finicky or require an additional hardware purchase.
Side-address microphones
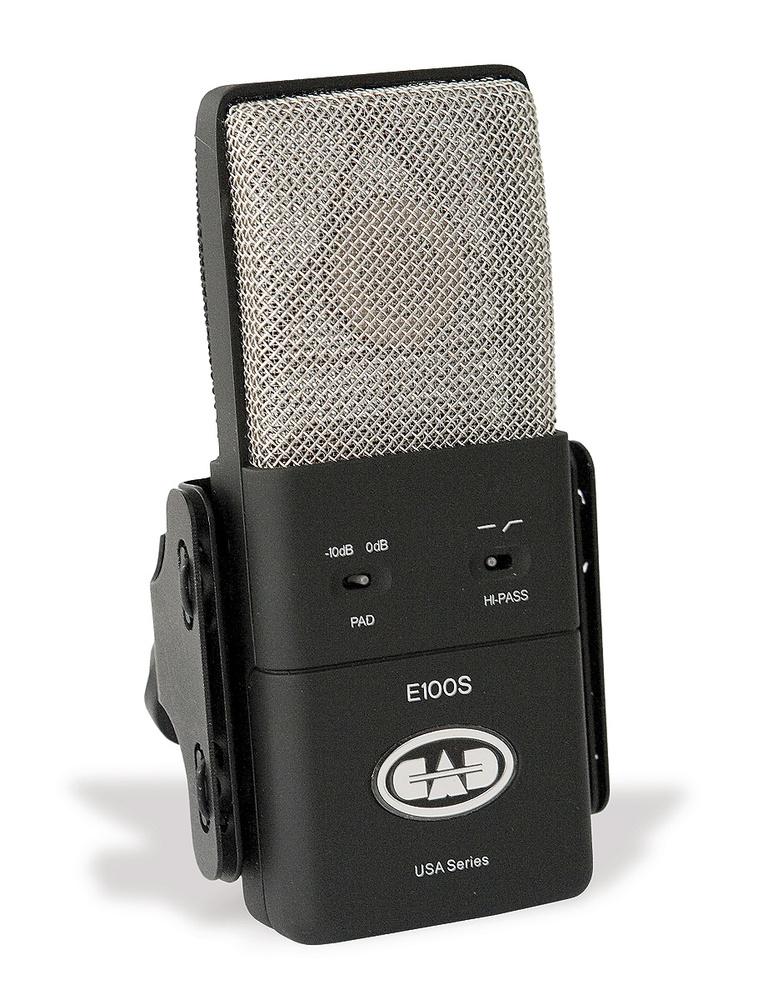
As mentioned in the video above, this is probably the nicest microphone that I own, and is certainly the only large diaphragm one. It comes highly recommended for voice work and spoken word, and has a very low self-noise floor—meaning that it is less likely to pick up the general hiss that other microphones show when you first turn them on. It is also flattering to male voices, but suffers a bit when it comes to singing and the female voice for the same reason. This is part of the reason why it's a good idea to test out microphones before purchasing to find the one that works best for you if you can. Another thing to consider is that this microphone is supercardioid, so it does have a small field of sensitivity at the rear of the unit.
If the price makes you leery, you might be interested to know that it tends to show up periodically on Drop.com and other sales/group purchase sites, so you can get it for less than the $499 list price if you're willing to watch and wait. That is how I picked up the microphone I have.
One final note—as the video shows this microphone is best when in close proximity to your mouth (see the section on proximity effect below) and as such is better suited for recording over slides for a class than for interviews or on-camera video. I would not hestitate to recommend it if you're going to be talking over slides, but think twice if you're going to be on camera as you may find yourself needing to buy another microphone as well.
Manufacturer's Specifications (opens in another window)
B&H Specifications (opens in another window)
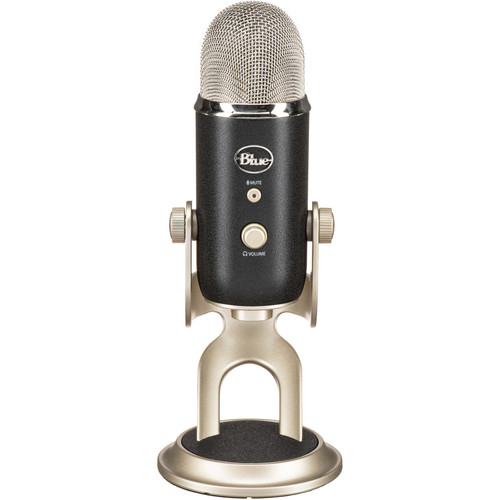
Blue microphones have a good reputation as a budget microphone for podcasting, general recording, and streaming, although the microphone chosen for those activities is often the Snowball rather than the Yeti or Yeti Pro. The difference between the latter two microphones is primarily that the Yeti Pro provides you with an XLR connector, which gives you the ability to use it both with an audio interface and plugged directly into your computer. It has threecapsules, so the sound is recorded in stereo (one channel for each capsule) as well as a feature that allows you to change the pattern of the microphone between four options: cardioid, stereo, omnidirectional, and bidirectional. This makes it a good option for recording ambient room noise, stereo effects, and conversations as well as what you're likely to be interested in it for if you're reading this post—single-speaker address without a lot of background noise. Additionally, it comes with a 3.5mm headphone jack, which means you can use it as a headphone amplifier as well as a microphone. This allows you to listen to yourself while you record and correct pitch and volume issues on the fly.
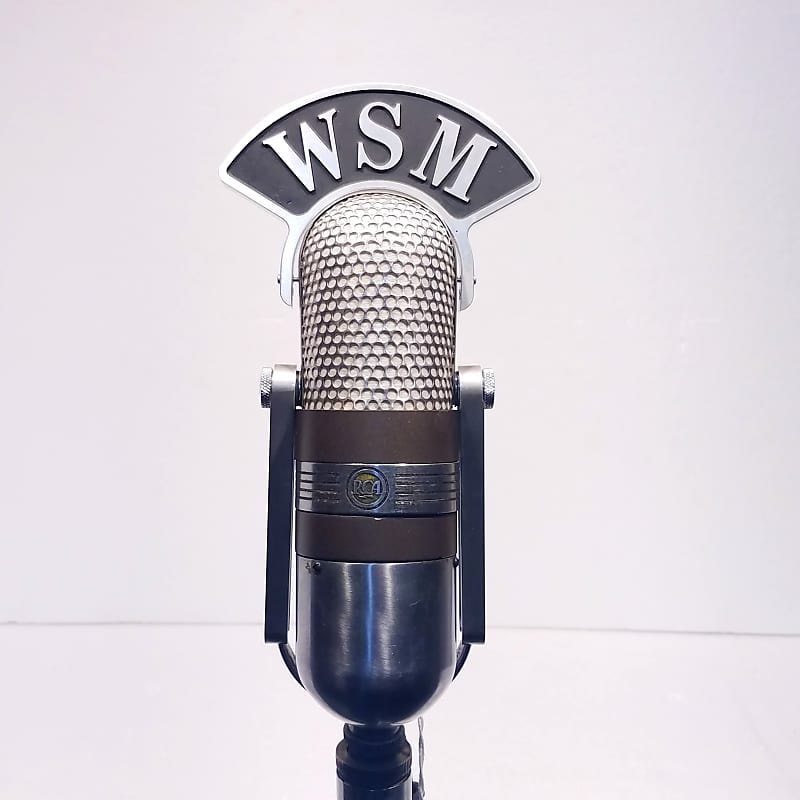
One other thing it's important to remember: the Yeti Pro is meant to be a side, rather than front-address microphone.I have seen and heard of numerous people who use the Yeti Pro incorrectly, effectively speaking into the top. I blame this on cultural memory and false visual cues—the Yeti Pro obviously takes some its design cues from the RCA 77, which is often pictured at an angle. Combine that with the front-address most dynamic microphones use and a first-time user is likely to make assumptions about whythat angle exists that are simply wrong. It might help to remember that the RCA-77 was side-address as well by picturing either it or the Yeti Pro with a call letters flag placed over the top, which would naturally make a speaker address it from the side.
Manufacturer Specifications (opens in another window)
B&H Specifications (opens in another window)
XLR connection
USB connection
Front-address microphones
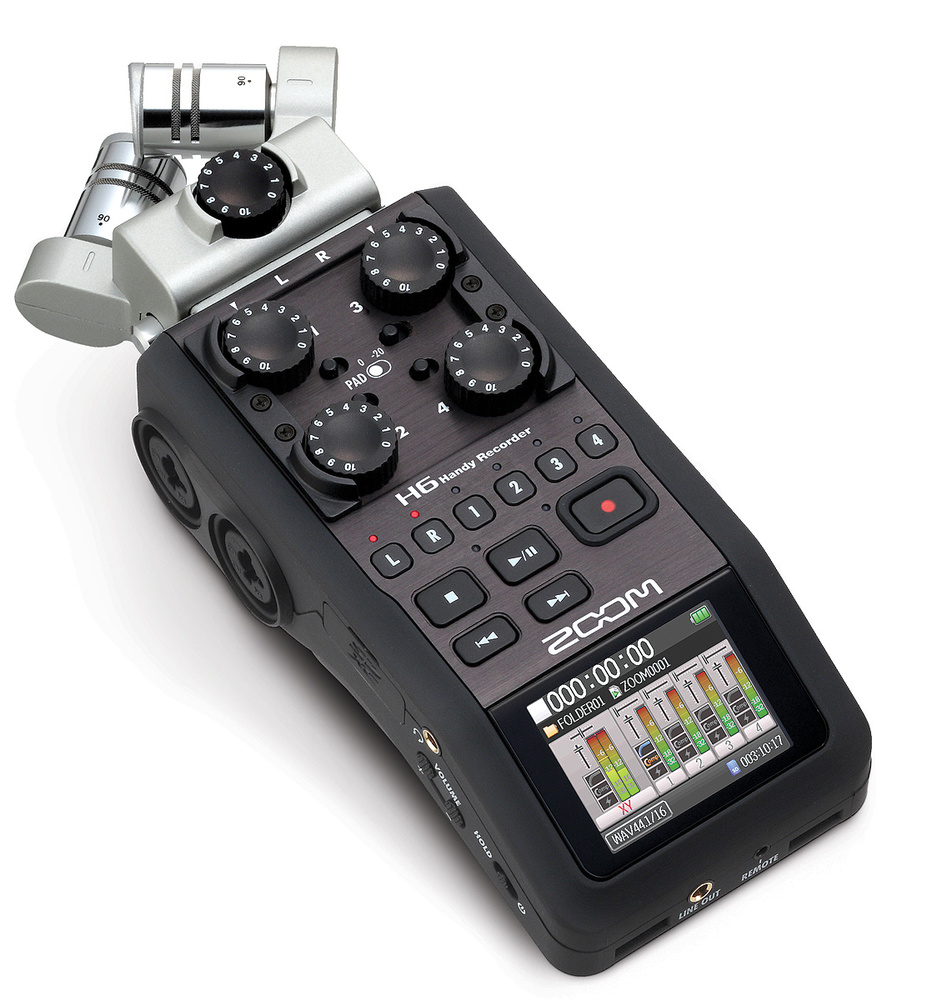
Since it is primarily an audio recorder and interface, the description of the H6 in the audio interfaces and mixers section below will speak to the capabilities of the unit more broadly. It is included in the image here because you require either an H5 or H6 in order to use the various microphone capsules Zoom offers. Here, I want to talk about the XYH-6 capsule that comes with all of the versions of the product. Some also include a mid/side microphone, the MSH-6, but I'll include more information regarding that capsule in the next slide
An X/Y microphone is less a particular type of microphone (although that is how it is presented by the H6) and more a stereo mic'ing technique, wherein you place two microphones right next to each other such that the diaphragms are almost, but not quite, touching. It's designed to pick up a stereo image, and as such it is intended for situations where you're six feet or more from the subject. That's how long it takes for a stereo image to develop. That said, it is noted elsewhere that the x/y configuration on the Zoom H6 can be an effective for close-up work. For this reason, I'll provide close-up recordings (no more than a foot away from my mouth) as well as recordings from about six feet away.
One aspect of the Zoom H6's X/Y capsule that might be of interest is the ability to shift between a 90° and 120° angle between the microphones. Switching the angle can create a wider stereo image, but obviously that wider image requires additional distance. Also, because you're speaking at a distance the X/Y capsule suffers some of the problems with proximity effect and audio dropoff that you see with any microphone at a distance. That said, it can be a good microphone to get crowd noise or perhaps to pick up class discussion without requiring each student to be individually mic'd.
Manufacturer's Specifications (opens in another window)
B&H Specifications (opens in another window)
90° setting
120° setting
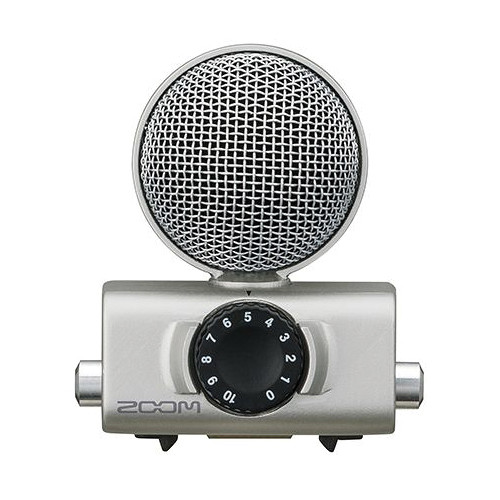
An X/Y microphone is less a particular type of microphone (although that is how it is presented by the H6) and more a stereo mic'ing technique, wherein you place two microphones right next to each other such that the diaphragms are almost, but not quite, touching. It's designed to pick up a stereo image, and as such it is intended for situations where you're six feet or more from the subject. That's how long it takes for a stereo image to develop. That said, it is noted elsewhere that the x/y configuration on the Zoom H6 can be an effective for close-up work. For this reason, I'll provide close-up recordings (no more than a foot away from my mouth) as well as recordings from about six feet away.
One aspect of the Zoom H6's X/Y capsule that might be of interest is the ability to shift between a 90° and 120° angle between the microphones. Switching the angle can create a wider stereo image, but obviously that wider image requires additional distance. Also, because you're speaking at a distance the X/Y capsule suffers some of the problems with proximity effect and audio dropoff that you see with any microphone at a distance. That said, it can be a good microphone to get crowd noise or perhaps to pick up class discussion without requiring each student to be individually mic'd.
Manufacturer's Specifications (opens in another window)
B&H Specifications (opens in another window)
Shotgun microphones
Shotgun microphones are more properly called "interference tube" microphones, and consist of condenser microphone at the bottom of a slotted tube. The idea is that sound recorded straight-on will pass unimpeded down the tube, but sound recorded from the sides will be partially cancelled out as it enters the sides of the tube at different points and bounces against the walls and each other. More information regarding how they work is available here.
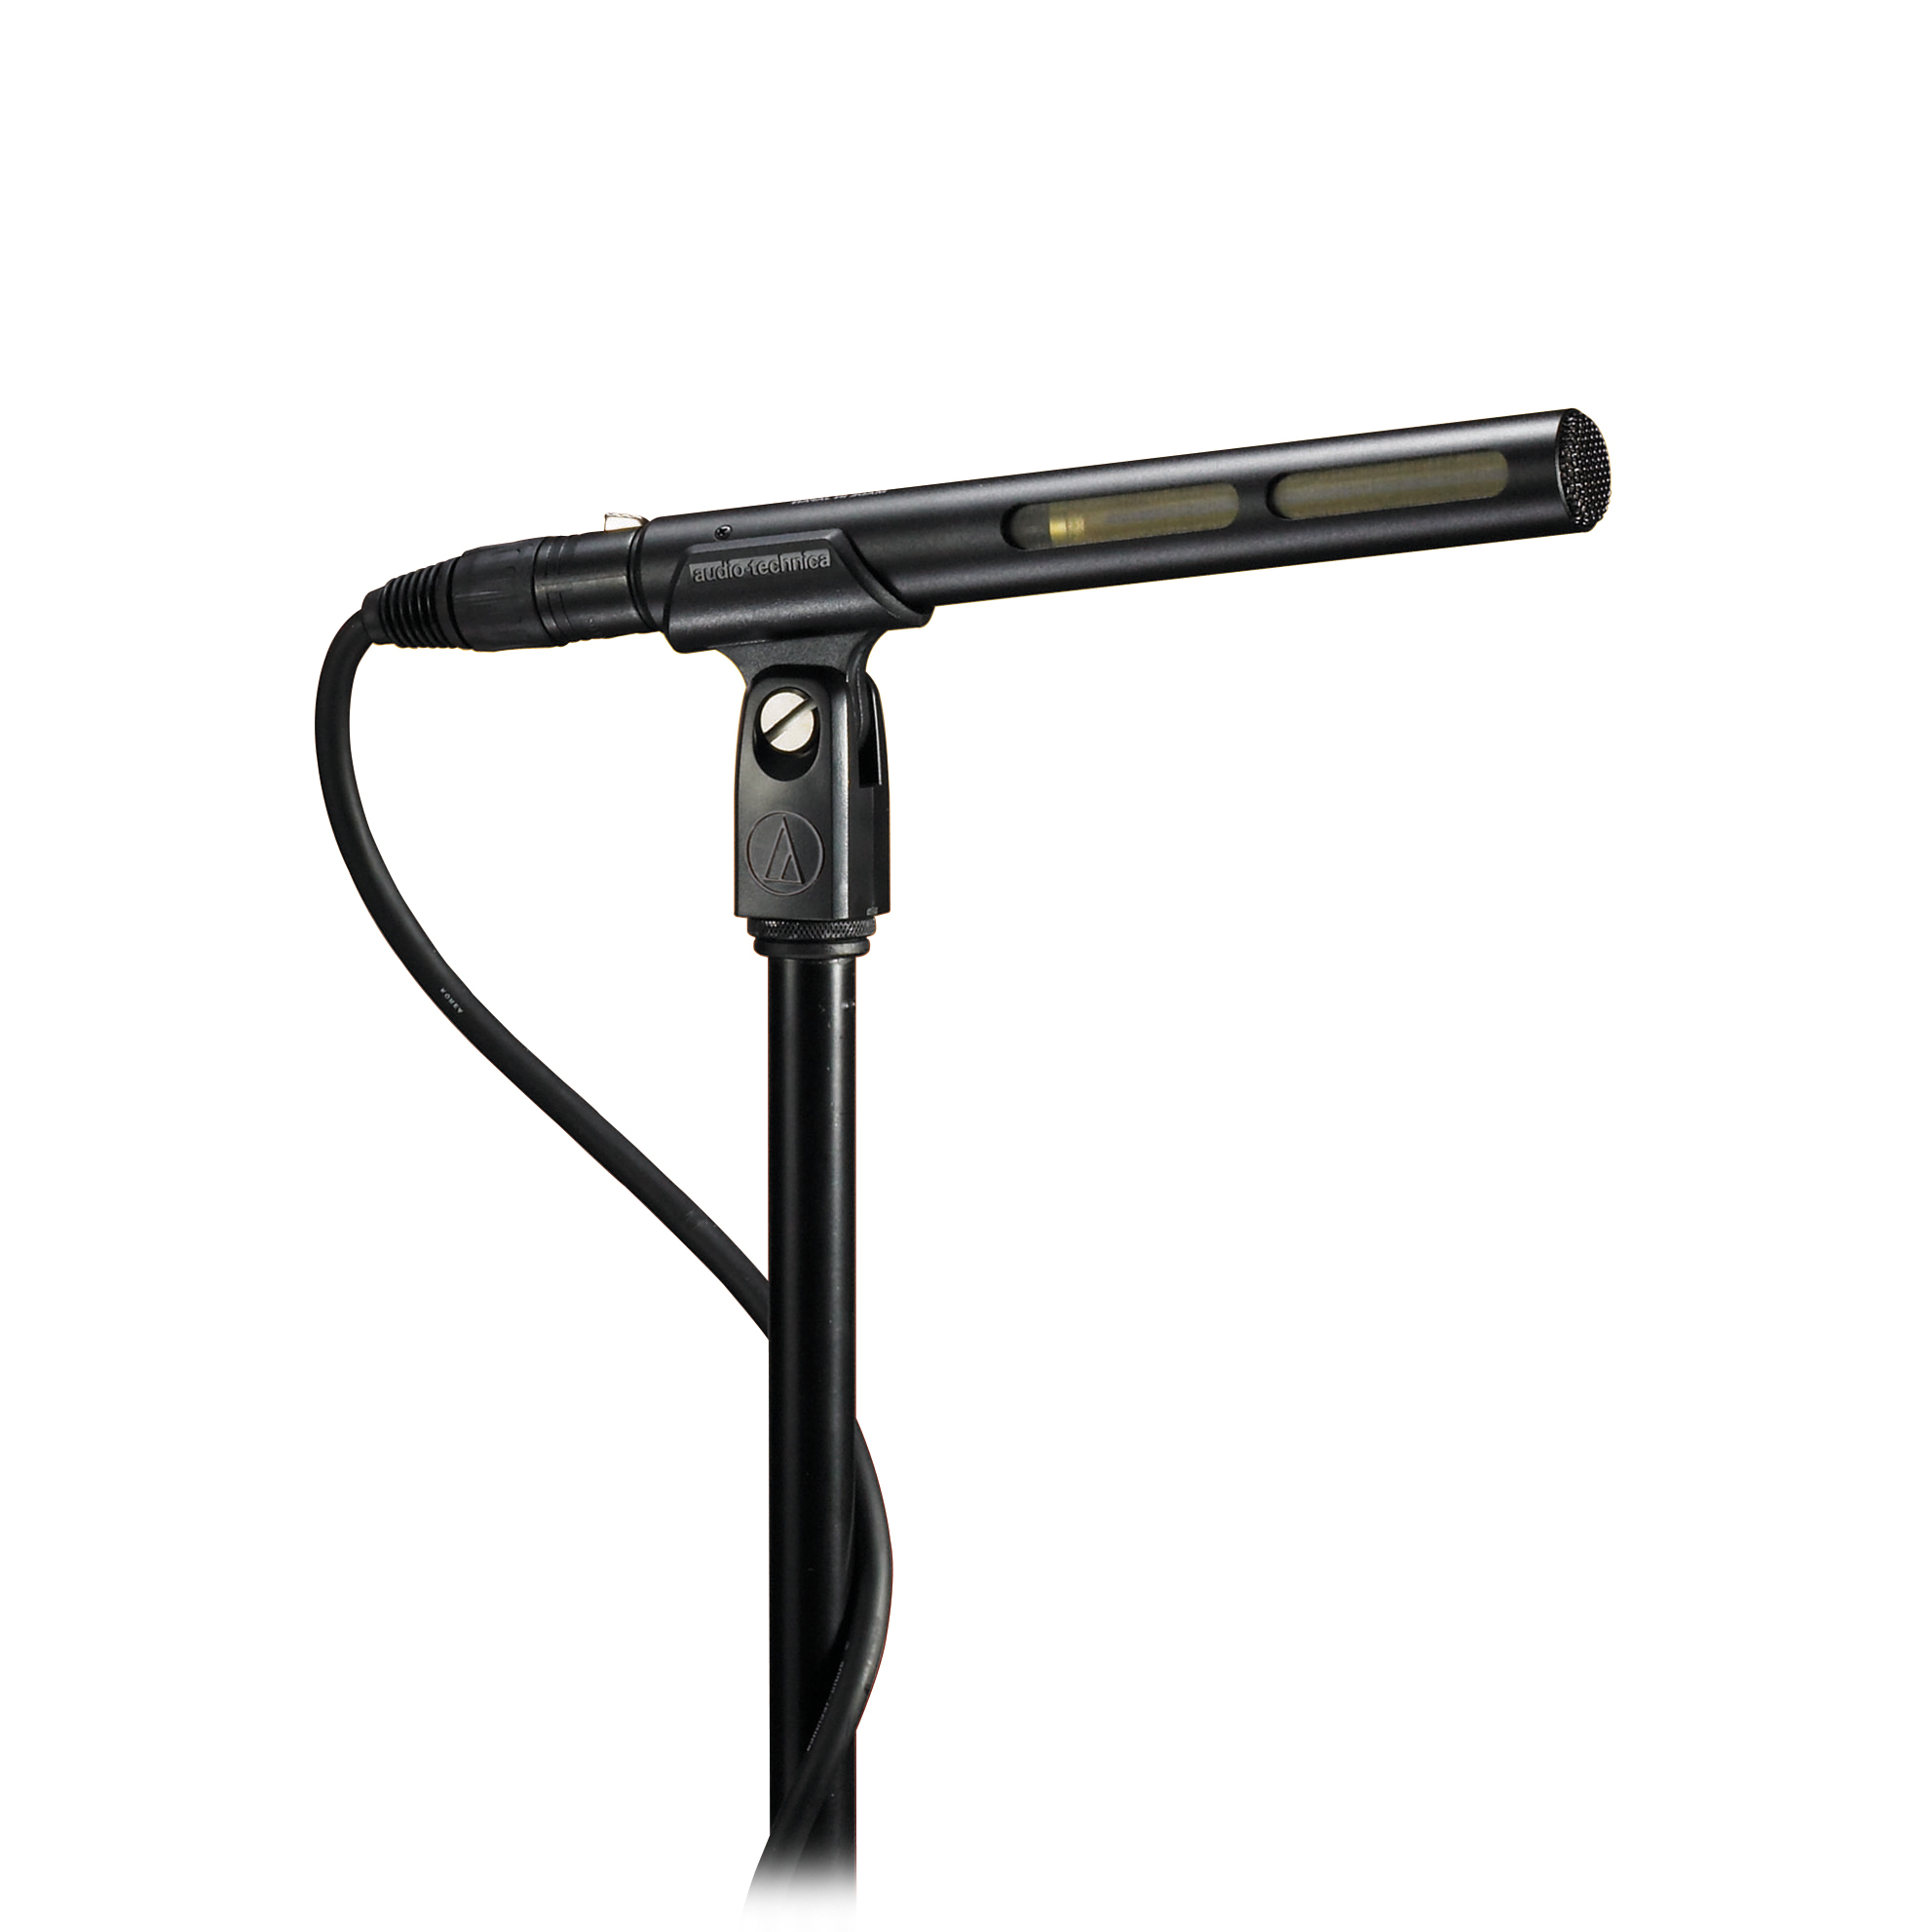
The Audio Technica AT875R (not ATR875R, which you will hear me refer to it as in the recordings below) is a shotgun microphone. While usually shotgun microphones have a lobar pattern this microphone claims to have a "line+gradient" pattern that tends to be more like a supercardioid than anything else—which is why you hear me refer to it as such in the audio. It's intended to be able to pick up voices in noisy environments and can have some pretty severe proximity effect and dropoff issues if it's not positioned right, but is not as finicky as a true shotgun microphone with a lobar pattern. I have heard it argued that you should properly point the front of the microphone at your sternum, rather than your mouth, for the greatest effect and so I recorded audio with it pointed in both locations.
As I said in the video above I'm not a big fan of this microphone, personally. Because of the way you have to position the microphone just out of frame it makes your voice seem more distant than a lavalier microphone might (compare it, for example, to the audio of the webcame below) and the ease of not having to thread a wire through my clothing doesn't overcome that sense of distance. Similarly, if you were to move around a room you'd have to have someone actively pointing the microphone at you in order to get the best sound, which may not be possible if you're recording a lecture.
Manufacturer's Specifications (opens in another window)
B&H Specifications (opens in another window)
Sternum
Mouth
Lavalier microphones
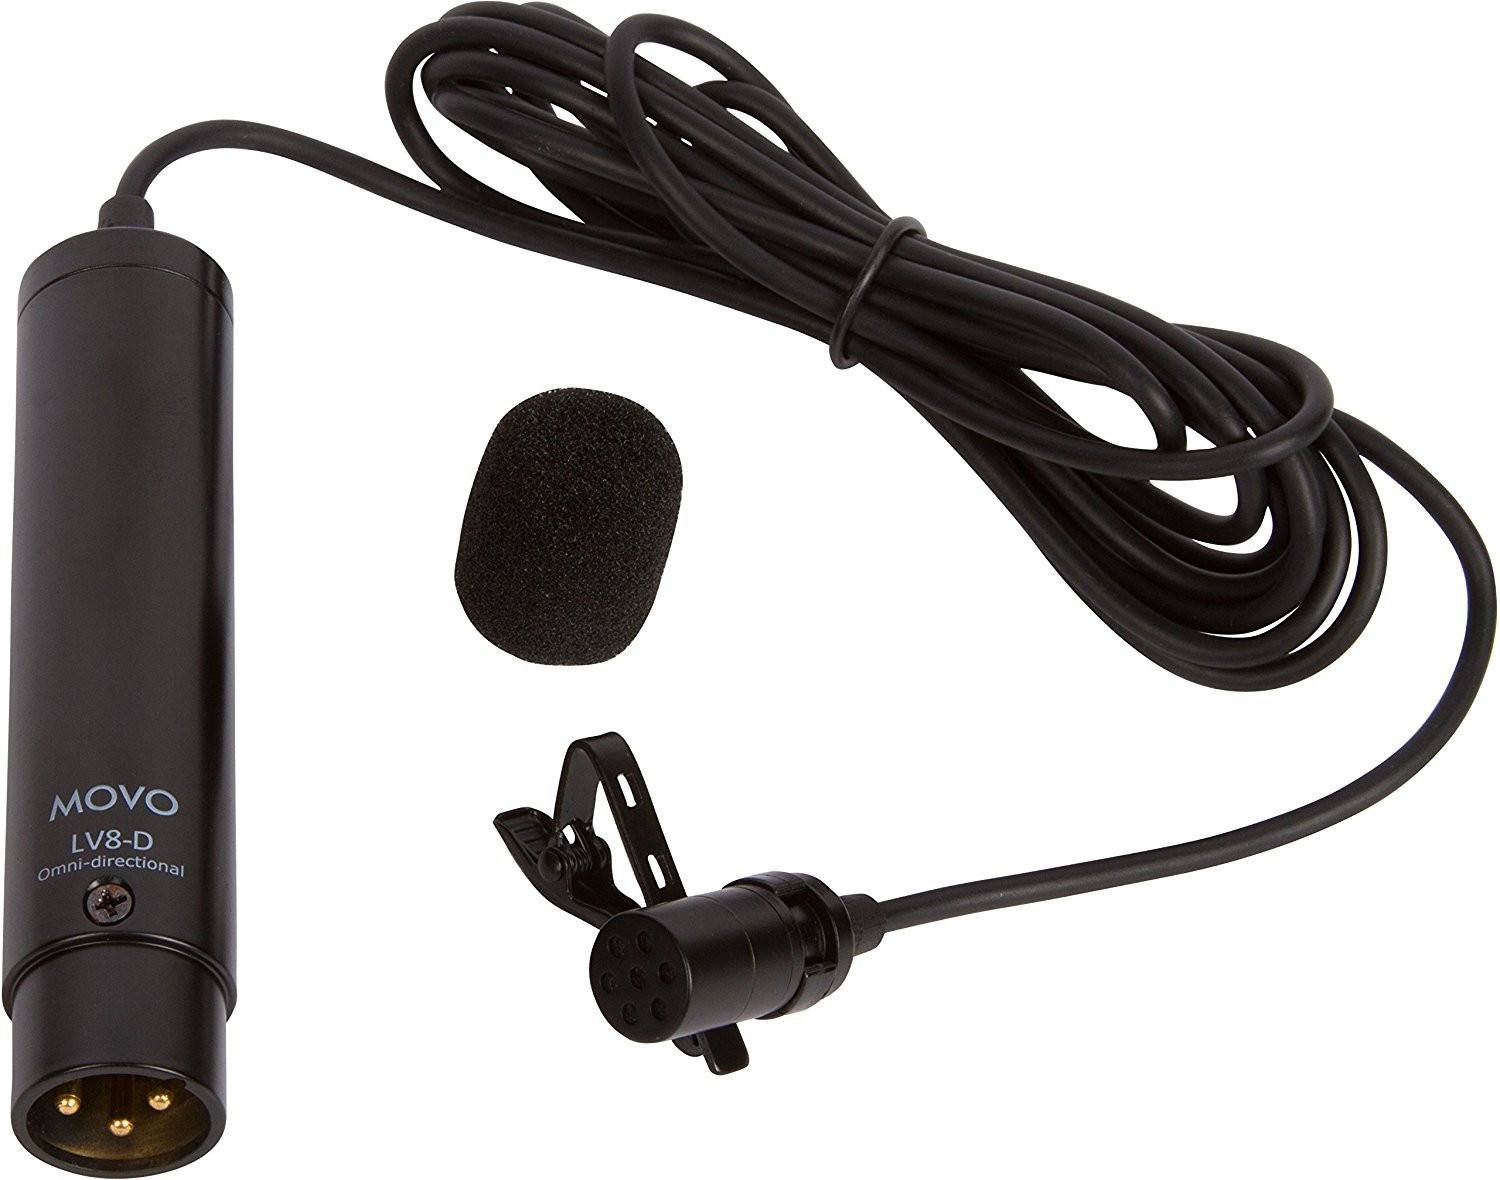
This is the nicest lavalier microphone I own. It uses a XLR hookup rather than a 3.5mm jack, which means it's designed to be plugged into a recorder or mixer. It also comes with a 12mm capsule that's significantly larger than the capsules of other lavalier microphones. This allows it to pick up sounds that may not be picked up by other units.
I also really like the lack of noise floor (or microphone hiss) that this microphone has. I attribute that to the larger capsule, but I could be wrong.
One positive and negative of the microphone is that it comes with a 6½' cable. It's useful because it's long enough to snake through your clothing if you're tall, but it's not long enough that you can really move away from your recorder or mixer if you need to. This can be overcome with a wireless pack, but that significantly increases the cost of your setup. Another issue is that while the capsule is larger and thus can pick up sounds quite nicely it can make it harder to find a good foam windscreen and microphone clip.
Manufacturer's Specifications (opens in another window)
B&H Specifications (opens in another window)
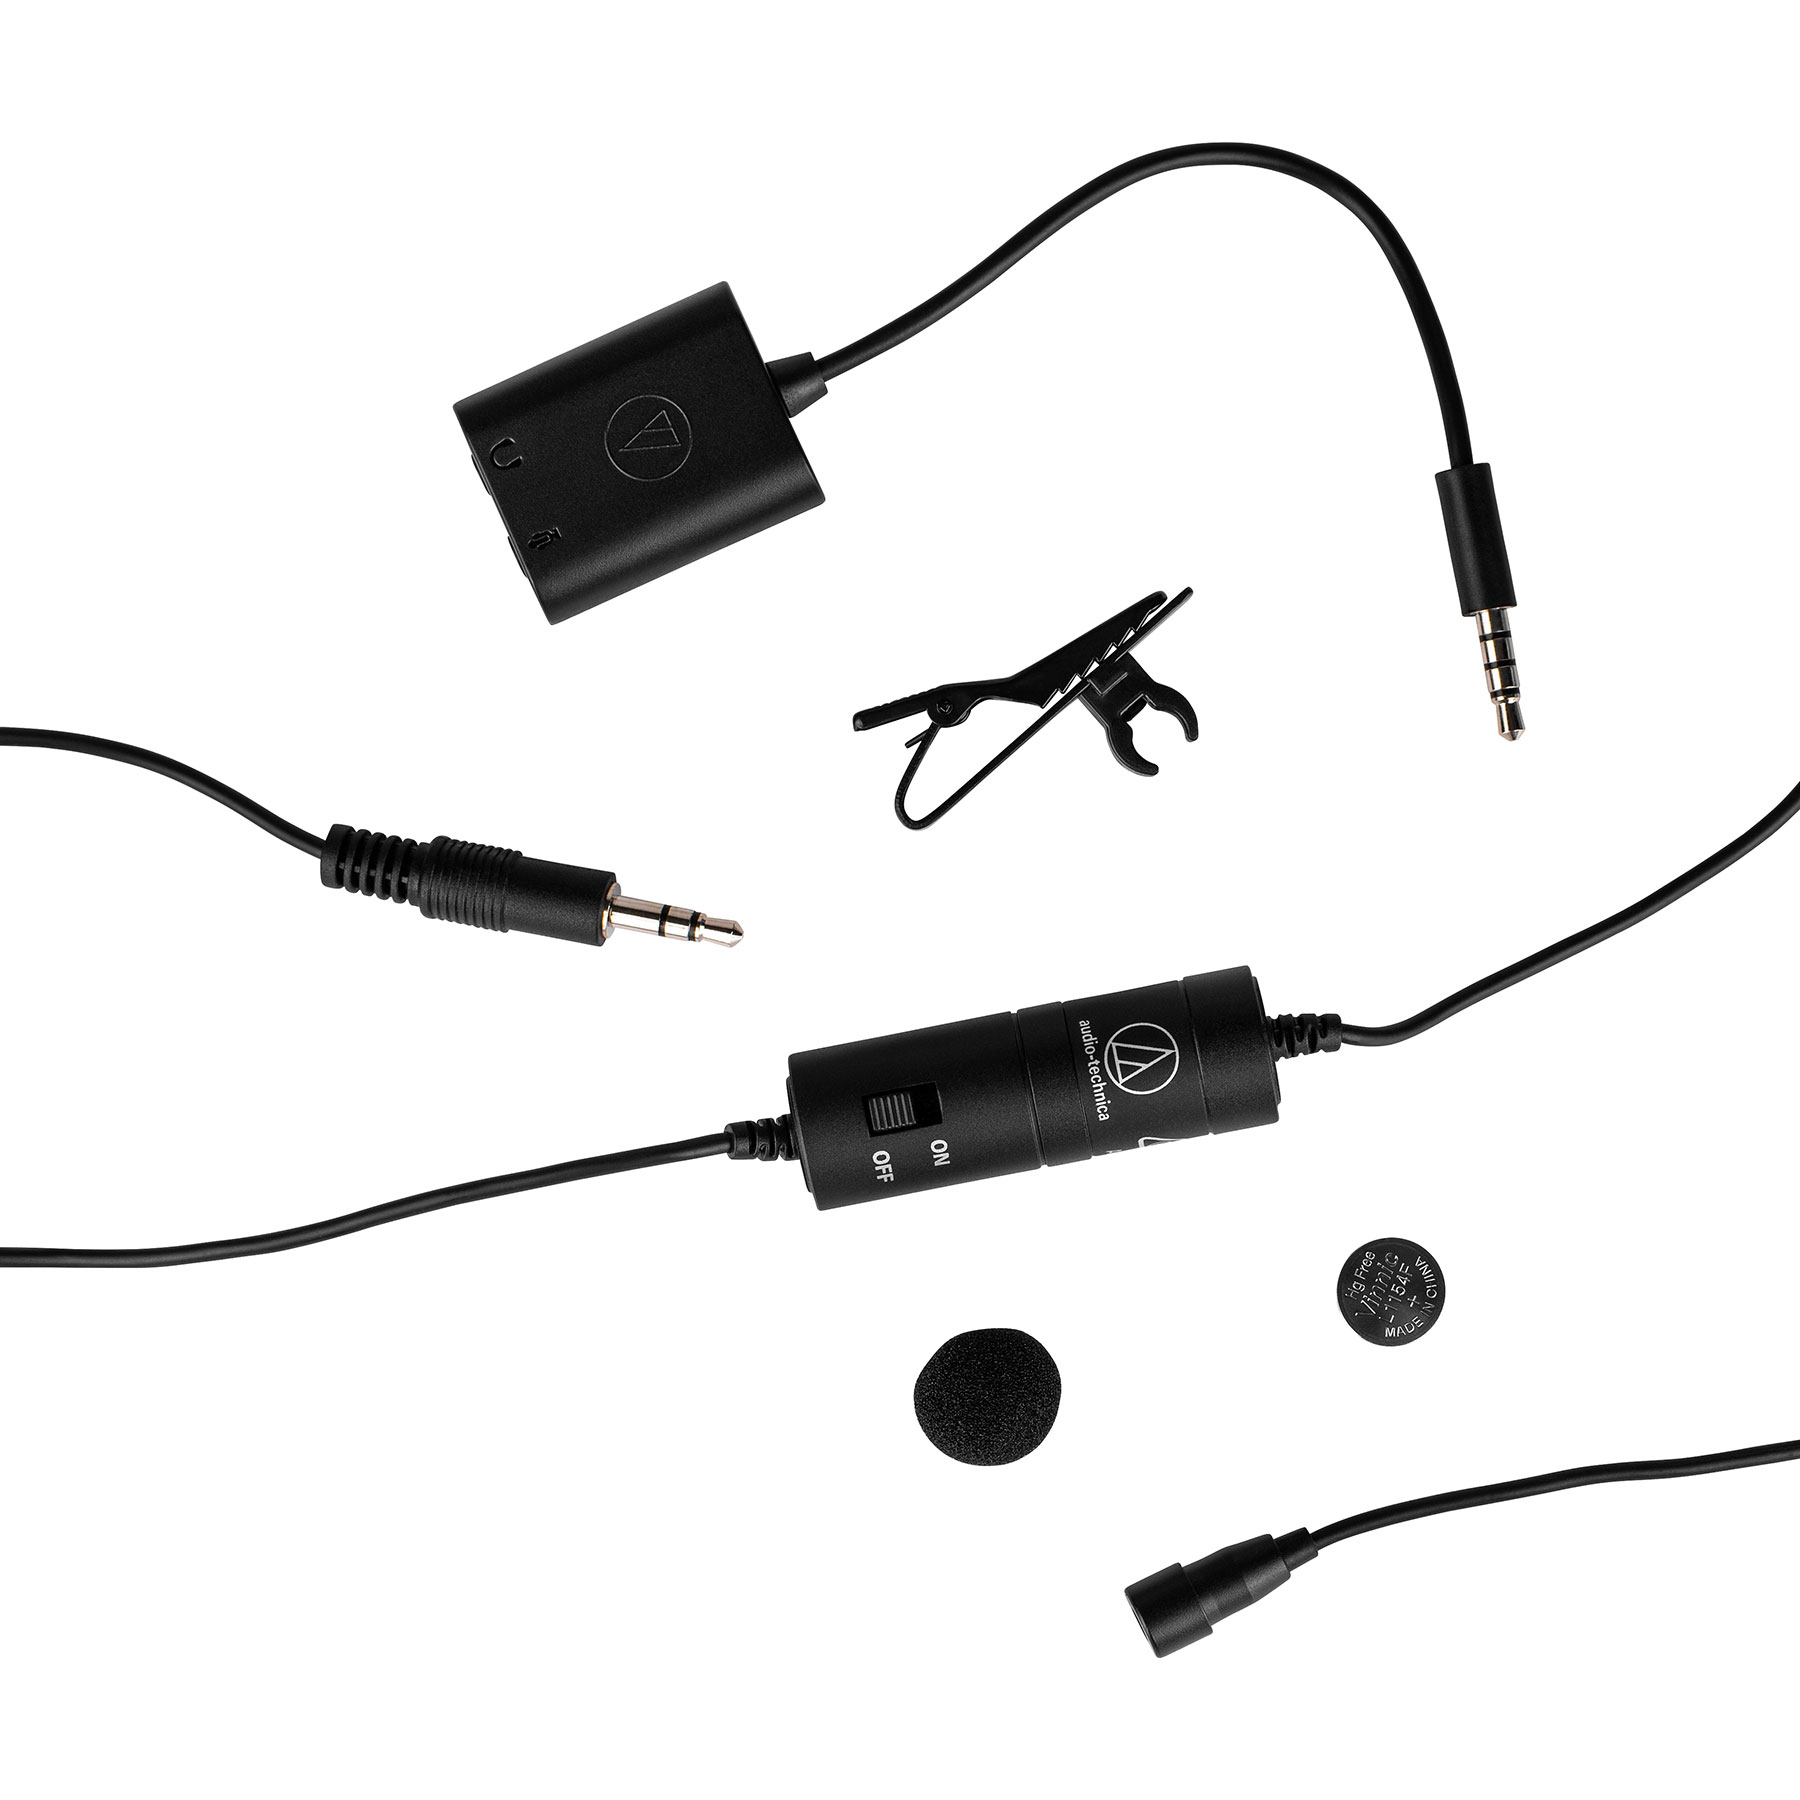
This is an extremely versatile and inexpensive lavalier microphone. As you can see it comes with the microphone and windscreen, a lapel clip, and a splitter that allows you to have the microphone as well as a set of headphones come out of something like your cell phone or an older laptop computer with a TRRS jack. It's powered off an LR44 battery, which is the same sort of battery that powers small calculators, pacemakers wristwatches, and the like. If you want to try to record directly to your computer or to a recorder with a 3.5mm input this will serve you well with fairly low out of pocket costs.
Like the Movo the pickup pattern of the microphone is omnidirectional, so it will pick up sounds from any direction. However, it's smaller than the 12mm capsule of the Movo so it's not going to pick up low sounds quite so easily.
Again like the Movo the one downside of this microphone is that there's a 20' cable running from the capsule to the recording unit. The battery compartment is along this cable, which can be annoying as well, and there's no LED indicating that the power supply is on or off so you can accidentally leave it on and not realize it if you're not careful. When I was using this microphone to help a hard of hearing student be able to hear me in class I tended to carry a packet of batteries just in case I left the unit on when I put it back in my desk after class.
Manufacturer's Specifications (opens in another window)
B&H Specifications (opens in another window)
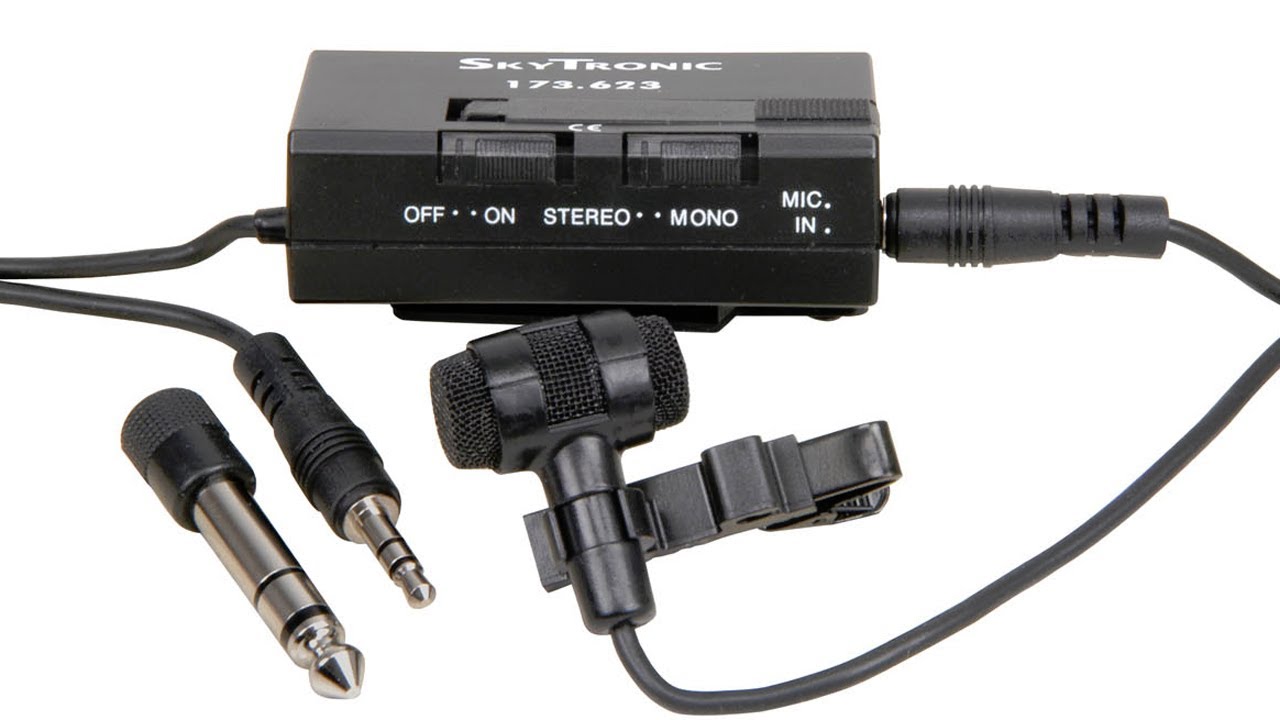
Unlike the other two lavalier microphones I mentioned here the Yoga EM-8 is a stereo microphone. It has two cardioid receivers set in opposition to each other, so the overall effect is bi-directional. The noise floor is not great so it hisses a lot.
There are two things about this microphone that are interesting, as well. You can switch the microphone between stereo and mono outputs, so if you find the stereo aspects of this microphone are not to your taste you can try it as a mono microphone. The other thing that's interesting is that there's a 3.5mm jack between the two capsules and the power pack, and then from the power pack to the computer or recorder. It's also possible to use this microphone with a ¼" jack with the provided adapter. The whole thing is powered off a single AA battery.
You'll note that the image for this entry is not labeled Yoga, but "Skytonic." That is because this is an extremely low-end microphone that is made in Taiwan for the rebranding market rather than as a product on its own. The company that produces it, Yoga, still makes the EM-8 but it no longer seems to be available via retail outlets anymore. I purchased mine from Maplin in the United Kingdom on a whim when I realized my point-and-shoot document camera had the ability to record audio from a 3.5mm jack, and as such I don't have a record of how much I paid to use instead of a list price, unfortunately. One of the reasons I ended up buying the ATR3350is is because the Yoga EM-8 is not really worth the cost. It is interesting as a stereo lavalier microphone, though, so worth knowing about as an example of a general type.
Manufacturer's Specifications (opens in another window)
Microphone Placement
It's not simply enough to have a good microphone. That microphone also needs to be placed in the best position possible to get the full sound of your voice. If all you're looking to do is record audio where you won't be seen that can be easier than if you're looking to both record audio and video, but in either case the most important thing is to make sure the microphone flatters your voice and makes you sound as you expect to. While certainly not perfect, the video below helps to illustrate what a difference proper microphone placement can make in terms of the quality of your voice even with a microphone not intended to be used for it. I've done nothing to improve the quality of the audio either in postproduction or by treating the room for recording. What you're getting here is the raw sound and video from each of the two webcams.
Proximity Effect
The reason my voice sounds fuller when a microphone is closer to my mouth is known as the proximity effect. Basically, when you're using a microphone with a non-omnidirectional pattern the difference in pressure between the front and back of the diaphragm is what helps to pick up the sound. Since higher frequency sounds tend to exert more pressure, microphones are built to compensate for that. That means that when the microphone is moved closer the lower end will be picked up more while the higher end drops off.
Effectively, what this means for your interview or recording is that men can have deeper, richer voices—and the gravitas we convey societally to those voices (think the "in a world..." of the stereotypical movie trailer)—simply by speaking closer to the microphone. This can be a double-edged sword, however, as speaking too close to the microphone can cause a man's voice to be overly-bassy and plosives can become overemphasized.
If you want added bass tones when recording over slides and the like the proximity effect can work to your benefit. Likewise, If you find that speaking into a microphone makes your voice deeper than you'd like or too unlike your natural speaking voice you may want to consider an omnidirectional microphone, moving the microphone further away from you, or finding a microphone designed to cut down on the proximity effect. If you go with the former two options you may need to position yourself to minimize reflected sound from the room. Obviously, however, regardless of your individual situation placing a microphone close enough to your mouth to really benefit from the proximity effect is going to look odd on video, and so you'll likely have to forego sounding like James Earl Jones when you wow your hiring committee.
Lavalier Microphone Placement
You will often see a lavalier microphone placed near the top of an article of clothing, especially along lapels in suits. After all, they are colloquially called "lapel" microphones, right? This may lead you to think that placement along the collarline is key. Pay close attention to how the microphone is actually placed on the speaker, though. Generally, what's being done is that the microphone is being placed as close to possible to a position about six inches from the mouth, which places the microphone about two inches above the line drawn by your nipples. Depending on how you're positioning the microphone it may not prove to be possible to center it perfectly, so really anywhere in a space between an imaginary line between your shoulders and one between your nipples that is close to that sternum spot is best.
One thing that's going to determine how you place the microphone is the type of clothes you wear and what, exactly, you can do to place the microphone on your person. Generally, along the button line of a button-down shirt works best if you're wearing one, or along the v-line of a collar towards the bottom. For women, they might even consider somewhere along their braline if all else fails. If you do place it along a bra, a coat lapel, or on a tie, however, you have to be careful to place it in such a way that fabric layers rubbing against each other doesn't get picked up more than your voice. Usually, a lavalier microphone will come with a clip to place it. This can be supplemented or replaced entirely through the use of moleskin, transpore, or gaffer's tape, especially if it needs to be placed very specficially or you don't have a clip handy. Another option are purpose-made adhesive disks or a vampire clip, which is a small clip attached to two pins that you press into a collar or along a lapel where multiple layers of fabric might hide the pins. Unless you're set on hiding your microphone, however, tape or the provided clip will generally work best. You might also experiment with the angle the microphone is placed at. I've seen both facing upwards and downwards recommended, but I think it's going to depend on your particular microphone more than some set standard I can suggest to you as a tip.
Finally, in some cases people want to avoid their microphone being visible to the audience. One way to do this is to buy a small microphone not likely to be picked up on the camera. In fact if you do this it's likely you can get away with a headset rather than having to pin the microphone to your clothes. It's much more expensive, however, and not necessary usually when interviewing or when teaching. If you still want to make the attempt, however, you might consider placing the microphone in a beard or along the hairline, instead. Often theatrical microphone placement techniques will come into play, but I'm not really able to speak to those with any level of authority.
Sound Treatment
No matter what microphone you have, an empty room with a lot of broad, flat surfaces is going to reflect your voice and sound echoey. Generally speaking (and certainly in a lot of the links down at the bottom of this post) the solution for this is to create a dedicated recording space where the combination of room shape and acoustic treament can either absorb or diffuse these errant sounds and make sure that they aren't picked up by your microphone. It's incredibly unlikely you're willing to create permanent acoustic treatment unless you're a serious audiophile or plan to be doing a lot of interviewing or recording in a dedicated space. And even if that's your plan serious acoustic treatment may not be within your budget. There are some tricks you can use to help mitigate any sound issues.
Before you do anything try recording something in the space you're going to be working in. If it sounds all right to you, then you're lucky and won't need to do any extra work. If there are some odd elements you'd like to remove then what you want to do is break up those broad reflective surfaces. Generally speaking a proper room treatment will include bass traps at the corners, acoustic panels to absorb sound on the walls, and possibly acoustic diffusers. In the absense of any of those items what you might do is record or stream in front of a bookcase in order to absorb any sound from speakers (if you aren't using headphones or earbuds), bring heavy blankets, thick moving blankets, or dedicated acoustic blankets that you can put in corners or around your camera and lights to help dampen your voice before it reaches those outer walls, and seek out locations that don't have tall ceilings or hardwood floors for the sound to bounce off of.
My office space, for example, has eight foot ceilings and carpet on the floor. I sit with a bookcase to my rear, which helps to diffuse any sound from speakers, and while the wall with the coffee cart is fairly flat the lights and camera help to break the space up. If I were being really serious about recording rather than interviewing I might make a frame out of PVC pipe and put some moving or acoustic blankets behind the lights and camera, but when I'm recording I'm typically using a fairly directional microphone anyway, so things sound ok. If you're reading this more for recording or a semi-permanent streaming space you may want to experiment a bit. An acoustic panel can look like a piece of decoration if built properly, but most people in the kind of price range I expect we're talking about go for pre-made acoustic panels which are hard to pretend are anything but what they appear to be. I wouldn't recommend them for a background if you're interviewing or lecturing online.
Audio Interfaces and Mixers
While in theory you could use an adapter to attach a microphone to your computer directly, the fact that most microphones output at something less than line level or simply won't output at all without phantom power means that you're really going to need something to connect between your computer and mic. And even if you aren't using a microphone that requires phantom power the preamps that come with something like the Blue Yeti Pro may turn out to be less than ideal for your purposes. Therefore if you're going to be recording for class it might be worthwhile to consider an inexpensive audio interface, dedicated recording unit, or a mixing board with the ability to output to your computer via USB.
Here, much like with the selection of microphone or camera I'd think about the purposes and environment you're likely to be in before purchasing any item. If all you're going to need is a way to connect a good microphone to your computer then a dedicated audio interface like the Focusrite Scarlett series might be enough for your purposes. If you want more ability to tweak the settings for individual microphones or you think you might be doing live interviews with guests for an online class then you might want to consider a mixing board that has a USB output. And if your setup needs to be portable, then you might consider a recorder with audio interface functions then something like the Zoom H6 might serve your purposes.
As you've no doubt noticed by now I am only really giving you opinions on specfic units I've owned, and so here I can't do the slide by slide comparison like I have for microphones. I'll mention what I like about the Zoom H6 below, but the USB-output mixer I own was a Goodwill purchase I repaired and cleaned up, so I don't know that a direct comparison would be fair. I'll provide a recording from it below as well so you can compare, but know that it wasn't purchased new in the first place.
Zoom H6
The Zoom H6 is a recorder and audio interface with four XLR/¼" "Combi" inputs (note, however, that each of the tracks are mono, so if you have a stereo microphone you'll need to use two of those inputs) as well as a 3.5mm input that can handle both stereo and mono microphones. It has the ability to add different "capsules" to the top of the unit, which allow you to adjust for different recording conditions, so it could be a decent all-around recorder if you need something that can operate in different conditions. I only have two of the capsules—the X/Y and mid/side ones—which I've written more about above.
While I like this recorder quite a bit, the "H6" in its name is a bit of misomer. It really has four inputs plus the capsule at the top. Most of those capsules can record in stereo and, in the case of the X/Y capsule, have an added 3.5mm input. Zoom does provide a capsule that gives you an additional two inputs but they cannot provide phantom power and so are useless for condenser microphones. If you don't think you'd need even four inputs and aren't interested in the capsules Zoom also offers some smaller recorders that might serve your needs, as well.
So what should I get?
I'd argue the most important considerations when thinking about what sort of interface you need—at least for the purposes I expect most of you are going to put them to—is the quality of the microphone preamps and the amount of inputs available. I'm not sure I have enough experience to speak definitively about what makes a good microphone preamp, but to be honest anything more than just a direct input into your computer is going to sound better than what you'll have otherwise. If you are really concerned, you might look into Sound on Sound's "Choosing an Audio Interface" article or B&H's article explaining audio interfaces to musicians. Know though that either source is probably more exacting than you need to be for your purposes if you're just looking for a source for streaming or recording classes.
In terms of inputs, the simple truth is the more input channels available to you the more expensive the unit is going to be. So if you're sure you're going to only use it with one microphone you can get something that's much less expensive than if you want to have the option of recording multiple sources.
Speakers and Headphones
Once you have the microphone set up and placed properly, you'll want to address the other part of the equation—speakers or headphones. Generally, you want to avoid using speakers. This can be less obvious if you primarily record, but once you introduce a microphone into the room there's a possibility it will pick up anything that is said by others and played through your speakers despite some software's attempts at audio suppression. If you are using a cardioid microphone this can be mitigated through proper microphone placement, but an omnidirectional microphone is likely to cause a nasty echoing effect with whoever you're interacting with as it picks up whatever they've just said and plays it back to them.
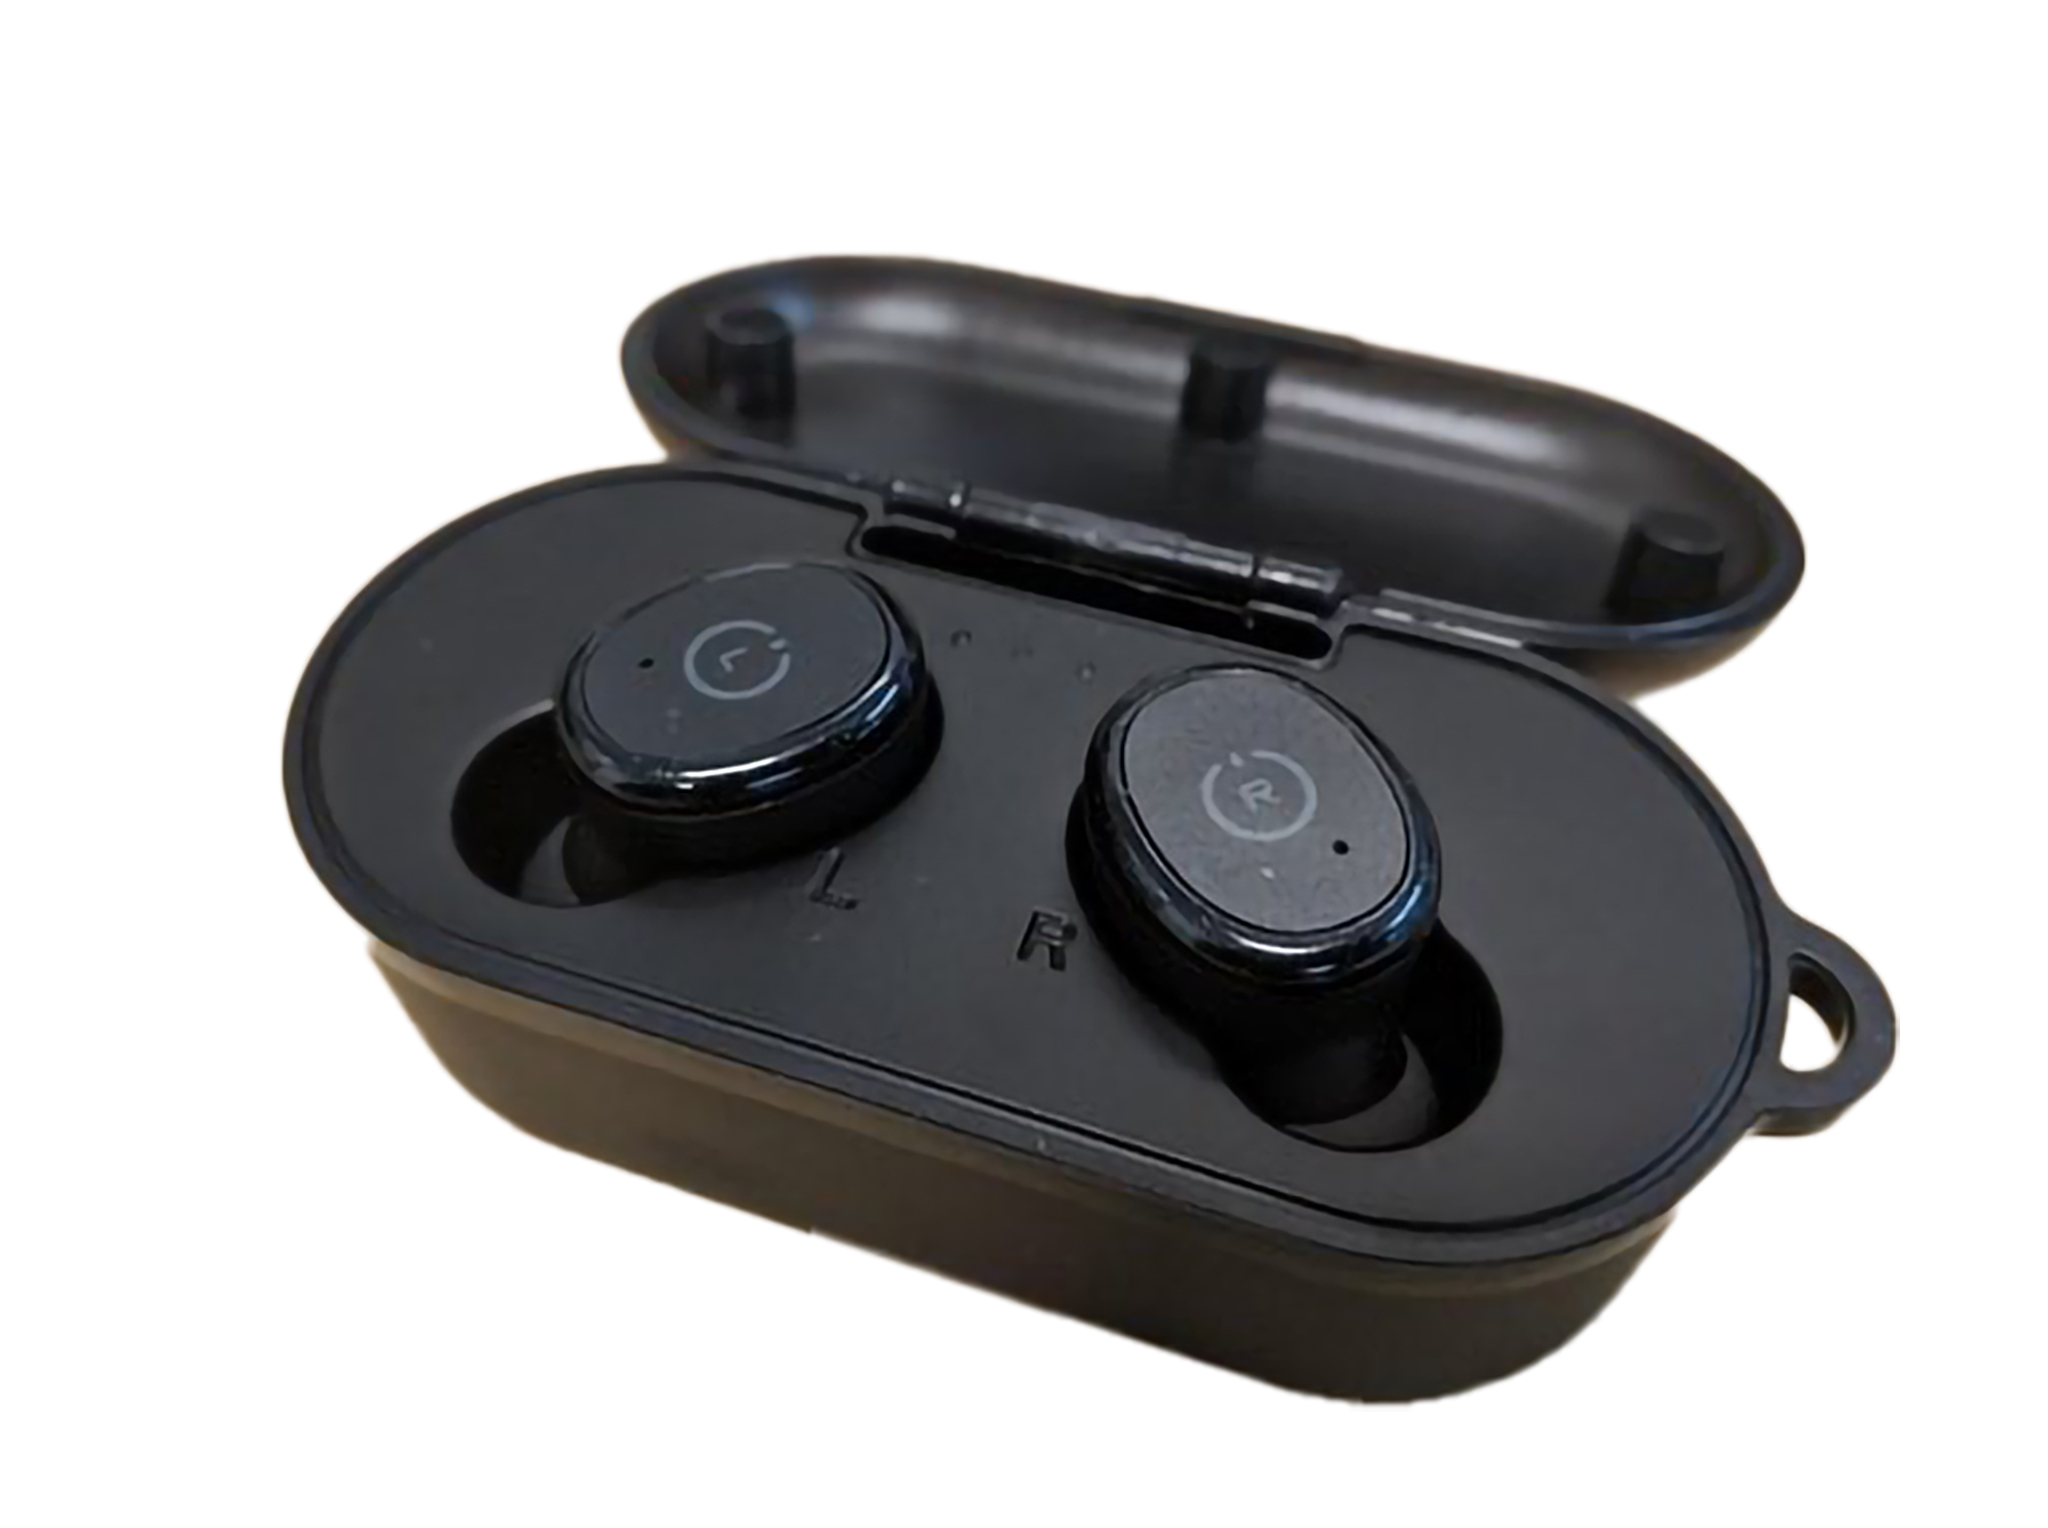
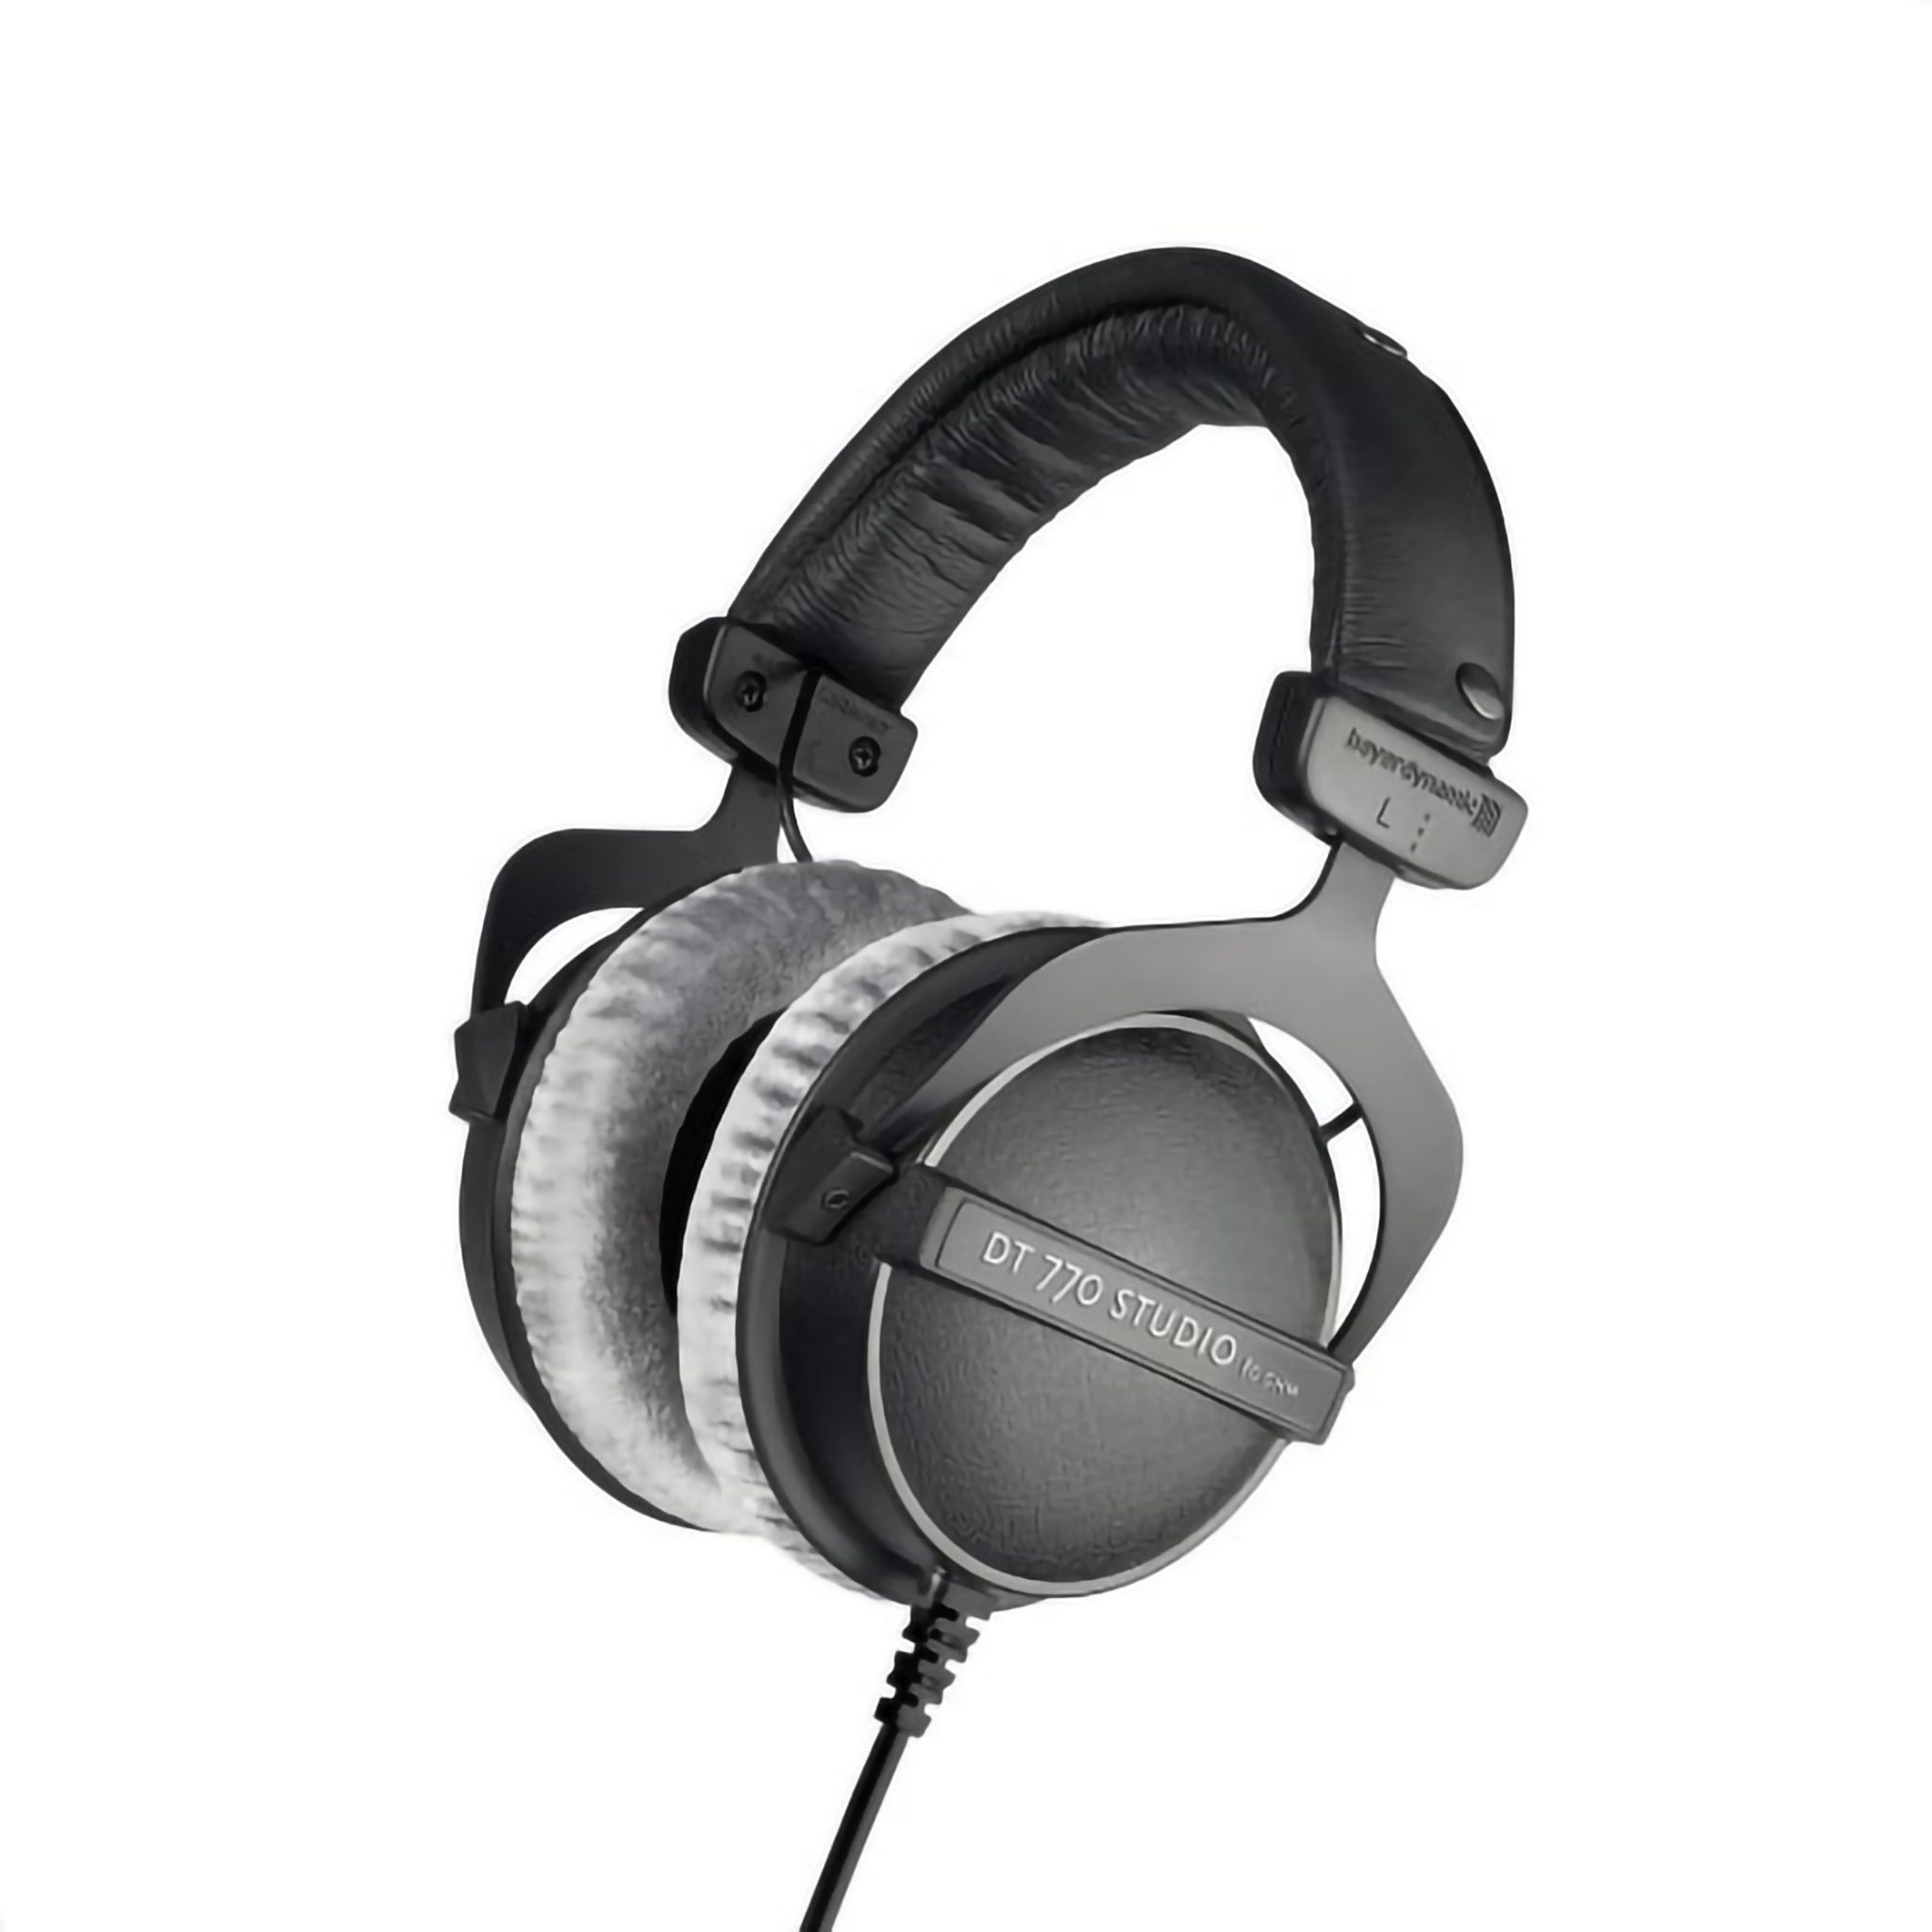
If you're following my advice above you're going to be using a lavalier microphone if you're on camera, since they tend to be visually inobtrusive. They're usually omnidirectional, so you're going to have to deal with the possibility of unintentionally picking up noise. For this reason, you should consider an inexpensive set of bluetooth earbuds and running the sound through them if you can. Until recently I didn't have a pair as I generally prefer over-ear headphones for listening to music or speech, so I purchased this set (which charges via micro-USB or the Qi protocol) for $40 via the manufacturer's website. The goal here isn't to break the bank, but just to make sure you can hear the committee rather than getting the absolute best sound possible. If you already have a pair of wired earbuds you can also try snaking them down through your clothes and out to your computer, but I doubt you'll have enough cable to do this without it being noticed unless you buy an extension cable. Adding that cable, however, introduces another point of failure in your setup that you need to be aware of.
If you're recording rather than interviewing or interacting live with an audience then you have the luxury of getting your audio closer to perfect than you might otherwise. To help you do that I would invest in a good set of headphones to do your sound postprocessing if you can. You'll be able to pick up issues wearing headphones that you might not notice using your computer speakers and correct them. This will improve the overall quality of your audio in postprocessing and make you sound like the professional you are.
Postprocessing (recorded video only for instructors)
-
Software options
-
Audio
- Audacity
- Reaper
- Apple's education bundle. Much more than Reaper, but you get Final Cut Pro which might be worthwhile if you're doing videos for a class.
-
Video
- Divinci Resolve
- Final Cut Pro
- Don't have access to Premiere - blow the money on the subscription for a month? What would it be?
- LUTs? Or do we mention that with OBS and then again here?
-
Audio
Conclusion
Much like the rest of the sections above the bibliography can be accessed by clicking on the link below. I've tried to separate it out roughly by the topics above, so you should be able to navigate to things you are more curious about fairly easily. I also intend to add to it as more things come across my radar, so treat it as though it were a living document rather than set in stone.
Also, I'm under no illusion that I've answered every question you might have, or that I have dealt with everybody's individual situation with regards to recording or interviewing. If you're confused by anything I've written or want more information, please don't hestitate to contact me at the email address on my CV and I'll be happy to either answer the question for you or to point you in the direction of a person, video, or help guide that might be able to do so. I am also sure that I mention things I've done, or will do, that have fallen between the cracks. I will catch those on further revision, but if you see anything particularly egregious please let me know, again at the email address above. As I mentioned in the nota bene at the start I started this post with one intention in mind and felt to need to expand it to try to fix what is, ultimately, an unfixable problem. I do hope it provides some of you, though, with a bit of stability in an unstable time.
Bibliography
General Advice
- “BONUS Streaming Tips for NON-Gamers! (IRL, Coding, Art, Education Streaming Tips).” 2020. YouTube Video. YouTube. https://www.youtube.com/watch?v=XjcoF0sQQio.
- “Cool and Credible Web Video: Old Rules, No Rules, or New Rules?” n.d. Er.Educause.Edu. Accessed June 27, 2020. https://er.educause.edu/articles/2011/12/cool-and-credible-web-video-old-rules-no-rules-or-new-rules.
- “How to Build a Multi-Camera Live Streaming Setup.” 2020. Wistia. May 14, 2020. https://wistia.com/learn/production/how-to-build-a-multi-camera-live-streaming-setup?fbclid=IwAR1Am7MyclZpEIySWYXPvJCyjxICtQup5IEQc5Sh1ekdlM7WO19nxtsDdzc.
- Neale, Adam. 2015. “10 Tips For Filming The Perfect Talking Heads Interview.” Bold Content Video Production. March 6, 2015. https://boldcontentvideo.com/2015/03/06/10-tips-filming-perfect-talking-heads-interview/.
- ponysmasher. 2020. “Filmmaking Tools I Use (and Even Cheaper Alternatives).” YouTube Video. YouTube. https://www.youtube.com/watch?v=FMx0Y5Uq-Tc.
- “Shooting Talking Heads - Tips for Shooting Video Interviews.” n.d. Www.Youtube.Com. Accessed June 29, 2020. https://www.youtube.com/watch?v=Jm-s-NO6fUQ.
Visual Aspects
Cameras
Cell Phone as a Webcam
- EposVox. 2020. “This One Technology Has REVOLUTIONIZED the Broadcast Industry... | NDI Explained.” YouTube Video. YouTube. https://www.youtube.com/watch?v=Ho8x4vJXMw0.
- pal2tech. 2020. “Use Your Phone as a Webcam | IPhone, Mac, PC (2020).” YouTube Video. YouTube. https://www.youtube.com/watch?v=1rXsWPEZosQ.
- StreamGeeks. 2020. “How to Connect NDI with Zoom.” YouTube Video. YouTube. https://www.youtube.com/watch?v=QTOJfjudwQA.
- “Using NDI® in Skype.” n.d. NewTek. Accessed June 30, 2020. https://www.newtek.com/blog/tips/using-ndi-in-skype/.
DSLR and Mirrorless
- Camber Motion. 2020. “Understanding Camera Metering – Best Metering Mode for Video Exposure (Evaluative, Center, or Spot).” YouTube Video. YouTube. https://www.youtube.com/watch?v=SYJdcXnxfvw.
- “Comparing Focal Lengths for Talking Head Videos.” 2017. YouTube Video. YouTube. https://www.youtube.com/watch?v=YGm1q2T2Vv0.
- DSLR Video Shooter. 2017. “How to Use Shutter Speed, Aperture and ISO For Video.” YouTube. https://www.youtube.com/watch?v=sMEnDA2DAic.
- EposVox. 2020. “Your Panasonic Camera Is Now a Webcam! ...Sorta, Maybe? [SETUP GUIDE}.” YouTube Video. YouTube. https://www.youtube.com/watch?v=34jyi7JWzVE.
- Lazarov, Tihomir. 2016. “Why Cinema Lenses Are Measured With T-Stops And What’s the Difference With An F-Stop?” Fstoppers. December 28, 2016. https://fstoppers.com/education/why-cinema-lenses-are-measured-t-stops-and-whats-difference-f-stop-158541.
- wolfcrow. 2020. “What Is the Best Aperture for Filmmaking?” YouTube Video. YouTube. https://www.youtube.com/watch?v=v6FeL7h7h18.
- “What Is ISO in Photography?” 2019. Modula. July 17, 2019. https://wp-modula.com/what-is-iso-in-photography/.
Processing
- “The Beginners Guide to OBS.” n.d. Streamshark.Io. Accessed July 11, 2020. https://streamshark.io/obs-guide/.
- EposVox. 2019. “My OBS Studio ‘Secret Sauce’ EXPLAINED! How to Get the BEST Quality Live Streams on Twitch or Mixer!” YouTube Video. YouTube. https://www.youtube.com/watch?v=fQ04pIcpMkM.
- --. “✪ OBS Studio MASTER CLASS 2018 ✪ - YouTube.” n.d. Www.Youtube.Com. Accessed July 17, 2020. https://www.youtube.com/playlist?list=PLzo7l8HTJNK-IKzM_zDicTd2u20Ab2pAl.
- Gaming, Alpha. 2020. “OBS For Brand New Streamers (Creating Scenes, Adding Custom Widgets, and MORE).” YouTube Video. YouTube. https://www.youtube.com/watch?v=EuSUPpoi0Vs.
- “How To Set Up a Live Stream With OBS Studio | A Guide to Twitch Streaming Your Games.” 2020. YouTube Video. YouTube. https://www.youtube.com/watch?v=SQPuSRghxMM. (NB: you may want to take or leave the advice regarding microphones, as they are obviously going to promote their own product. The second portion of the video, lighting, and the OBS section of the setup may be of use, however.)
- Michael Feyrer Jr. 2020. “STEP BY STEP - Stream from OBS to Zoom on Mac in 2020.” YouTube Video. YouTube. https://www.youtube.com/watch?v=S46Zz1TUeyQ. NB: there is a newer version of these instructions at the citation below.
- Michael Feyrer Jr. 2020. “FIXED! Obs To Zoom Mac Step by Step in 2020.” YouTube Video. YouTube. https://www.youtube.com/watch?v=yuwJ84f6E4I.
- StreamGeeks. 2020. “How to Connect Zoom & OBS - The Right Way!” YouTube Video. YouTube. https://www.youtube.com/watch?v=YMXHYRtoDWs&t=112s.
Framing
- Aiello, Arthur. 2000. “Getting Started: Video Composition.” Videomaker. June 1, 2000. https://www.videomaker.com/article/7596-getting-started-video-composition.
- “HOW TO FILM YOURSELF.” 2018. YouTube Video. YouTube. https://www.youtube.com/watch?v=dEfwjZZeBC4.
- “How to Frame a Talking Head | Shoot Marketing Video Like a Pro.” 2017. YouTube Video. YouTube. https://www.youtube.com/watch?v=3_0WNu-Vo0A.
- “Shot Composition.” 2011. Video Journalism. July 28, 2011. https://shumwayvideo.com/shot-composition/.
- “Talking Head Videos Tips!” 2017. YouTube Video. YouTube. https://www.youtube.com/watch?v=kPbEGa_u8JY.
Staging
- Becki and Chris. 2018. “How To Design A YouTube Filming Room.” YouTube. https://www.youtube.com/watch?v=IIpkDMp5wAw.(NB: This may be useful for those of you lucky enough to have a dedicated office space to dedicate to online instruction)
- Becki and Chris. 2019. “How To Style A Shelf.” YouTube Video. YouTube. https://www.youtube.com/watch?v=Z5WMAVCbld0.(NB: I personally am loath to use my books as decorative items and I would never lean them purposely as that is bad for their spines. The advice given can be modified, though, so take it in a general sense.)
- Chi, Yuliana. 2020. “DIY Stand Holders for V-Flat/Background Board.” YouTube Video. YouTube. https://www.youtube.com/watch?v=Jy5xLTAdkYg.
- Cityline. 2018. “The Designer Secrets to Make Your Surface Clutter Look Chic as Heck.” YouTube Video. YouTube. https://www.youtube.com/watch?v=4F43R5MnWrM.
- “How To Find Your Design Style for YOUTUBERS.” 2020. YouTube Video. YouTube. https://www.youtube.com/watch?v=-58k_I_rcD4. (NB: This is not useful for interviews, and is only really applicable when recording if you are going to have a dedicated recording space. But the section regarding background color choice and skin tone might be useful both if you're painting a space and if you're using a backdrop.)
- Indy Mogul. 2020. “Parks & Rec Production Designer Explains How Design Creates Story.” YouTube Video. YouTube. https://www.youtube.com/watch?v=IlB3IBOJQgw.(NB: This is interesting to look at because the production designer, despite apparently being interviewed in an ad-hoc space, has obviously followed similar rules to those he describes for set design for his background.)
- Moda Misfit. 2020. “How to Style a Shelf Without Clutter.” YouTube Video. YouTube. https://www.youtube.com/watch?v=4P33ZHvYzcg.
- YCImaging. 2020. “Minimalist Office Tour 2020 (Color Scheme, Youtube Filming Angles, & Large OLED TV).” YouTube Video. YouTube. https://www.youtube.com/watch?v=03GwgqWMTHg.
The Rule of Three
- Cityline. 2018. “The Designer’s ‘Rule Of 3’ Takes the Guess-Work out of Your Décor.” YouTube Video. YouTube. https://www.youtube.com/watch?v=tyV45kNey2M.
- Evolve Premier Realty. 2018. “Rule of Three’s in Home Decorating.” YouTube Video. YouTube. https://www.youtube.com/watch?v=0Jrb7pjA4LM.
- Süßen, Matthias. 2017. “Michael Rosenblum’s ‘Five Shot’ Method for Meaningful Video Sequences.” Matthias Süßen. April 11, 2017. https://matthias-suessen.de/en/2017/04/michael-rosenblums-five-shot-method-for-meaningful-video-sequences/.
Lighting
- “5 Easy Studio Setups With One Light.” 2015. Digital Photography School. May 12, 2015. https://digital-photography-school.com/5-easy-studio-setups-with-one-light/.
- Andyax. 2020. “Affordable Lighting to Spice up Your Videos!” YouTube Video. YouTube. https://www.youtube.com/watch?v=jJOGu0nfTp8.
- Andyax. 2020. “Cinematic Teal and Orange Lighting.” YouTube Video. YouTube. https://www.youtube.com/watch?v=KCqcG4q5x5A.
- Andyax, 2013. “Easy Light Setup to Improve Your Films.” 2013. YouTube Video. YouTube. https://www.youtube.com/watch?v=NVIbirzZn0M.
- Antos, Tom. 2020. “DIY vs Pro Light Diffusion Frame from Digital Juice.” YouTube Video. YouTube. https://www.youtube.com/watch?v=CbIVrv8943E.
- Becki and Chris. 2020. “One Light Three Ways - How To Get The Most Out Of Your One Light Set-Up.” YouTube Video. YouTube. https://www.youtube.com/watch?v=vJIL7WAq22w.
- Cinecom.net. 2017. “5 Cinematic LIGHTING HACKS.” YouTube. https://www.youtube.com/watch?v=PNzG_ZxFLag.
- “A Clever Way To Hold A DIY Foam Board Reflector/Flag.” 2014. DIY Photography. January 28, 2014. https://www.diyphotography.net/clever-way-hold-diy-foam-board-reflectorflag/.
- Delaney Media. 2020. “Youtube Video Lighting Setup for Beginners.” YouTube Video. YouTube. https://www.youtube.com/watch?v=NJRzWgF9k9c.
- “DIY Bounce for Lighting Videos [Dollar Store Lighting Hack].” 2018. YouTube Video. YouTube. https://www.youtube.com/watch?v=JoJjYId97Ig.
- DIY Perks. 2020. “DIY Studio Lights - How to Build Your Own!” YouTube Video. YouTube. https://www.youtube.com/watch?v=DhbMnQt14_o.
- DSLRguide. 2020. “DIY Cinematic Lighting Setup - $50.” YouTube Video. YouTube. https://www.youtube.com/watch?v=tAWAuGcQ8Zc.
- Edelman, Joe. 2020. “DIY Photography Studio Reflector Holder and One Light Portrait Lighting Tutorial.” YouTube Video. YouTube. https://www.youtube.com/watch?v=FJlvwCQh1F4.
- Film Riot. 2020. “DIY Bounce Board & Interview Lighting!” YouTube Video. YouTube. https://www.youtube.com/watch?v=TAcY5ob2UnE.
- Film Riot. 2020. “DIY Diffusion & Butterfly Frame.” YouTube Video. YouTube. https://www.youtube.com/watch?v=1DaSjG74-WU.
- Film Riot. 2020. “$10 DIY Light Stand!” YouTube Video. YouTube. https://www.youtube.com/watch?v=lJ5rZrNQBXo.
- “$40 DIY CAKE PAN LIGHT... Better than a $1000 Video Light?!?” 2019. YouTube Video. YouTube. https://www.youtube.com/watch?v=IFON04_L3zk.
- GetBackUp Productions. 2020. “Cake Pan Video Light Challenge.” YouTube Video. YouTube. https://www.youtube.com/watch?v=7G11WL2xrW8.
- Hellerman, Jason. 2019. “Types of Film Lights (and How to Use Them).” No Film School. May 7, 2019. https://nofilmschool.com/types-of-film-lights.
- “How to Light People With Glasses and Avoid Glare.” 2017. YouTube Video. YouTube. https://www.youtube.com/watch?v=9NWAcK-wM80.
- “How To LIGHT With JUST ONE LIGHT!” 2017. YouTube Video. YouTube. https://www.youtube.com/watch?v=BjtcHig6DrU.
- “IKEA LED Bulbs: Good Enough for Video Lighting?” 2018. YouTube Video. YouTube. https://www.youtube.com/watch?v=R9tRSoMCD9I.
- McKinnon, Peter. 2020. “CHEAP LIGHTING SETUP on a Budget! - DIY.” YouTube Video. YouTube. https://www.youtube.com/watch?v=AHi35Q__WeY.
- McKinnon, Peter. 2020. “Make Your PHOTOS & VIDEOS More PROFESSIONAL!” YouTube Video. YouTube. https://www.youtube.com/watch?v=yzbBAkbgfW4.
- “More Clever Ways To Mount Foam Board Reflectors and Flags.” 2014. DIY Photography. March 19, 2014. https://www.diyphotography.net/clever-ways-mount-foam-board-reflectors-flags./
- Potato Jet. 2020. “How These Make Your Camera Look Cinematic | Circular Polarizers & ND Filters.” YouTube Video. YouTube. https://www.youtube.com/watch?v=AbuynZ_BhUI.
- Potato Jet. 2020. “10ish Cinematic Lighting Setups... ONLY ONE LIGHT.” YouTube Video. YouTube. https://www.youtube.com/watch?v=iiUTTk67kXE.
- RocketJump Film School. 2020. “Lens Filters 101.” YouTube Video. YouTube. https://www.youtube.com/watch?v=7x7oRoYsrr4.
- RocketJump Film School. 2020. “Lighting 101: Quality of Light.” YouTube Video. YouTube. https://www.youtube.com/watch?v=Jw066PBZe60.
- Video Influencers. 2015. “Video Lighting Tutorial.” YouTube Video. YouTube. https://www.youtube.com/watch?v=XqeCHzk2RdA.
- “What Is CRI? The Ultimate Guide to the Color Rendering Index | Waveform Lighting.” n.d. Www.Waveformlighting.Com. Accessed July 18, 2020. https://www.waveformlighting.com/tech/what-is-cri-color-rendering-index.
- YCImaging. 2020. “Cheap Music Video Lighting Tips (Vlog).” YouTube Video. YouTube. https://www.youtube.com/watch?v=loaCN6DZ0qM.
- YCImaging. 2020. “I Made A DIY Aputure 120D for $50! (Cheap Video Lighting).” YouTube Video. YouTube. https://www.youtube.com/watch?v=HN00nlDU3HU.
Lighting Darker Skin
- Beyond Photography. 2020. “ADVANCED Spot Metering Techniques (Using Shadow & Highlight) !!!!” YouTube Video. YouTube. https://www.youtube.com/watch?v=FoYv41wLUjw.
- “The Cinematography of Moonlight with Cinematographer James Laxton.” 2017. YouTube Video. YouTube. https://www.youtube.com/watch?v=kr6aYjtT288.
- Filters, LEE. 2020. “Lighting Skin Tones.” YouTube Video. YouTube. https://www.youtube.com/watch?v=grDY2Rq8NOw.
- Jackson, Posted by Alexxiss. “Cinematography Tips & Tricks for Lighting Various Skin Tones.” Entertainment Creative Group. ECG, May 4, 2020. https://www.ecgprod.com/cinematography-tips-tricks-lighting-various-skin-tones/.
- Hallease. 2018. “How I Light My Melanin.” YouTube. https://www.youtube.com/watch?v=ls_AlSCYjjI.
- Hallease. 2020. “How I Get That Film Look.” YouTube Video. YouTube. https://www.youtube.com/watch?v=gvAmhjxrVl4.
- Harding, Xavier. n.d. “Keeping ‘Insecure’ Lit: HBO Cinematographer Ava Berkofsky on Properly Lighting Black Faces.” Mic. https://www.mic.com/articles/184244/keeping-insecure-lit-hbo-cinematographer-ava-berkofsky-on-properly-lighting-black-faces.
- Larrow, Aundre. n.d. “10 Tips for Photographing Darker Skin Tones | Create.” Create.Adobe.Com. Accessed June 24, 2020. https://create.adobe.com/2017/11/28/_10_tips_for_photographing_darker_skin_tones.html.
- Moment. 2020. “How To Photograph Dark Skin Tones | Aundre Larrow.” YouTube Video. YouTube. https://www.youtube.com/watch?v=XRVMFqb1Y2I.
- Shameless Maya. 2020. “Lighting for Diverse Skin Tones.” YouTube Video. YouTube. https://www.youtube.com/watch?v=QhVOLaRHv94.
- “Using Zoning System In Spot Metering & Exposing Darker Skin Tone.” 2017. YouTube Video. YouTube. https://www.youtube.com/watch?v=c3nq6qOBF-0.
- Variety. 2020. “‘Insecure’ Cinematographer Patrick Cady - Variety Artisans.” YouTube Video. YouTube. https://www.youtube.com/watch?v=46XB-kicjcI.
Audio Aspects
General Sound
- EposVox. 2020. “Stream Audio Quality Is NOT Hard... Stop Scaring Away Viewers!” YouTube Video. YouTube. https://www.youtube.com/watch?v=4KLCE_REbw4.
- Fox, Arthur. “What Are Top, End & Side-Address Microphones? (+ Examples).” My New Microphone, March 31, 2020. https://mynewmicrophone.com/what-are-top-end-side-address-microphones-examples/.
- “Sweetwater’s Vocal Mic Shootout.” n.d. Www.Sweetwater.Com. Accessed June 24, 2020. https://www.sweetwater.com/feature/vocal-mic-shootout/.
- “Home.” n.d. Teach Me Audio. Accessed June 24, 2020. https://www.teachmeaudio.com/.
Lavalier Microphone Placement
- Deity Microphones. 2020. “How To Hide A Lav Microphone On Every Outfit!” YouTube Video. YouTube. https://www.youtube.com/watch?v=ckSiYcX6HT8.
- “Essential Problem-Solving Accessories for Lav Mics.” n.d. B&H Explora. Accessed June 24, 2020. https://www.bhphotovideo.com/explora/pro-audio/features/essential-problem-solving-accessories-for-lav-mics.
- “How to Put a Lavalier Microphone on a T-Shirt.” 2016. YouTube Video. YouTube. https://www.youtube.com/watch?v=F_OWfO22_7o.
- Judd, Curtis. 2020. “Getting the Best Sound from Your Lavalier Microphone.” YouTube Video. YouTube. https://www.youtube.com/watch?v=bR4f8zTmmag.
- Kwan, Carl. 2020. “How to Properly Put On a Lavalier Microphone.” YouTube Video. YouTube. https://www.youtube.com/watch?v=BjMg--3-SxI.
- TheProGuys. 2020. “Audio for Video - How to Mic an Interview Subject.” YouTube Video. YouTube. https://www.youtube.com/watch?v=7oYar6hu1pM.
- “PRO TIP: Lavalier Mics.” 2016. YouTube Video. YouTube. https://www.youtube.com/watch?v=FG78T1l88_w.
- “PRO TIPS: The Infamous Lavalier Microphone.” 2015. Seattle Sound Guy. February 14, 2015. https://seattlesoundguy.wordpress.com/2015/02/14/pro-tips-the-infamous-lavalier-microphone/.
- “7 Great Techniques for Hiding Lav Microphones.” 2014. No Film School. October 13, 2014. https://nofilmschool.com/2014/10/7-great-techniques-hiding-lav-microphones.
Sound Treatment
- “All About Diffusion.” 2015. YouTube Video. YouTube. https://www.youtube.com/watch?v=vb30CICG68c.
- Becki and Chris. 2020. “Building Acoustic Sound Panels - Do They ACTUALLY Make a Difference?” YouTube Video. YouTube. https://www.youtube.com/watch?v=k_O4DdxIjTo.
- Booth Junkie. 2016. “A Voiceover Vocal Booth in 10 Minutes - for Free?” YouTube. https://www.youtube.com/watch?v=5Se381sERrY.
- Booth Junkie. 2017. “Improvised Vocal Booth in a Hotel Room.” YouTube. https://www.youtube.com/watch?v=cP5Q6k7ZtO8.
- “DIY Acoustic Sound Panels.” n.d. Becki and Chris. Accessed July 3, 2020. https://www.beckiandchris.com/blog/diy-acoustic-sound-panels.
- DSLR Video Shooter. 2019. “GIANT DIY Sound Blanket Panels For Better Audio and Lighting!” YouTube Video. YouTube. https://www.youtube.com/watch?v=4ZeECB76Pdo. (NB:This is an interesting idea, but may be too large for the space you're recording in. Nevertheless, it might serve as inspiration.
- “GIK Acoustics: The Basics, Bass Traps, Diffusion, Panels.” 2012. YouTube Video. YouTube. https://www.youtube.com/watch?v=G4O4ZpYVesc.
- “High-Performance DIY Acoustic Panels (Build Guide).” 2019. YouTube Video. YouTube. https://www.youtube.com/watch?v=qczNxoG8s6o.
- “How I Made DIY Acoustic Panels For Under 5 Dollars A Panel in 2020.” 2020. YouTube Video. YouTube. https://www.youtube.com/watch?v=hL-VPld7coI.
- “How to Reduce Microphone Noise in Skype Calls.” n.d. Closedlooplabs.Com. Accessed June 24, 2020. https://closedlooplabs.com/guide/how-to-reduce-microphone-noise-in-skype-calls.
- MapleViewStudios. 2020. “Review of Sound Blankets to Use for Acoustic Room Treatment in a Recording Studio.” YouTube Video. YouTube. https://www.youtube.com/watch?v=XUnLsNjI25M.
- Saturday Sound Guy. 2017. “Acoustic Blankets for Set or Studio.” YouTube Video. YouTube. https://www.youtube.com/watch?v=C-WkWkDMxdQ.
- “Using Soundproof Blankets to Reduce Noise.” 2019. Residential Acoustics®. April 19, 2019. https://residential-acoustics.com/using-soundproof-blankets-to-reduce-noise/.
- VocalBoothToGo. 2019. “Sound Treating Home Studio with Acoustic Blankets Producers Choice. Acoustic Room Treatment Review.” YouTube Video. YouTube. https://www.youtube.com/watch?v=G7fvuBp9Tt8.
Interfaces and Mixers
- “Choosing An Audio Interface.” n.d. Www.Soundonsound.Com. Accessed July 23, 2020. https://www.soundonsound.com/sound-advice/choosing-audio-interface.
- Krause, Julian. 2020. “Beginner’s Guide to the Zoom H1n Audio Recorder.” YouTube Video. YouTube. https://www.youtube.com/watch?v=2trnJiUFMcs.
- “Zoom H6: My Impressions After 4 Weeks.” n.d. Learn Light and Sound. Accessed June 24, 2020. https://www.learnlightandsound.com/blog/2015/06/29/zoom-h6-my-impressions-after-4-weeks.
Postprocessing
- DSLR Video Shooter. 2020. “Better Skin Tones With ANY CAMERA!” YouTube Video. YouTube. https://www.youtube.com/watch?v=tA6i8wEpeCY.
- “Editing Skin Tone: The Techniques You Need to Master.” 2020. The Shutterstock Blog. April 13, 2020. https://www.shutterstock.com/blog/editing-skin-tone.
- Learn Color Grading. 2020. “The 7 Essential Color Grading Styles Every Filmmaker Must Learn First.” YouTube Video. YouTube. https://www.youtube.com/watch?v=AnImo1jV52Q.
- The Modern Filmmaker. 2019. “Color Grading DARK Skin | Davinci Resolve 16 Tutorial.” YouTube. https://www.youtube.com/watch?v=7sd9md6cJZw.
- “Simple Workflow for Perfect Skin Tones | DaVinci Resolve Tutorial.” 2018. YouTube Video. YouTube. https://www.youtube.com/watch?v=HcFPJOLTFP0.
Good and Bad Examples
- ben designs. 2020. “How to Leave Adobe in 2020 and Save $600.” YouTube Video. YouTube. https://www.youtube.com/watch?v=kLQuOk99MXw.
This is a solid example of someone who has obviously put some thought into staging and has a very well-thought and researched opinion, but whose audio is somewhat wanting -- which undermines the perception of them as an expert.
"Gerald Undone's"Studios Undone series
NB: I like these for examples of different staging and lighting results. The equipment selections tend to be beyond what I would expect someone to want to spend for an interview or class recording, but they show a lot of different possibilities for staging at different budget levels.

Add new comment